Campus Instruction is designed to collect all the tools needed by teachers to effectively manage classrooms and instruction. Some of the tools available in Campus Instruction may require additional setup or allow users to modify individual settings or preferences.
Campus Learning
Campus Learning, an enhancement to Campus Instruction, is the Infinite Campus learning management system (LMS) that connects teachers to new, powerful tools for digital learning.
Campus Learning Startup Guide
To get started with your new Campus Learning license you will need to enable tool rights to access their new Campus Learning tools.
Have a License - Now What?
To get started, enable Tool Rights for teachers to access Campus Learning tools. This Tool Rights document indicates Campus Learning-specific tools with a ![]() icon.
icon.
What's Included in Campus Learning?
Campus Learning Tools for Teachers
Here's a summary of the tools available to teachers as part of a Campus Learning license.
PlannerDisplays teacher's schedule and section curriculum in a date-based view, allowing teachers to view their curriculum plan for a whole week and easily click-and-drag units, lesson plans, and assignments based on a section's progress. Progress MonitorEmpowers standards-based instruction by allowing teachers to view student proficiency at a glance and manage assignments across all standards in a section. Know at a glance how students are doing, who needs attention, and what assignments need to be scored.
Engagement Check-InAllows teachers to check in with students to gauge their well-being and engagement with the class and curriculum. |
Enhanced CurriculumExpands assignments created in Campus far beyond simple dates and scoring alignments:
|
Curriculum LibraryShare curriculum to the library to make it available to other users in the district. Teachers can then add curriculum from the library to their own sections and modify it to fit their needs. With the Curriculum Library District Manager tool right, users in a curriculum director role can add curriculum for teachers to use and help maintain the library.
QuizzesCreates robust quizzes to be administered through assignments. Choose from a variety of question types to meet the needs of different classes and subjects. Included in Enhanced Curriculum tool right. Google DriveConnects to your district's Google Apps for Education account and allows teachers to distribute Google files through curriculum. DiscussionsEnables forum-style discussions within sections through Campus Student. Discussions are administered via resources and assignments and can be scored if desired. Included in Enhanced Curriculum tool right. |
Integrating with Digital Learning Partners
A Campus Learning license makes two additional types of integrations available in Digital Learning Applications Configuration.
- OneRoster Roster-Sync - Allows third-party vendors to request section and roster data from Campus. This type of connection is available without Campus Learning.
- OneRoster Grade Book Sync - Allows third-party vendors to request section and roster data from districts and send assignment, score, and grade data.
- LTI - Allows districts to establish connections with other learning tool providers and integrate those tools with assignments. Students access these tools through Campus Student and scores are received if enabled.
Visit infinitecampus.com for a list of current digital learning partners.
Which type of integration is right for my district?
If your teachers manage grading outside of Campus, use a OneRoster connection with Grade Book Sync. This type of integration prevents the need to double-entry of section and roster data, and receives assignment, score, and grade data from an outside program and makes that data available in other areas of Campus, such as through the Campus Student and Campus Parent Portals and report cards and transcripts. |
If your teachers manage grading using Campus but use a third-party program to provide additional resources, use an LTI connection. This type of integration connects resources in a third-party program with individual assignments, which students can launch from assignments in Campus Student. If supported in the third-party program, teachers can score student work in the other program and automatically populate those scores in their Campus Grade Book. |
If your district manages grading using Campus and has Google Apps for Education, use a Google Drive connection. With this type of integration teachers can add Google Drive files to assignments for students to access, students to submit Google Drive files through Campus Student, and teachers can view and score those files without leaving Campus. |
Campus Learning Licensing
Administrators can use the Campus Learning Licensing tool to track and manage licenses as well as request new ones.
Campus Learning Usage
Track how staff are using Campus Learning tools using the Campus Learning Usage tool.
Tool Search: Campus Learning Usage
The Campus Learning Usage tool tracks how staff are using tools in the Campus Learning offerings. Filter results by selecting a School and Calendar in the Campus Toolbar or view usage for the entire district.
Totals for the School or District are shown in the top table, with totals for individual teachers in the second table.
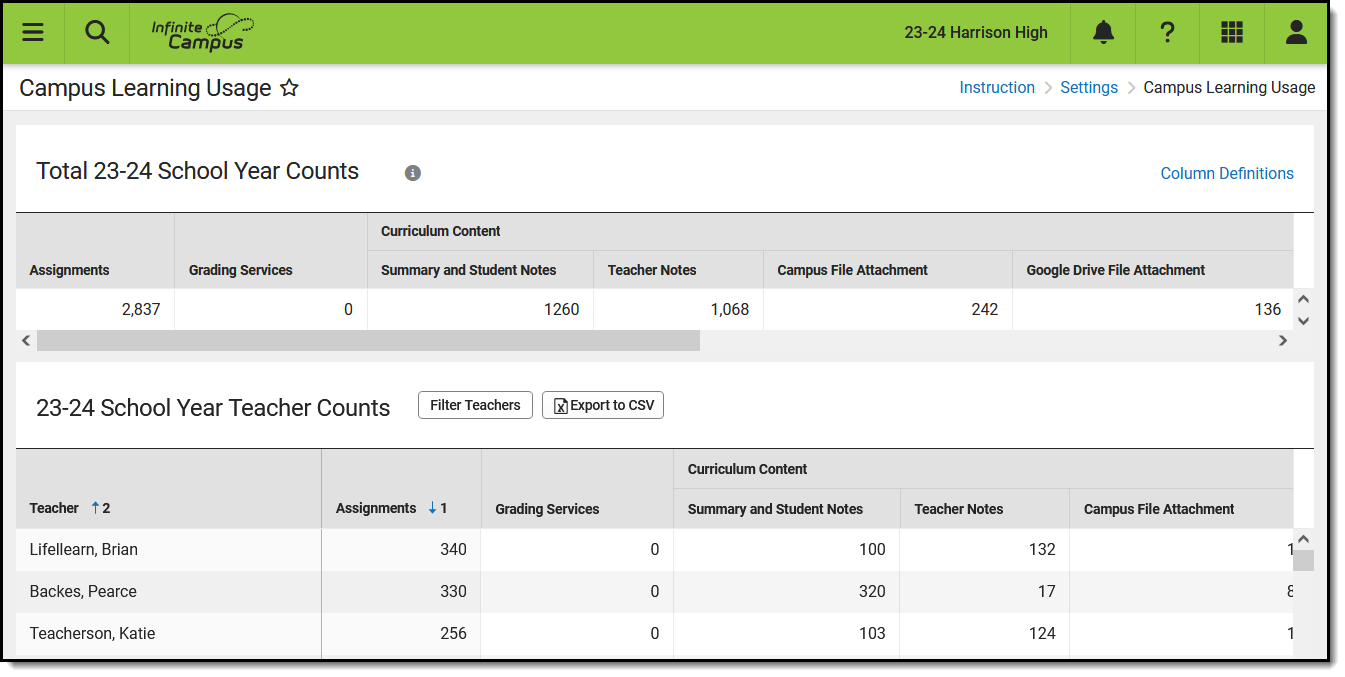 The Campus Learning Usage tool provides totals for school staff using Campus Learning features.
See the Instruction Settings Tool Rights article for more information.
Column Definitions
Counts are provided for the following features, which are also described in the Column Definitions link:
| Feature | Description |
|---|---|
| Assignments | A base count of all assignments. |
| Grading Services | Assignments received from an 3rd party learning management system (LMS) through a Digital Learning Partner connection to the OneRoster API. |
| Curriculum Content | Files attached to assignments. |
| Summary and Student Notes |
Assignments that have content in the Summary and Notes fields, which are visible in student and parent views. |
| Teacher Notes | Assignments that have content in the Teacher Notes field, which is visible only to teachers when looking at the assignment. |
| Campus File Attachment | Assignments with a file attached that is stored in the Campus Digital Repository (CDR). This field counts both files attached in For Students to be accessible in student views and those attached in For Teachers, which are only visible in the assignment. |
| Google Drive File Attachment | Assignments with a google drive file attached. This field counts both files attached in For Students to be accessible in student views and those attached in For Teachers, which are only visible in the assignment. |
| Student Submission | Enabled options allowing students to submit responses. |
| File Attachment | Assignments set up to accept student responses via files stored in the CDR. |
| Text Editor | Assignments set up to receive student responses via a text editor. |
| Google Drive | Assignments set up to receive student responses via google drive files. |
| Quick Assessment | Assignments that include Quick Assessments. |
Data Analysis Options
The Teacher Counts table can be sorted numerically by any of the feature columns.
Click Filter Teachers to add a search field to the top of the list.
Click Export to CSV to export the table as currently displayed as a CSV file, to be viewed using a program such as Excel.
The Campus Learning Usage tool allows participating districts to evaluate how teachers are using the premium Campus Learning offerings, such as student instructions and various types of file attachments and student submissions.
The Campus Learning Usage tool tracks how staff are using tools in the Campus Learning offerings. In this lesson, a system administrator needs to review how teachers in the district are currently using Campus Learning features.
Classroom
Teachers using Classroom can view curriculum at a glance and navigate between tools while staying within the context of their classroom.
Classroom Settings
To get started with Classroom, the Classroom view will need to be enabled from Classroom Settings. When enabled, the Classroom view will display for all students and parents in the district and makes Classroom available for teachers to enable from their Teaching Center.
Digital Repository
Digital Repository Preferences
The Digital Repository provides districts with storage space to save uploaded documents. From Preferences, administrators can set digital repository preferences for the entire school district.
Tool Search: Digital Repository Preferences
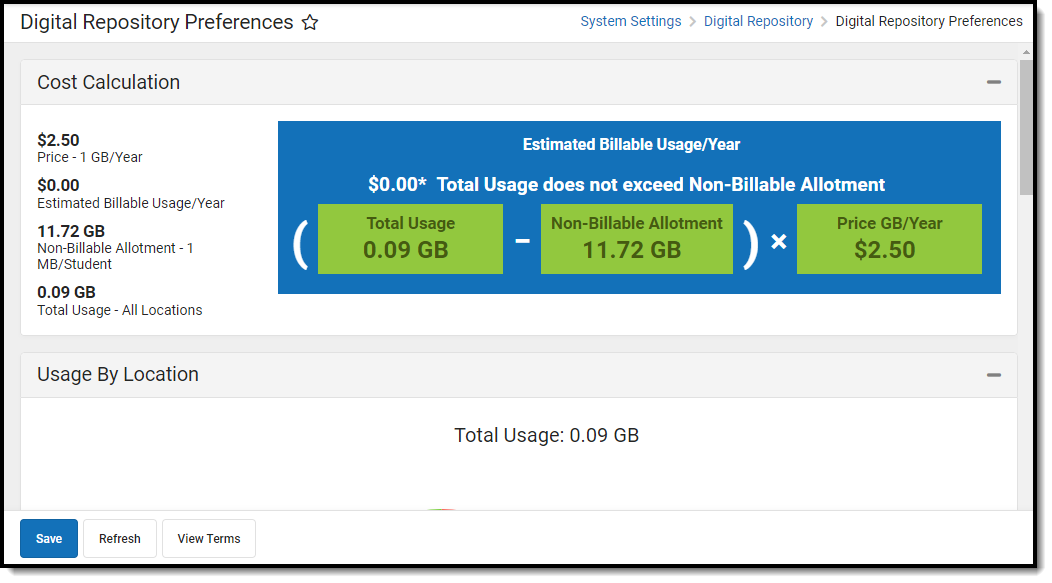
Digital Repository Preferences allow you to control which tools have document upload functionality, modify the cache, and limit the file size allowed for uploads. They also provide a detailed breakdown of your district's cost (based on total usage) and a useful pie chart to better understand your district's usage per Infinite Campus location.
With the end of June 2025 release (Campus.2527), CDR on-premise hosting will be transitioned to an off-premise cloud-based solution.
To maintain uninterrupted access to CDR, all districts still using the CDR on-premise repository will be automatically migrated to the CDR off-prem repository starting with the end of June release. CDR functionality is not impacted during migration and remains the same after the migration.
Prior to the end of June release, CDR on-premise districts should review and accept the latest terms and conditions by selecting the Change CDR Hosting button

Click here to learn more about our off-premise CDR storage.
See the Digital Repository Tool Rights article for details on available tool rights.
Enable Campus Digital Repository
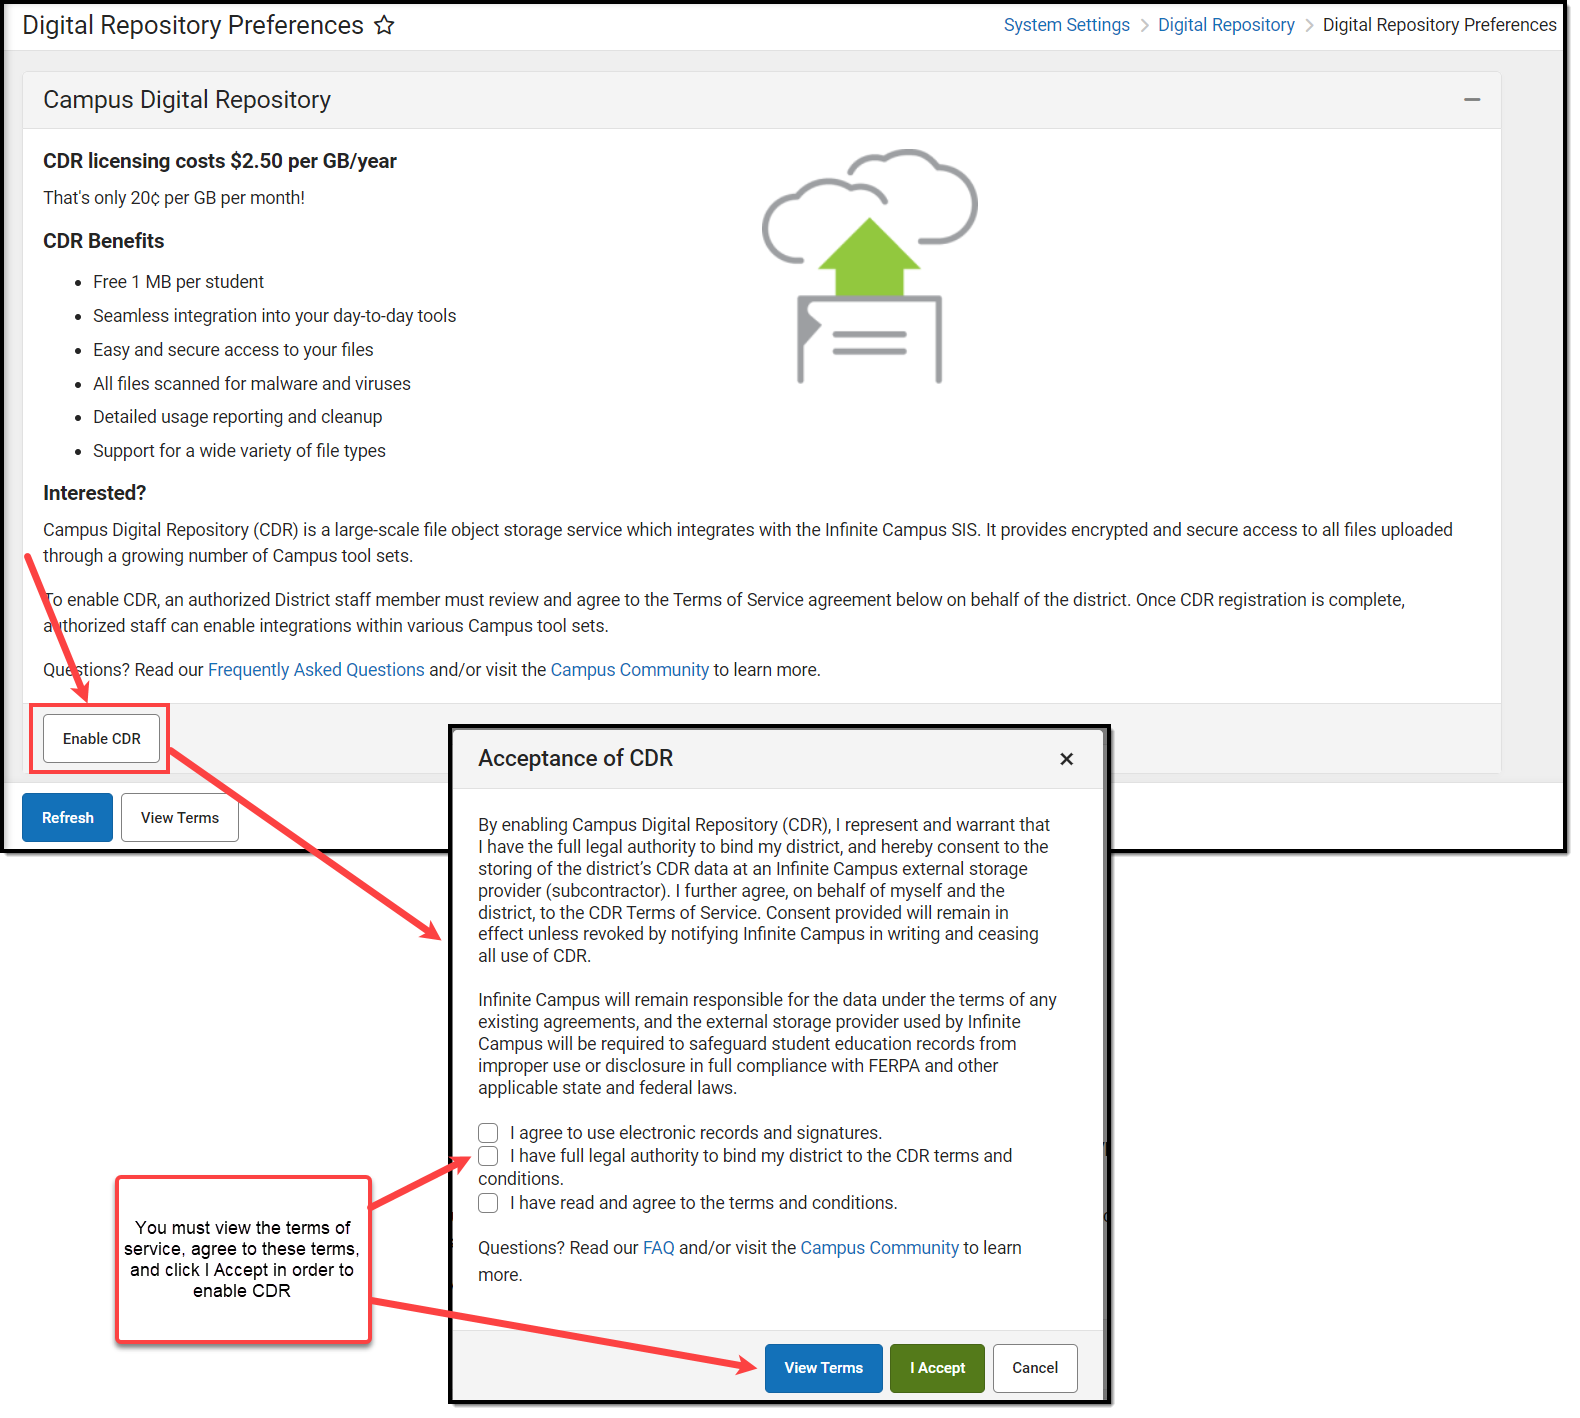
To begin using Campus Digital Repository functionality, authorized district personnel can select the Enable CDR button.
The Acceptance of CDR editor will appear, requiring you to click View Terms and read all terms and conditions, mark all three checkboxes indicating you agree to each of the terms listed for each checkbox, and select the I Accept button.
Enabling CDR allows your district 1MB of storage space per student at no cost. The student count used is your state-reported student number. Read the Terms of Service to see additional costs for using space beyond your free amount.
Please allow up to 24 hours for your free storage allocation to be calculated.
Understand the Cost Calculation
The Cost Calculation section details your district's current estimated cost per gigabyte per year, your estimated billable usage, your non-billable allotment, your total space usage across all of Infinite Campus, and a display of the calculation (using real-time numbers) of how Infinite Campus determines your Estimated Billable Usage for the year.
The non-billable allotment is determined by the district’s count of state-funded students. Annual usage is calculated as the average of monthly values.

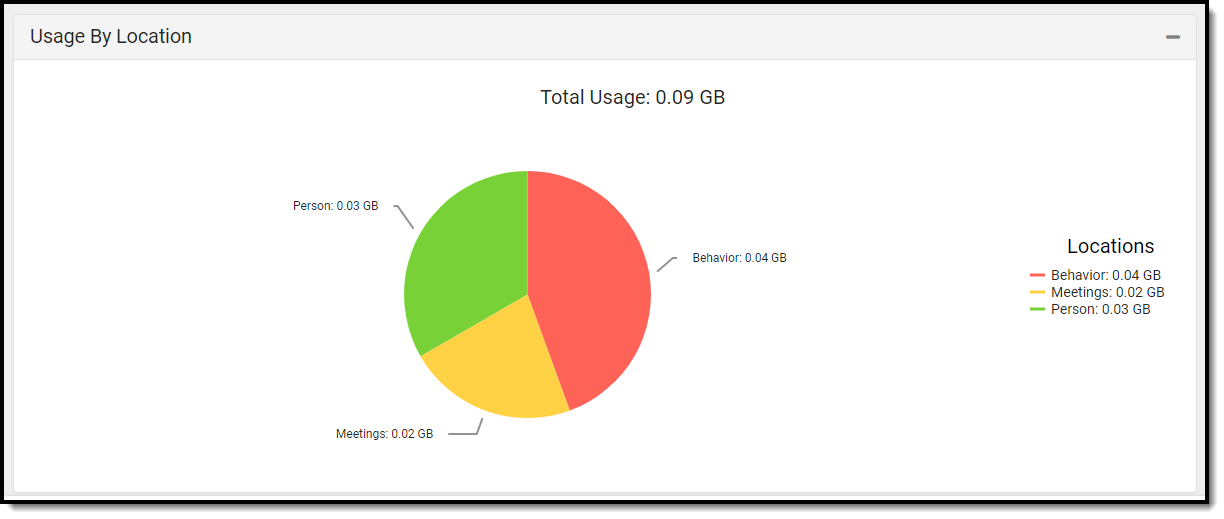
Usage by Location
The Usage By Location pie chart displays how much space is being used by uploaded files per area of Infinite Campus. This chart is useful for understanding where the most data is being used and can serve as guidance on potential cleanup when needing to free up space.
File Upload Preferences
The Cache Size is the amount of space available on the district's local repository instance, and the setting is used to support system performance. Five GB is the recommended Cache Size, but options are 1, 5, and 10. Contact Infinite Campus Support if your district's needs exceed the allowed amount.
The Max File Size field allows you to control the maximum size allowed per uploaded file. This field allows for a range between 1 - 100mb.

Common File Sizes
The following information can be used as a reference for common file sizes. Files that include images are commonly larger than those that don't.
- 1000 KB = 1 MB
- 1000 MB = 1 GB
File Type |
Size |
|---|---|
2-page Word document |
Less than 20 KB |
20 slide PowerPoint |
Roughly 1 MB |
25 page PDF |
Roughly 2 MB |
1 MP3 |
Roughly 3-6 MB |
Enable Campus Digital Repository Per Module/Tool
Use the table below to better understand how each Digital Repository preference functions within Infinite Campus.
| Module | Toggle and Explanation |
|---|---|
| School Store | Enabling this option allows you to upload images for display of each item within a School Store.
Infinite Campus highly recommends enabling this option when using the School Store.  |
| Activity Registration | Enabling this service allows you to enable and disable the document upload feature in the Activity Registration. After the service is turned on, administrators can select the option to allow uploading files when purchasing an activity.
If Campus Digital Repository is disabled (either at the Activity Registration location or the specific post location), activities will become inactive (the step 4 "Active" checkbox will be unchecked) and cannot be re-checked until Campus Digital Repository is re-enabled. Once Campus Digital Repository is re-enabled, you will need to manually check the "Active" checkbox to allow the activity to go live again.  |
| Survey | Enabling this option allows files (such as images, signatures, etc) to be uploaded to surveys via the Survey Designer tool.
NOTE: Survey Designer options that utilize file upload capabilities are part of the Campus Analytics Suite  |
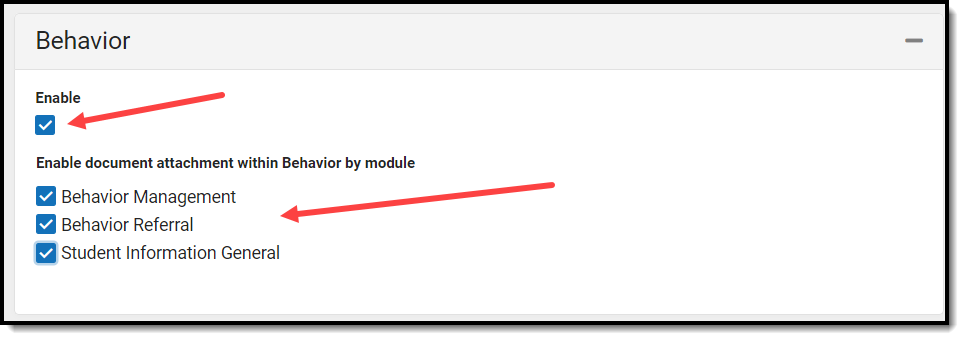
| Behavior | Enabling these options adds a Manage Files button to behavior events and incidents, allowing behavior administrators to attach files to them. See this document for more information. This does NOT add a documents button to the top of any Behavior tools.
To enable document attachment functionality, mark the Enable checkbox, mark the checkbox next to each tool that should allow files to be attached, and click Save.
File attachments can be added to student behavior records in the following tools:
|
| Campus Communicator | Enabling Inbox / Email - Inline Images allows users to embed images directly into the message body in Messenger 2.0. Enabling Voice/Text allows Messenger with Voice customers to upload .wav files for use in voice messages.  |
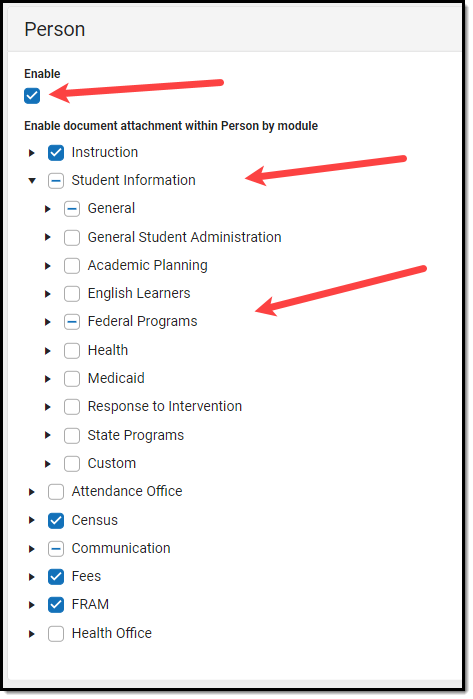
| Person | Enabling these options allows documents to be attached to various person-related tools, including Custom Tabs.
To give users access to the document upload feature, mark the Enable checkbox and then mark the checkbox next to the tool(s) where the Documents button should appear, and click Save.
All documents uploaded via any of the Person tools listed are visible in Person Documents.
To use the Document feature, users must have tool rights to the tool in which the Documents button appears. Read/Write (RW) rights allow users to view the document, edit details (description and file name), and replace a file. Add (A) rights allows the user to upload a new document and Delete (D) allows the user to delete a document.
Clearing the checkbox next to the tool disables the user's ability to upload documents and hides the Documents button. Previously uploaded documents are NOT removed. Removing document attachment functionality only disables the user's ability to add additional documents. |
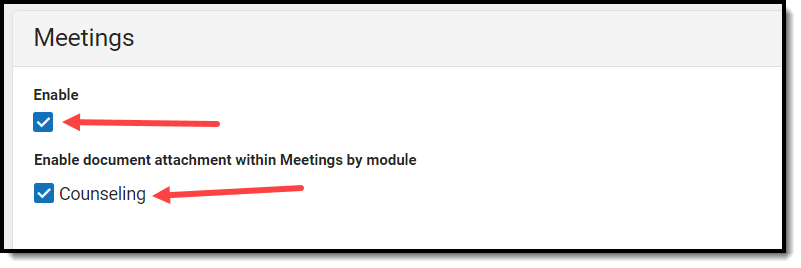
| Meetings | Enabling this option allows counselors to attach files to meetings.
 |
| Campus Learning | |
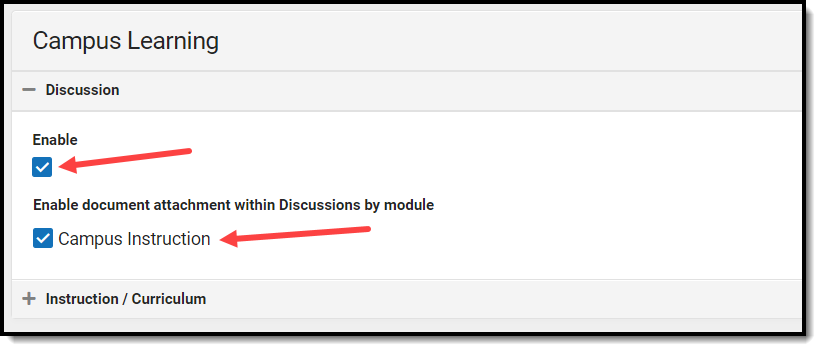
| Discussion | Enabling this option allows moderators to set up discussions that allow participants to attach files to their posts.
 |
| Instruction/Curriculum | When this option is enabled for a school, teachers have the option to allow students to submit assignments via the Campus Student Portal.
If you are a teacher, see the Enabling Submissions article for directions about using the repository to create assignments for submission on the portal, viewing student submissions, and responding to student submissions.
Marking the Staff File Uploads checkbox allows staff to upload files within Instruction/Curriculum tools. 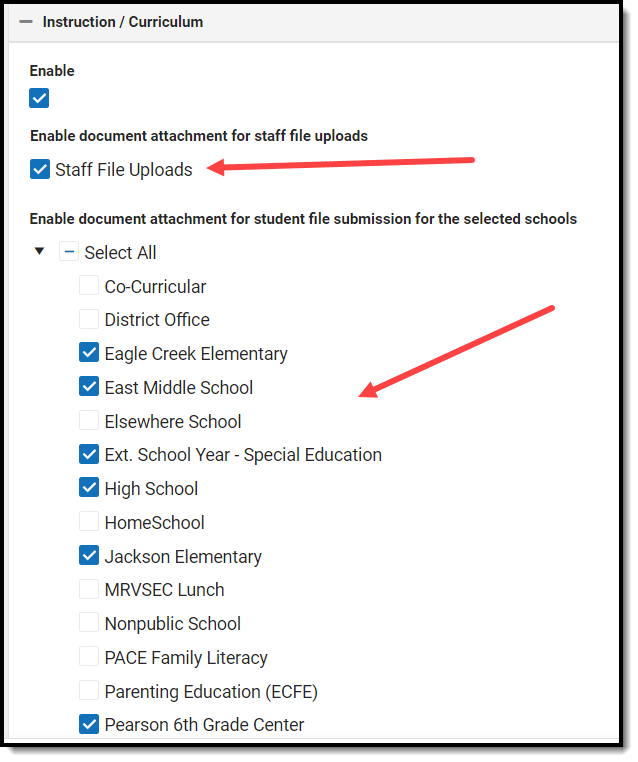 |
| Groups | When this option is enabled for a school, participants in a group can add file attachments and images to posts and replies.  |
Supported File Types
Digital Repository allows for the upload of all file types except for the extensions listed below.
You cannot upload a document with a file name containing one or more of the following illegal characters: | , [ ] { } ( ) ! ; " * ? < > : / Tab, LF, CR
Periods are allowed except at the end of the file name, creating two or more periods before the extension (i.e., testFile..jpeg)
The following file types cannot be uploaded to the Digital Repository:
Excluded File Types |
|---|
_exe, a6p, ac, acr, action, air, apk, app, applescript, application, awk, bas, bat, bat, bin, cgi, chm, class, cmd, com, cpl, crt, csh, dek, dld, dll, dmg, docm, dotm, drv, ds, ebm, elf, emf, esh, exe, ezs, fky, frs, fxp, gadget, gpe, gpu, hlp, hms, hta, hta, icd, iim, inf, ins, inx, ipa, ipf, isp, isu, jar, java, js, jse, jsp, jsx, kix, ksh, lib, lnk, mam, mcr, mel, mem, mpkg, mpx, mrc, ms, msc, msi, msp, mst, mxe, obs, ocx, pas, pcd, pex, pif, pkg, pl, plsc, pm, potm, ppam, ppsm, pptm, prc, prg, pvd, pwc, pyc, pyo, qpx, rbx, reg, rgs, rox, rpj, scar, scf, scpt, scr, script, sct, seed, sh, shb, shs, sldm, spr, sys, thm, tlb, tms, u3p, udf, url, vb, vbe, vbs, vbscript, vdo, vxd, wcm, widget, wmf, workflow, wpk, ws, wsc, wsf, wsh, xap, xlam, xlm, xlsm, xltm, xqt, xsl, zlq |
The Digital Repository Preferences tool allows districts to manage settings for the Campus Digital Repository, including storage space, maximum file size, and the areas throughout Campus where file upload is enabled.
Existing Campus Digital Repository users can now switch their hosting model from on-premise to off-premise.
Off-premise hosting provides a highly available, reliable, and secure way to store and transmit your files within Campus. See this section for more information.
In the July 2025 release of Campus, access to the Campus Digital Repository will be disabled for districts who are still using the on-premise object repository.
In preparation for this change, a series of notifications will be sent to Campus administrators of districts who need to migrate their CDR accounts off-premise. A Process Inbox message is sent to all users with the SIS Product Security role or who have tool rights to the Digital Repository Preferences tool. The message instructs users to visit the Digital Repository Preferences tool and switch their CDR account to off-premise. An additional message is sent every two weeks until the CDR hosting model for their account is updated.
Switch to CDR Off-Premise
Customers who have already enabled and are using Campus Digital Repository services now have the option to change their hosting from on-premise to off-premise. Off-premise hosting provides numerous benefits, including:
- File replication across multiple geographically distant availability zones.
- 99.99999999999% durability.
- 99.99% availability.
Switching to off-premise hosting does not change or modify the user experience within Campus, and your existing files are seamlessly migrated without any work or intervention required.
To make the switch, click the Change CDR Hosting button, agree to the terms, and get started!
If you do not see the Change CDR Hosting button, your district already uses off-premise CDR hosting.
NOTE: Off-premise hosting is not available for BIE customers.

Digital Learning Applications
The Digital Learning Applications Configuration tool allows districts to configure and manage OneRoster and Learning Tool Interoperability (LTI) connections.
Full functionality of tool is available as part of the Campus Learning premium offering. Without Campus Learning, districts can only create connections using Roster Sync. All other types of connections require Campus Learning, including Grade Book Sync and Score Passback.
Tool Search: Digital Learning Applications Configuration
The Digital Learning Applications Configuration tool allows districts to configure OneRoster and LTI connections. Each application the district has connected to displays in a tile, with a ![]() indicating digital learning partners. Connections to partners are supported by Campus. A yellow icon indicates that the partner is at risk of no longer being supported and a red icon indicates that the partner used to be supported but is not anymore.
indicating digital learning partners. Connections to partners are supported by Campus. A yellow icon indicates that the partner is at risk of no longer being supported and a red icon indicates that the partner used to be supported but is not anymore.
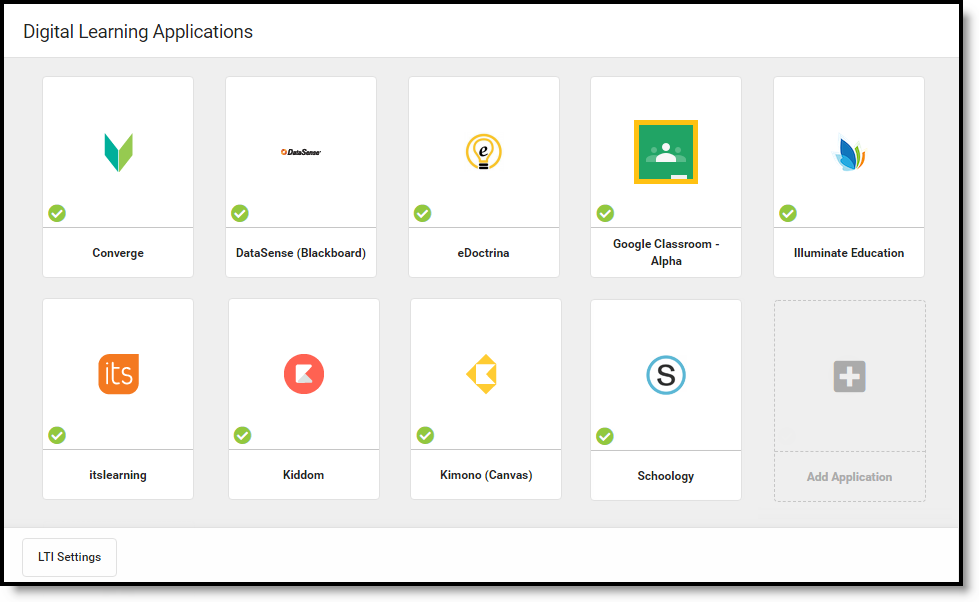
The Digital Learning Applications Configuration tool lists Digital Learning Applications that the district has enabled.
See the Instruction Settings Tool Rights article for more information.
Icon Legend
The following icons indicate the vendor's status in the Infinite Campus Digital Learning Partner Program.
 indicates a member of the partner program.
  indicates a vendor is out of compliance with the Digital Learning Partner Program.
Click on a vendor to view any additional information provided by Campus. These icons are for informational purposes and do not affect the connections themselves.
What's the difference between LTI and OneRoster?
OneRoster connections allow vendors to request section and roster data from Campus and send assignment, score, and grade data to Campus. LTI connections allow teachers to integrate learning tools with assignments. Students access these tools through Campus Student and scores are received into the Grade Book where available.
LTI connections are used by teachers who manage assignments and grading in Campus. In comparison, OneRoster connections are helpful for teachers who manage assignments and grading outside of Campus; a OneRoster connection with grade book sync brings assignment and score data from an external program into Campus, where grades can be posted to report cards and students and parents can track progress through Campus Student and Campus Parent.
Most vendors offer either LTI or OneRoster connections, but some support both.
What kinds of connections are available?
Click Add Application and select a vendor to see what functions are available for each vendor. Lozenges on the right indicate which functions are available and which have been enabled.

Plain black lozenges indicate available functions; green with a checkmark means the function is enabled for that vendor.
See the Types of Digital Learning Application Connections article for more information about the types of connections available.
What is a "supported" vendor?
Connections to vendors who are part of the Infinite Campus Digital Learning Partner Program are "supported" vendors. Supported connections allow for access to more data, and Campus provides an increased level of support and troubleshooting.
See the Supported and Unsupported Connections article for more information.
I don't see my vendor.
Does your district use an LMS or other vendor who is not part of the Infinite Campus Digital Learning Partner Program? You can create a connection to the vendor, but be aware that Campus does not support these connections; Campus Support will not be able to help troubleshoot. A vendor would also not display in this tool if they were previously a Digital Learning Partner but were removed from the program.
See Connecting to Non-Partner Vendors for more information.
Have a vendor you think Campus should partner with? Share this form with the vendor.
I don't recognize this vendor.
 Do you see this vendor in your list? If a district had existing OneRoster connections when Campus released this Learning Interoperability tool, Campus matched connections with recognized vendors based on the name entered by the district. If Campus couldn't determine the vendor based on the name entered, those connections were put here in 'Other OneRoster Provisioning Credentials.
Settings & Management
The Settings and Management panel includes identifying information for your district's instance of Campus in the LTI Settings section.
The OneRoster Settings section includes the following options:
- Use Secondary Email addresses for OneRoster 1.1: Since an email address is required for all students and teachers in a OneRoster connection, this option allows districts to use the Secondary Email entered in Demographics for all user accounts.
- Use Local Grades for OneRoster 1.2: If set to No, the CEDS/NCES grade level that a local grade level is mapped to is returned. If set to Yes, the local grade levels are returned. This option applies to all OneRoster 1.2 connections at the district.
- OneRoster Daily Cache Refresh Time: Users also have the option of setting a different time for the daily cache refresh. By default, a time of 10:10pm is entered. If desired, set a custom time to refresh for your OneRoster connections. Off-peak times are recommended. See the OneRoster API article for more information.
- Last Successful OneRoster Cache Refresh: The date and time of the most recent successful refresh of the cache.
Click Refresh OneRoster Cache to trigger a manual refresh. The refresh begins two minutes after clicking Refresh OneRoster Cache. A refresh cannot be triggered if one is in progress. A process alert is sent when the refresh is complete.
See the OneRoster Cache article for more information about how OneRoster data is cached.
Configuring OneRoster Connections
OneRoster connections allow outside programs to request roster and section data from Campus and, if enabled, send assignment and score data back through the OneRoster API.
This tool is available as part of the Campus Learning premium offering.
Location: Digital Learning Applications Configuration > click a specific application > Add OneRoster Connection
OneRoster connections allow outside programs to request roster and section data from Campus and, if enabled, send assignment and score data back through the OneRoster API. These connections are helpful for users who manage assignments and grading outside of Campus, but use Campus as the source of truth for report cards and transcripts, and use the Campus Student and Campus Parent Portals to communicate with students and parents.
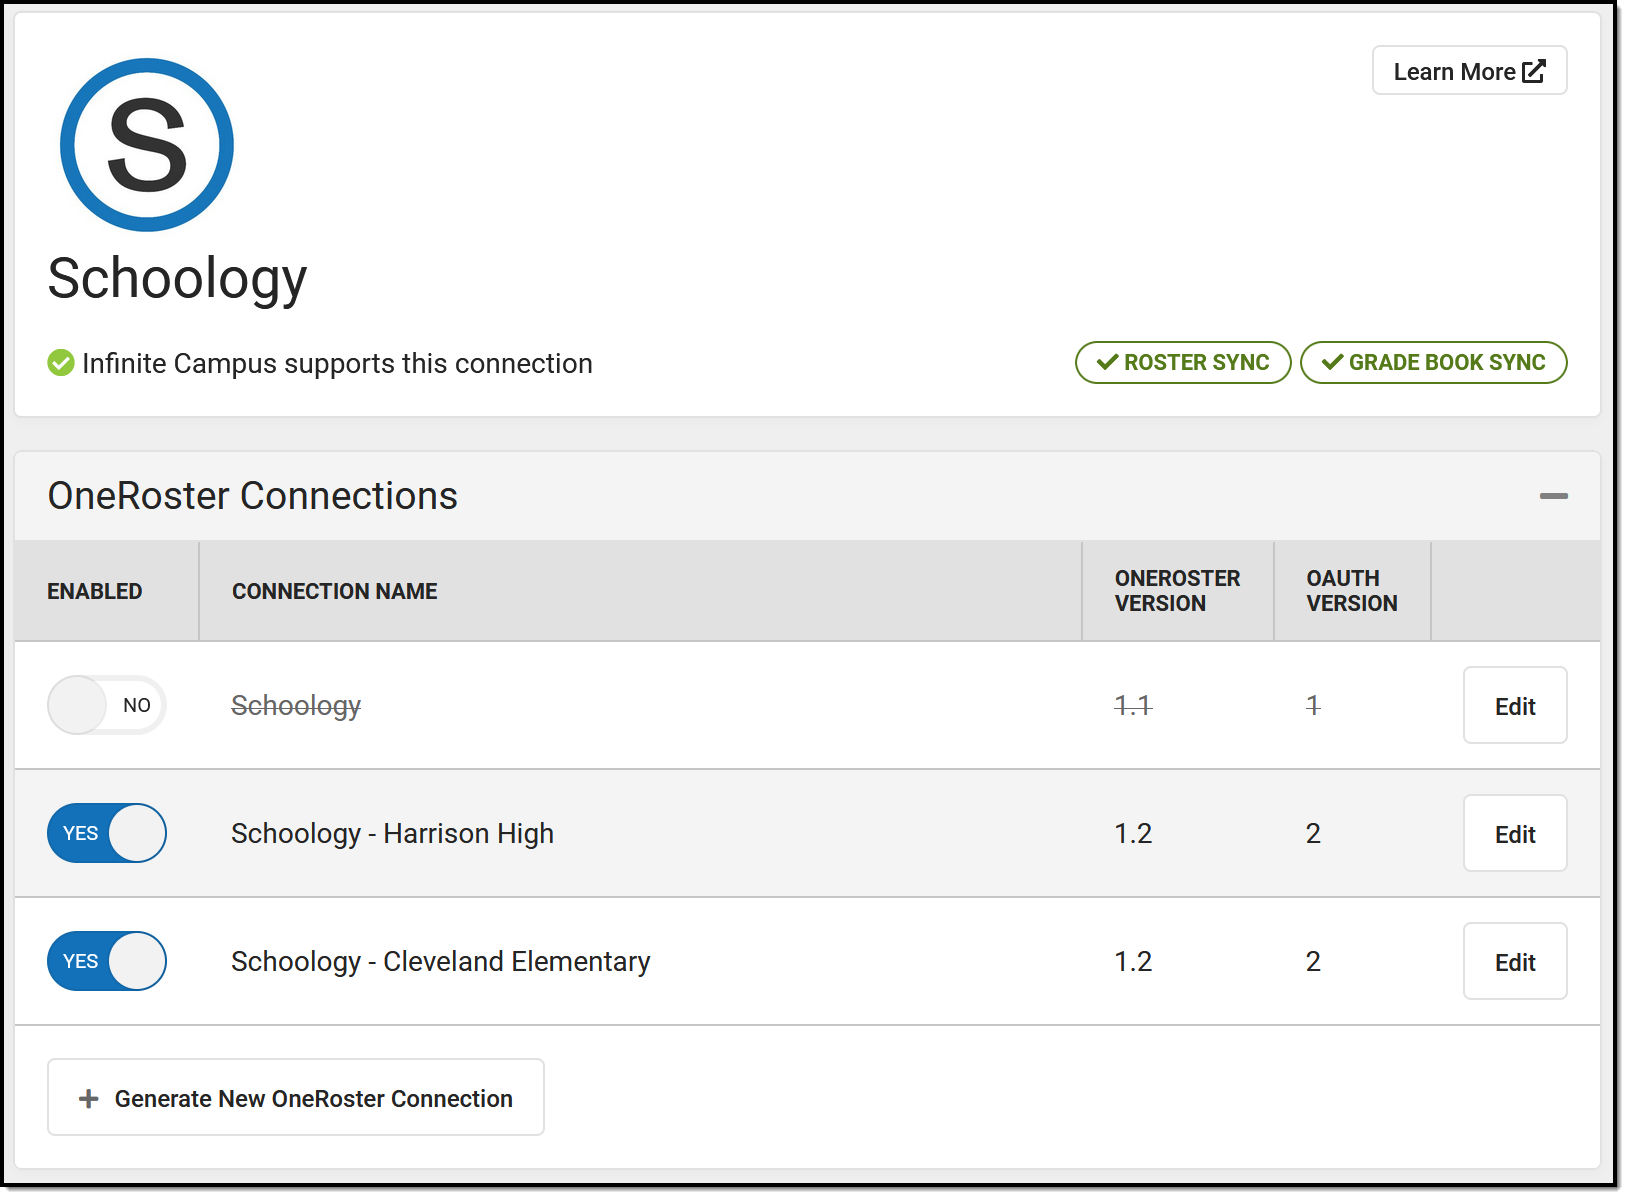 OneRoster connections indicate the version of OneRoster and of OAuth used.
Digital Learning Applications Configuration tool rights grant full access to this tool.
Types of OneRoster Connections
The lozenges at the right of the screen indicate what functions are available for the partner and what functions have been enabled by the district.

Lozenges indicate available and enabled functions.
Vendors with ![]() enabled can request section and roster data from Campus.
enabled can request section and roster data from Campus.
Vendors with ![]() enabled can send assignment and score data to Campus. This type of connection includes roster sync by default.
enabled can send assignment and score data to Campus. This type of connection includes roster sync by default.
Vendors with  enabled can send assessments and assessment scores to Campus. This type of connection includes roster sync by default.
Lozenges that are black without a checkmark indicate that a function that is available for the vendor but has not been enabled by the district.
1.1 Versus 1.2
OneRoster connections can be made through the 1.1 or 1.2 version of the OneRoster specification.
Connections to 1.2 are available on a vendor-by-vendor basis as partners implement this new version of the specification. Campus encourages districts to contact the vendors they use to inquire about 1.2 implementation timelines.
What's new with 1.2?
OneRoster 1.2 includes:
- The option to scope connections by a specific school. As described below, a vendor connection scoped to a single school or set of schools limits the roster and section data available to that vendor to only data for those schools. This option is also available for connections using OneRoster 1.1 and OAuth 2.0. Connections should be scoped to specific schools only as required by a vendor.
- Streamlined reception of assignments and scores, requiring less teacher effort. Because categories and grading tasks are included in the 1.2 version of the specification, teacher are no longer required to categorize and align assignments received through a OneRoster connection.
Enabling a OneRoster Connection to a Partner
To enable a connection, select the application from the Digital Learning Applications Configuration tool or click Add Application to select from the list of Campus-supported partners. To add an additional connection to an application that has existing connections, open the application and click Generate New OneRoster Connection.
In the pop up that displays, select the appropriate option based on the version of the OneRoster specification and the version of OAuth used by your vendor. Verify with your vendor to make sure you're selecting the correct option. Connections using OAuth 1.0 are no longer supported and can no longer be created or enabled. See the OneRoster Migration Instructions article for more information.
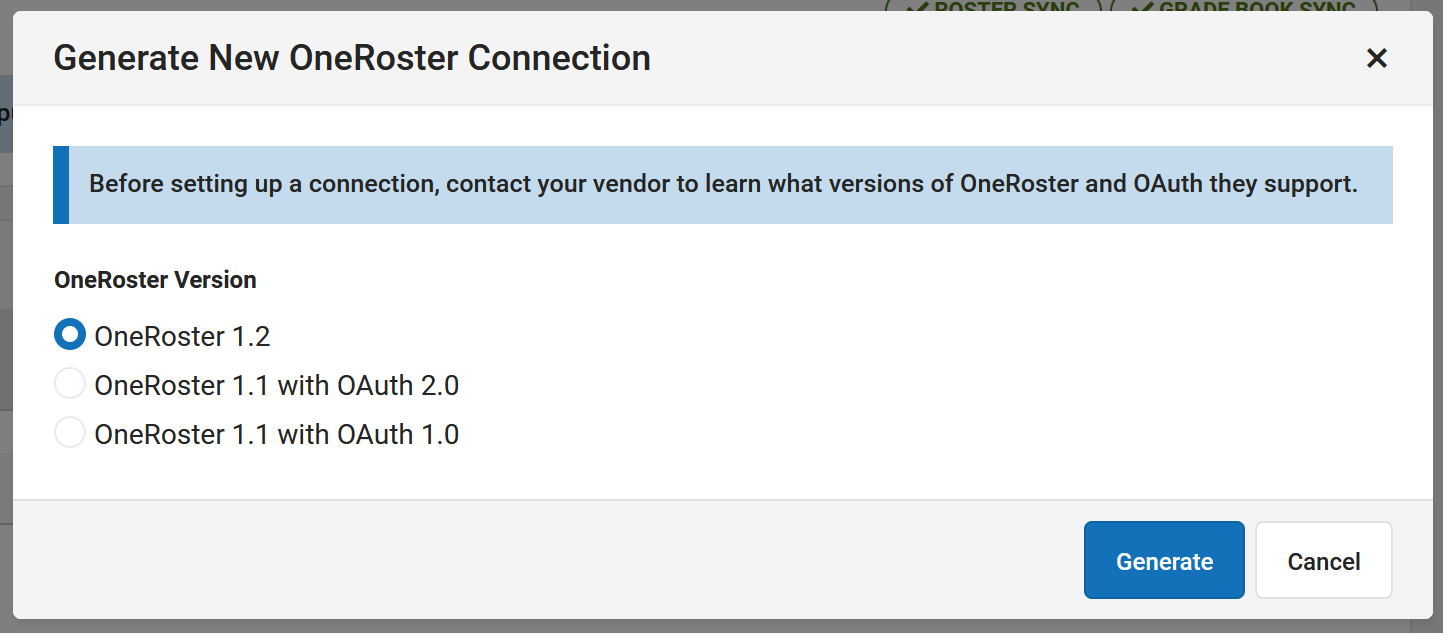 Select the appropriate option based on the versions supported by the vendor.
Once the version is selected, the Edit OneRoster Connection displays. The options on this screen vary based on the versions of OneRoster and OAuth selected.
- If desired, modify the Name of the connection. This option is helpful if your district has multiple schools connected to the same vendor - each school can have their own connection.
- Mark the lozenges for which Data to Share, Assessments, Demographics, and/or Grade Book.
- Assessment data can be received from select vendors (OneRoster 1.2 only). Select this option to allow the vendor to send assessment scores to Campus.
- Demographics data can be shared if using OAuth 2. This data is not shared by default. Enable this option to share this data with the vendor. Consult district guidelines concerning data protection and FERPA before sharing this data.
- Grade Book data is enabled by default. Disable if desired.
- An additional Identity Management option is currently available in a beta release. Vendors with this option enabled can sync email address data for students and teachers. This option is only available in some states and for some vendors.
- Delaware districts should contact Classlink for assistance in setting up this integration. Select the 'Identity Management DE' application for these connections.
- North Carolina districts should ise the 'RapidIdentity' application for Identity Management connections.
- Copy all fields in the Information to Share section and share them with your vendor to allow them to connect to your district's instance of Campus. Fields in this section differ based on which version of OAuth the connection is using. See the OneRoster API for more information that may be useful to send.
- Consult Troubleshooting Documentation as needed. For OneRoster 1.1 connections, a link to the REST Documentation Client is available. For 1.2 connections, links to the Rostering API Documentation and Gradebook API documentation are provided. These provide documentation for the API and allow users to review endpoints and retrieved data for troubleshooting and verification purposes.
| More about OneRoster 1.1 When teacher receive assignments through a 1.1 connection, they must select categories and grading alignments for those assignments so that grades can be reported. The Uncategorized Assignments and Non-Campus Assignment Defaults article provides instructions to teachers for completing this process. |
Additional Information
Below the Information to Share and Troubleshooting Documentation are three sections of additional information and options. View this information when you create the connection, or click the Edit button for a specific connection.
 View additional information about a connection by clicking Edit and expanding the relevant section.
Connection Configuration
The Connections Configuration section includes the following options for further manage data in the OneRoster API:
| 1.1 Connections | 1.2 Connections |
|---|---|
|
|
Enabled Schools
If using OneRoster 1.2 or OneRoster 1.1 with OAuth 2, the connection can be scoped by school. By default, connections are scoped to all schools in the district. If directed by your vendor, mark Use School Scoping and select which school should be included in the connection.
To disable School Scoping, unmark the Use School Scoping checkbox and click Save.
Legacy Configuration
This section includes stores legacy configuration that is no longer used for this connection.
Disable versus Delete
There are three ways to stop a connection:
Disable a connection to stop the flow of data to and from Campus until the connection is re-enabled. |
Remove credentials to remove connections using that Key and Secret. To reconnect, generate new credentials and share them with the vendor. |
Delete a connection to remove all connections to that vendor. To reconnect, click Add Application and start over. |
Connecting to Non-Partner Vendors
Districts have the option of connecting to vendors who are not part of the Infinite Campus Digital Learning Partner Program. Be aware that Campus does not support these connections; Campus Support will not be able to help troubleshoot.
![]() is not available for non-partner vendors. Additionally, lozenges do not display indicating what functions are available.
is not available for non-partner vendors. Additionally, lozenges do not display indicating what functions are available.
- Click Add Application, then scroll to the bottom and click Connect to Other Applications.
- Enter an Application Name. The image displayed in the vendor is the first letter of the entered name.
- Generate credentials and share them with the vendor to connect.
Use caution when sharing student data with vendors that may not meet Campus's data security standards.
Have a vendor you think Campus should partner with? Share this form with the vendor.
Considerations for Using Grade Book Sync
Data received from vendors is the responsibility of the district, not Infinite Campus.
- The OneRoster specification currently does not support standards-based grading when using assignment and score sync. Assignments can only be aligned to one task or standard and scores can only be entered as numerical values, rather than the rubric-style scoring commonly used in a standards-based setup.
- In Campus, In-Progress Grades are calculated every 5 minutes to account for newly-imported assignments and scores.
"Source of Truth"
- For synced assignments, the Digital Learning Partner is the "source of truth." Modifying assignments or scores in your Campus Grade Book after syncing with the partner is not recommended as changes will be overwritten with the next sync. Instead, make changes in the partner program so that the correct data will sync with Campus.
- For term grades, Campus is the "source of truth." Campus recommends that districts using score passback from a vendor system turn off grade calculations in the vendor program. Students and parents should access In-Progress and Posted Grades only from Campus sources.
Grading Best Practices
- When syncing assignments and scores with Campus, the best practice is that all in-progress and posted grade calculations be performed in Campus instead of in the partner system. Campus is the district's system of record for grades, which are used in multiple ways throughout Campus, including report cards, transcripts, and GPA calculations.
Assignment Setup
- In Campus, assignments must have a Points Possible value that is whole number. Currently, assignments received from a partner that have a Points Possible value with a decimal point are rounded down.
- In Campus, assignments cannot be assigned and due at the exact same date and time. If an assignment received via OneRoster has identical Assigned and Due date/times, one minute is subtracted from the Assigned time.
- Assignment Due Dates must fall within the Term Dates of the section in Campus. Even if a student is given an extension to turn in an assignment in the partner program, the due date must still be on or before the end date of the section in Campus.
- Assignment Multipliers (a.k.a. Assignment Factors) - The OneRoster specification does not support syncing multipliers between systems. Campus recommends that teachers adjust total points in the partner system rather than using multipliers for synced assignments. Alternatively, once an assignment has been received into Campus, teachers can update the Multiplier on the Campus assignment to match the one entered in the partner program, and it will not be overwritten.
Score Flags
- If an assignment received via OneRoster is flagged as Missing and does not have a score entered, the Missing Assignment Preferences are applied. If a score is entered for the Missing assignment, the Missing Assignment Preferences are not applied.
- If a teacher enters a score for a OneRoster assignment flagged as Missing, they will be given the option to flag the assignment as Turned In and Late or to remove the Missing flag. See the Scoring Assignments article for more information about logic for missing assignments.
Aligning Assignments to Categories and Grading Tasks
- If the partner is on a OneRoster version of 1.1, teachers must align assignments received from the partner. This can be done individually using the Uncategorized Assignments list or aligned automatically to a single category and task using the Non-Campus Assignment Defaults tool in Grade Book Settings. See the Uncategorized Assignments and Non-Campus Assignment Defaults article for more information.
- If the partner is on a OneRoster version of 1.2, teachers no longer need to align assignments, as long as the partner has implemented the category and grading task syncing capabilities available in 1.2. To sync categories and grading tasks, first set them up in Campus so they can sync to the partner program and use them for grading in the partner program. Assuming the partner has implemented category and task syncing, assignments will be received into campus with the category and grading task auto-aligned.
Considerations for Using Assessments Sync
- Assessment connections are only available with OneRoster 1.2.
- Data received from vendors is the responsibility of the district, not Infinite Campus.
- In the OneRoster API, assessments are returned in the LineItems endpoint and scores are returned in the Results endpoint. Data included in the rostering endpoints is also available for assessment vendors.
- Note: Because rostering endpoints are restricted to students enrolled in the current school year, assessment data can also only be returned for current year students. The OneRoster API cannot be used to import historical assessment data.
- Campus recommends that vendors sync parent assessment data first, followed by child assessments and then scores.
- Assessment data imported via the OneRoster API can be edited in Campus, but those changes will be overwritten if data is resynced.
- Imported assessments and scores are visible in the student's Assessment tool. Imported assessments are also added to the assessment list in Test Setup. Imported assessments are not currently differentiated from Campus-created ones in the UI, although there is a database indicator at the assessment level (Test.addedByVendor).
Refresh OneRoster Cache
See the OneRoster Cache article to learn how and when data is cached and caches are updated.
This tool is available as part of the Campus Learning Suite premium offering. Visit the Campus Learning Suite page to learn more.
The Digital Learning Applications Configuration tool allows districts to configure and manage OneRoster connections. In this video you will learn how to configure a OneRoster connection.
Previous Versions
Configuring OneRoster Connections - Video [.2443 - .2531]
Configuring OneRoster Connections - Video [.2152 - 2439]
Configuring LTI Connections
Learning Tool Interoperability (LTI) connections allow districts to establish connections with other learning tool providers and integrate those tools with assignments.
This tool is available as part of the Campus Learning premium offering.
Location: Digital Learning Applications Configuration > click a specific application > Add LTI Connection
LTI (Learning Tool Interoperability) connections allow districts to establish connections with other learning tool providers and integrate those tools with assignments.
LTI connections differ from OneRoster connections. OneRoster connections allow applications to request section and roster data from Campus and send assignment, score, and grade data to Campus. LTI connections allow teachers to integrate learning tools with assignments. Students access these tools through Campus Student and scores are received into the Grade Book where available.
URL Updates
If your district's URL has been updated as a result of hosting changes, existing LTI connections must be auto-configured. See Updating URLs After a Hosting Platform Change for more information.
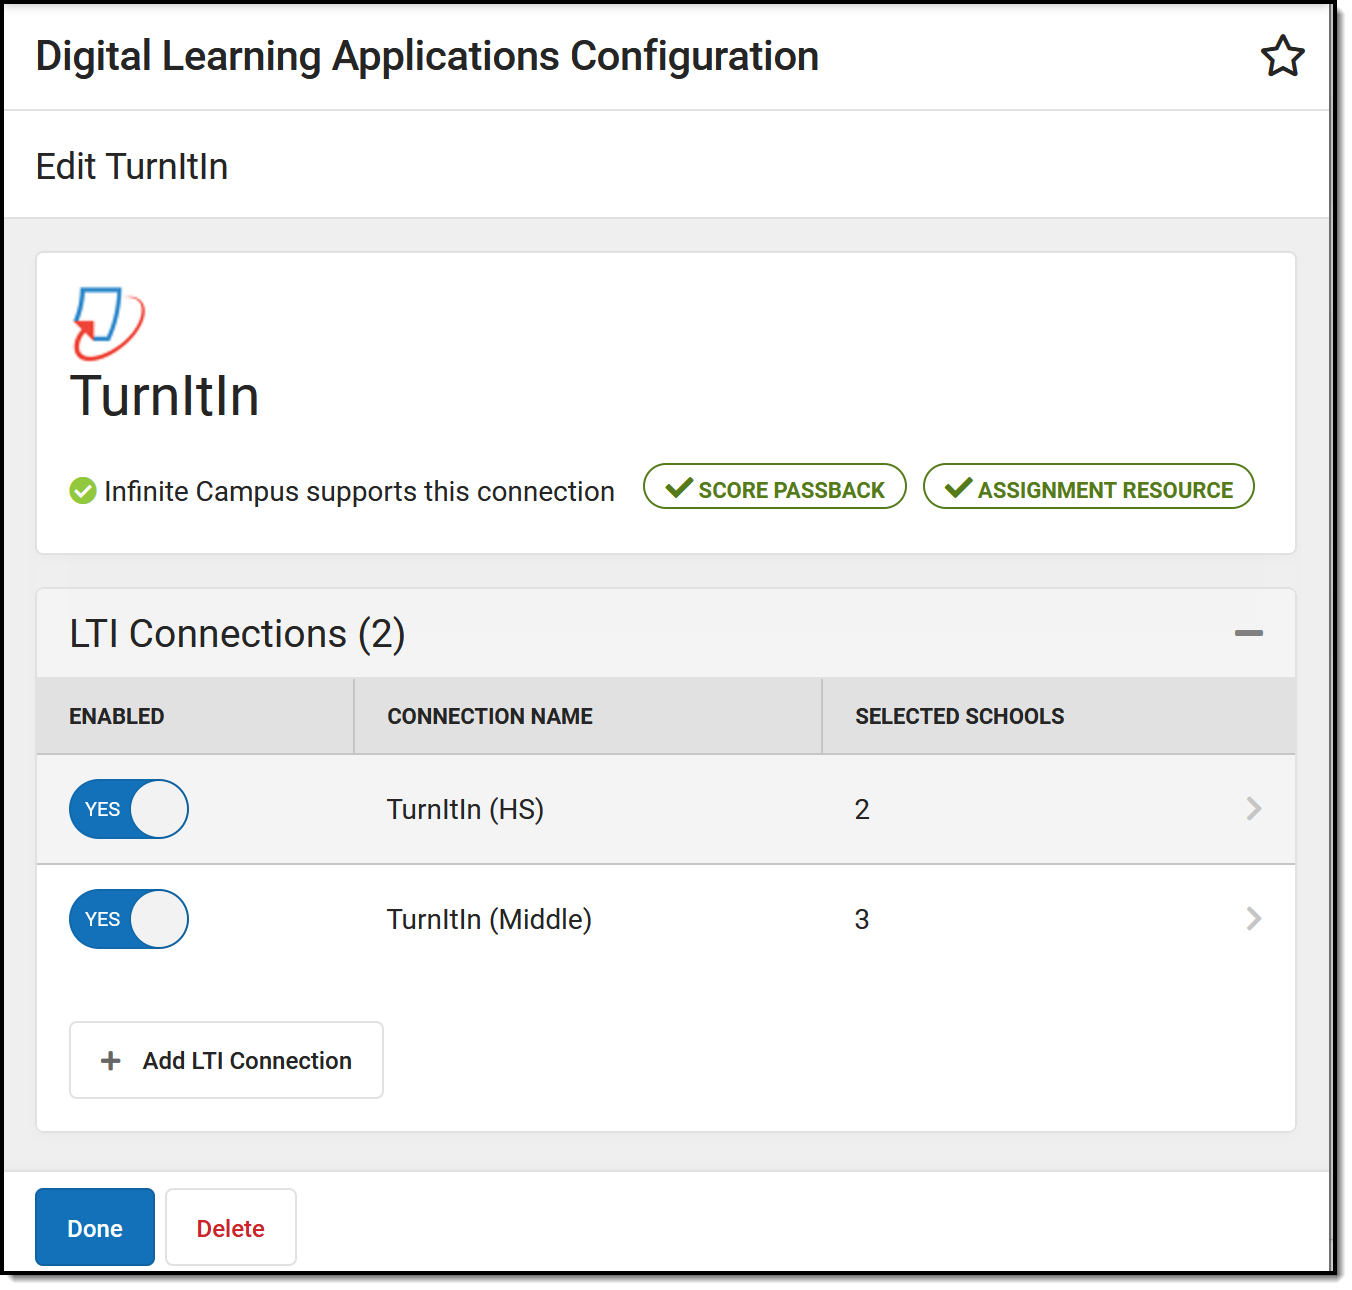 Configure LTI connections to external learning tool applications.
Digital Learning Applications Configuration tool rights grant full access to this tool.
Types of LTI Connections
The lozenges at the right of the screen indicate what types of connections are possible for the partner and which have been enabled by the district.
 Lozenges indicate available and enabled functions.
Connections with ![]() enabled display in the Learning Tools list for teachers, students, and parents (if configured). Specific pieces of content from the partner program can also be aligned to assignments.
enabled display in the Learning Tools list for teachers, students, and parents (if configured). Specific pieces of content from the partner program can also be aligned to assignments.
Connections with ![]() enabled allow teachers to integrate an assignment in an external application with a Campus assignment, score assignments in the external application, and have those scores display in their Campus grade book. This type of connection requires an extra level of security. See the More Information about Score Passback section at the end of this article.
enabled allow teachers to integrate an assignment in an external application with a Campus assignment, score assignments in the external application, and have those scores display in their Campus grade book. This type of connection requires an extra level of security. See the More Information about Score Passback section at the end of this article.
Connections with  enabled allow teachers to align resources from the application with a Campus assignment, which students can then access through Campus Student.
Connections with  enabled allow teachers to embed an image from the application in the Summary of an assignment, which students can then view in Campus Student.
Lozenges that are black without a checkmark indicate that a type of connection is available for the partner but has not been enabled by the district.
Enabling an LTI Connection
Select the partner to enable or click Add Application to select from the list of Campus-supported partners. Expand the LTI Connections section and click Add LTI Connection.
![]() Enter required data for a connection and select schools.
Enter required data for a connection and select schools.
- The Name is specific to the connection, modify if desired. If an application has multiple connections, it may be wise to differentiate the names of the connections.
- The Launch URL and Transfer Email Address settings are populated by default, based on Campus settings. These fields will likely not need to be modified.
- Enter the Key and Secret provided by the partner, which allows Campus users to connect the partner program.
- The
 button attempts to make a connection with the application using the information provided. Note: the user performing the test should have an email address entered on the Demographics tool to perform the test.
 - Modify the Enabled Schools list if desired. All schools are selected by default. Unmark the checkbox next to any schools that shouldn't be included in the connection.
- Under Include in Learning Tools List, mark Campus Parent and/or Campus Student to add the partner to the Learning Tools list in Campus Parent or Campus Student. Only applications marked as Learning Tools can display for parents and students.
- The Advanced Settings area includes multiple configuration sections. Data populates in these sections as applicable for the application. Users should not need to modify these values at this time.
- Click Save when finished and Close to return to the partner.
Give teachers tool rights to External Learning Tools to grant access to LTI tools.
Enabling Multiple Connections for an Application
An application may have multiple connections, such as if the high schools and middle schools in a district are using different connection data. To add additional connections, click Add LTI Connection from the application page. Give each connection a unique name; by default, connection names are iterated numerically.
Each school can only have one connection per provider. When adding an additional connection, and schools selected in existing connections are not listed in the new connection.
Restore Defaults
Click Restore Defaults to restore fields to the default options provided by Campus.
More Information about Score Passback
- Only assignments scored using points can use score passback functionality. Assignments scored using marks or rubrics should not use this option.
- Most applications make the connection between the teacher in Campus and the user of the external application based on the email address entered in Demographics.
- Scores are received from the external application as percentages. The student's numerical score is then calculated using that percentage and the Points Possible entered on the assignment in Campus.
Save
Save
Save
Save
Save
Save
Save
Save
Save
Save
Save
Save
This tool is available as part of the Campus Learning Suite premium offering. Visit the Campus Learning Suite page to learn more.
The Digital Learning Applications Configuration tool allows districts to configure and manage Learning Tool Interoperability (LTI) connections. In this video you will learn how to configure an LTI connection.
Previous Versions
Configuring LTI Connections [.2443 - .2531]
Configuring LTI Connections - Video [.2203 - .2439]
Additional OneRoster Information
Select from the following articles to learn more about OneRoster.
OneRoster API
Revised article!
We've updated this article recently and hopefully improved the information available. What do you think? Is anything missing? Scroll to the bottom of the article and leave a comment if you have feedback or concerns. Thanks!
What is OneRoster?
OneRoster is a set of specifications established by the 1EdTech Learning Consortium. Campus created our OneRoster API based on these specifications.
The OneRoster API allows third-party systems (such as an LMS) to retrieve data from Campus, if the system has been given the correct credentials. The data that can be gathered through this API includes roster and section data, as well as assignments, grades, and scores, if enabled. This API allows districts to more simply integrate their third-party program with Campus.
Campus does not own the OneRoster specifications; we created the OneRoster API based on those specifications to allow third-party systems to communicate with Campus. Fields in Campus are mapped to fields in OneRoster.
Getting Started
It is important to understand that the OneRoster API allows third-party systems to request information from Campus and send it back; Campus does not make requests, it only receives them. Thus, there is no interface in Campus through which users interact with OneRoster. The external system is responsible for making all requests for data, either to receive section data or to send grade/score information. If the OneRoster API were a telephone, Campus would only be able to receive calls, not make them.
In order for the third-party system to make these requests, they must be given credentials to Campus through the Digital Learning Applications Configuration tool. After these credentials are created, the district is responsible for communicating important fields with the third-party system. The Implementing OneRoster section below explains this process and the fields used by the third-party system to connect to Campus.
Type of OneRoster Connections
See Types of Digital Learning Application Connections for more information about the types of OneRoster connections are available. Connections are managed in the Digital Learning Applications Configuration tool.
Versions of OneRoster
1EdTech currently supports the 1.1 and 1.2 versions of the OneRoster specification. Vendors may only support one version of the specification. It's important to verify what version(s) a vendor supports before creating a connection. See the next section for more information.
Another distinction in OneRoster connections is which version of OAuth they use, which are backend authentication protocols related to data security. OAuth 1 is an older version of the protocol that has been officially deprecated. Vendors who do not support OAuth 2 are not using the most secure methods of syncing data and are out of compliance with the OneRoster specification. As of December 2023, any new connections created use OAuth 2. OAuth 2 is the only version currently supported by Campus.
Implementing a OneRoster Connection
At the beginning of the school year, districts should not sync with vendors until student scheduling is finalized. Syncing prior to finalizing scheduling may cause incorrect data in the vendor system.
Step 1: Verify Vendor
Verify whether the vendor conforms to the OneRoster specification (version 1.1 or 1.2).
If the Vendor is a Digital Learning PartnerIf the vendor is already a member of the Digital Learning Partner Program, then they meet the necessary requirements and any connections with that vendor are supported by Infinite Campus. If the Vendor is not a Digital Learning PartnerIf the vendor is interested in becoming a Digital Learning Partner, have them fill out this interest form. Districts can connect to vendors who are not Digital Learning Partners, BUT
|
Step 2: Gather Information
Prior to configuring a OneRoster connection, gather answers to these questions and make decisions based on how your school/district stores data.
- Will the connection use the 1.1 or 1.2 version of the specification?
- Communicate with the vendor about which version of the specification they use.
- Which types of connections will this OneRoster connection use? See the Types of Digital Learning Connections article for more information.
- How does my district store data?
- There is some customization options available for OneRoster connections, based on how districts manage student data. Review the global settings that apply across connections and connection-specific configuration options that apply to individual connections.
- Is there data that should NOT be included in the API?
- The External LMS Exclude checkbox, with appears on various school and student records, prevents data from being made available in the OneRoster API. Review the External LMS Exclude article and mark records that should not be included.
- When should the cache refresh?
- Communicate with the vendor about when the daily OneRoster cache refresh should be set to run. Review the OneRoster Cache article for more information about the cache and how to change the refresh time.
Step 3: Verify Data Setup
Review the OneRoster Prerequisites article to verify that data made available via the API is set up correctly.
Step 4: Configure the Connection
Use the Digital Learning Applications Configuration tool to configure connections to OneRoster. See the Configuring OneRoster Connections article for more information about configuring a connection to a Digital Learning Partner or a non-partner vendor.
Step 5: Share Necessary Information
As part of the configuration process, you'll gather data that must be shared with the vendor for them to establish a connection. Data is found in the Information to Share section when you configure the connection.
Information includes:
- The Client ID and Client Secret: the username and password the vendor uses to access Campus. (Sometimes called a API Key and Secret)
- The Token URL:
- The Base URL: the URL the third-party system uses to access Campus. (Sometimes called a Source URL)
Campus also recommends sharing:
- The link provided in Troubleshooting Documentation to the OneRoster 1.1 or 1.2 API Documentation.
- This document of OneRoster API Consumer Guidelines.
Once these credentials are shared with the vendor, the vendor can begin requesting data via the OneRoster API.
At this point, the remaining setup is performed by the vendor. Districts are responsible for ensuring that vendors conform to any recommended guidelines.
Additional Information
The Digital Learning Applications article collects links to all information relevant to this tool. These articles might prove helpful for understanding OneRoster:
OneRoster - What's new in 1.2?
This document outlines differences between the 1.1 and 1.2 versions of the OneRoster specification as they relate to Campus's implementation of the specification.
School Scoping
Campus users have the option of scoping the data accessible in the OneRoster API to specific schools. This includes both Rostering and Gradebook data. This option was originally released with OneRoster 1.2 but is now available for OneRoster 1.1 connections that use OAuth 2.0 as well.
Roles
The Orgs collection was replaced by Roles, which define the school the user is associated with and their role at that school. Users can have multiple roles - they are reported in the Users endpoint once, with multiple roles if applicable. For example, a student may be enrolled in multiple schools or a teacher may also have an assignment with a non-teacher role.
- Student: Role types of primary and secondary are mapped to the Service Type selected on the enrollment. If the student has multiple Primary enrollments, the earliest one is returned with a role of primary.
- Aide: Users with an Employment Assignment and any Role other than Teacher.
- Administration: Users with an SIS Security Role.
- Users may be considered as 'aides' and 'administrators.'
- Guardians: Anyone with a relationship to a student that has the Portal checkbox marked on their Relationship.
User SourcedIds
In 1.0 & 1.1, User records only reported one role per person, reporting multiple records for multiple roles. Each of these records had its own sourcedId, prefixed by a letter indicating the type of role (s for student, t for teacher, etc). In 1.2, User records can have multiple roles but only have one sourcedId, which does not have a role-specific prefix. Thus, sourcedIds are not backwards compatible prior to 1.2. However, Campus provides the metadata.ic.legacysourceId value, which is the legacy sourcedId without the role prefix. For example, if a (student) user's sourcedId in 1.1 was s+123456, their legacy sourcedId would be 123456. This value may be useful to connect records between 1.2 and prior versions.
Note: userMasterIdentifier returns the StateID for all students.
User Accounts not Required
To report, users are no longer required to have user accounts. However, if user accounts are present, their actual username is reported in the User Profiles collection, not the User object. Username is populated as the Identifier and the type is hardcoded as 'infiniteCampus'. All usernames report for a user; Campus does not determine the primary username. Passwords are not included.
Because user accounts are no longer required, the GETALL Demographics endpoint may be larger than in previous versions.
Note: although user accounts are no longer required by the 1.2 specification, some vendors do require user accounts for 1.2 connections.
Categories & Score Scales
The main changes to the Gradebook endpoints is that Category and Score Scale are now required and included in score LineItems received by Campus. Including this data in the LineItem endpoint means that synced assignments are fully integrated in the Campus Grade Book and teachers will no longer need to categorize and align OneRoster assignments.
Categories
Previously, a Category of all 1's was auto-filled for assignments, requiring teachers to categorize and align assignments received through the OneRoster API. Now that Categories are included in the specification, this auto-filled category of 1's has been removed. Score lineItems are now aligned to real categories instead.
As a result of this change, the GETALL Categories endpoint reports all Categories in all classes (LessonPlanGroup records). Because many classes may have categories with duplicate names, the GETALL endpoint for Categories likely won't be very useful. Campus recommends using GETALL Categories for a Class to provide more relevant data.
Score Scales
The Score Scale is determined using the Task the score is aligned to and the Score Group used to determine the grade.
For example, a section has two Tasks, one for Quarter grades and one for Semester grades. Both tasks have a Score Group of A-F. The Score Group identifies the possible grades the student can receive on the task (A, B, C, etc) and the percentage thresholds for those grades (A = above 90%, B = above 80%, etc). In this example, two Score Scale records are returned for the section: Quarter A-F and Semester A-F.
Score Statuses
The following table maps OneRoster scoreStatus values to the flags available in the Campus Grade Book and provides a priority for aligning those flags. In some instances, an assignment can have multiple flags in Campus.
| scoreStatus | Campus Flag | Priority |
|---|---|---|
| Exempt | X - Exempt | 3 |
| Fully Graded | No flag |
|
| Not Submitted | M - Missing | 1 |
| Partially Graded | No flag |
|
| Submitted | No flag |
|
| Late | L - Late | 5 |
| Incomplete | I - Incomplete | 6 |
| Missing | M - Missing | 1 |
| Withdrawal | Dr - Dropped | 4 |
| In Progress | No flag |
|
| No flag | Ch - Cheated | 2 |
| No flag | T - Turned In | 7 |
Additional Information:
All Gradebook endpoints still require Campus districts to have a Campus Learning license.
| Endpoint | Change |
|---|---|
|
GETALL and GETONE Students w/o roles |
User SoucedIds in 1.2 are not backwards compatible with 1.1. See SourcedId section above for more info. |
| GETALL Classes | Does not include grade levels, which is part of the specification. Campus does not limit sections by grade level. Endpoint returns all sections for the current school year. |
| GETALL and GETONE Demographics | Any Gender value other than M or F reports as O: Other. |
| GETALL and GETONE Teachers |
|
| GETALL and GETONE Users | This endpoint is a concatenation of Students and Teachers and also includes Administrators (Staff with a role other than teacher) and Guardians (people with a relationship to a student with the Portal checkbox marked) |
| GETALL and GETONE LineItem | Category and School have been added to this endpoint. |
OneRoster API Consumer Guidelines
The Campus OneRoster API is used to integrate core elements from the Campus SIS with other 3rd party systems. Districts are advised to share the following recommendations with their vendors to ensure successful implementations and mitigate performance concerns. Districts integrating with multiple vendors should ensure proper communication across all vendors to avoid requests that will negatively impact others.
General Synchronization Recommendations
- Perform full syncs weekly.
- Perform differential syncs on a nightly basis, filtering on dateLastModified values.
- Perform all syncs during off-peak hours, as defined by the district.
- Consumers should ensure that syncs complete prior to the end of the off-peak window.
- Utilize Campus-defined core endpoints and override the default page size to optimize performance (See the Optimizing Data Pulls section below).
- Make no concurrent requests during peak hours (serial requests only).
- Make no more than 5 concurrent requests during off-peak hours.
- Districts should coordinate with their vendors to ensure that they are not all hitting the same objects at the same time.
Optimizing Data Pulls
The following is a recommended sequence of endpoint calls and pagination limits to pull the data in the most efficient way. If you are encountering performance issues, please be sure that district support contacts are aware of the full request URL with district app and API path, including parameters values for sorting, filtering, paging...etc.
Please note that Campus has exposed additional endpoints that are not included in the original OneRoster v1.0 specifications. These endpoints are intended to supplement or replace contextual or aggregate endpoints for the purpose of syncing large sets of data. For example, Results only exist in the specification with respect to a class (e.g. /learningdata/v1/classes/<classSourcedId>/results). Campus also breaks down User and Enrollment types into separate endpoints. By using these endpoints, a sync's performance can be improved by loading more records in a single request and ultimately issuing less requests.
| OneRoster 1.1 | OneRoster 1.2 | |
|
|
OneRoster Troubleshooting (1.1)
This article provides some troubleshooting tips for users of the OneRoster API. OneRoster connections are managed the Digital Learning Partners tool. Review the OneRoster API article for introductory information about these connections.
How do I know the OneRoster connection is working on the Campus end? How do I know what data is being retrieved from Campus?
Use the OneRoster API Documentation to verify your Campus connection to the OneRoster API and show what data the API is collecting for various endpoints. The API documentation also allows you to query specific data in OneRoster via the sourceId.
The sourcedId is a key piece of data used to identify records. This value is usually the unique identifier for an element, such as the GUID. The following table provides the Campus database location and UI path of the sourcedId for each object:
| Object | Campus Equivalent | Campus Database | Campus Path |
|---|---|---|---|
| Academic Sessions | Term Schedule | Term.termID | Not shown in the UI System Administration > Calendar > Calendar > Terms |
| Class | Section | Section.sectionID | Scheduling > Course > Section > SectionID |
| Course | Course | Course.courseID | Scheduling > Courses > Course > CourseID |
| Demographics | Identity | Identity.identityGUID | Census > People > Identity > Person Identifiers > Person GUID |
| Enrollment (Student) | Roster records | S + Roster.rosterID For example: s1234567 | Not shown in the UI Scheduling > Course > Section > Roster |
| Enrollment (Teacher) | Staff History records | T + SectionStaffHistory.historyID For example: t123014 | Not shown in the UI Scheduling > Course > Section > Staff History (Role of Primary or Teacher) |
| Grading Period | Not captured in Campus - placeholder created based on Term | N/A | N/A |
| Line Item | Grading Task/Standard and Section Term Mask | Section.sectionID + (no spaces) | Not shown in the UI Scheduling > Courses > Grading Tasks, Standards |
| Line Item Category | Not captured in Campus - always returns 00000000-0000-0000- 0000-000000000000 | N/A | N/A |
| Org | District or School | District.districtGUID School.schoolGUID | Not shown in the UI System Administration > Resources > District Information |
| Result | Posted Grades | GradingScore. externalLMSSourcedID | Not shown in the UI - generated by the system of record (Campus or Vendor) |
| Score Group | Score Group or Rubric | ScoreGroup.scoreGroupID | Not shown in the UI |
| Term | Term | Children of Academic Sessions Term.termID | Children of Academic Sessions System Administration > Calendar > Calendar > Terms |
| User | Person + role in Campus (student, staff, teacher) | Student: s + UserAccount.personID | Not shown in the UI System Administration > User Security > Users > User Account |
Why is a user not being retrieved from Campus?
For OneRoster 1.1, users need user accounts to be included in OneRoster. User accounts can be created individually, en masse, or automatically.
Teachers need a District Assignment with a Role of Teacher marked.
Non-Teachers staff members need a District Assignment with a Role other than or in addition to Teacher marked.
REST Documentation Client
OneRoster 1.1 Data Models
OneRoster is a set of specifications established by the 1EdTech Learning Consortium. Campus created our OneRoster API based on these specifications. Campus currently supports the 1.1 and 1.2 versions of this specification. This article details the 1.1 version.
| See the OneRoster API article for more information about OneRoster and the Configuring OneRoster Connections article for instructions on setting up a connection. |
The tables below lay out the OneRoster 1.1 specification and identify, where applicable, the location in the Campus interface and database where this data populates, with any additional information.
What are 'SourcedIDs'?
The sourceId of a record is a key piece of data used to identify that record. This value is usually the unique identifier for an element, such as the GUID. In the tables below, the sourceId is the first element listed for each endpoint, with examples provided.
Users
Users must have an enabled user account to return.
There are 5 roles in the Campus implementation of OneRoster 1.1:
- Student: A person with an Enrollment in the active year.
- Enrollments marked as No Show are not returned.
- Teacher: A person with a District Assignment in the active year with a role of Teacher marked (EmploymentAssignment.teacher
- Administrator: A non-teacher staff member. A person with a District Assignment in the active year with a role other than Teacher (EmploymentAssignment.specialEd, .program, .behavior, .health, .responseApprover, .rti, .advisor, .supervisor, .counselor, .foodService, .approver, or .framProcessor)
- Guardian: A person with access to Campus Parent and a Guardian relationship to a student in the current year.
- Relative: A person with access to Campus Parent and a non-Guardian relationship to a student in the current year. Grade Book sync must be enabled for the OneRoster connection to return relative information.
A user's currently active role returns as 'Primary'.
Vendors may choose to access only specific types of users by using role-specific endpoints of /students or /teachers. All roles may be used via the /users endpoint.
Note: A record returns for each role, not for each individual. Multiple records may return for an individual, such as a teacher who is also a guardian or an administrator.
| Data Element Name in OneRoster Spec | Campus Interface & Database Location | Description & Notes |
| sourcedId | Census > People > Identities > PersonID Student: OneRosterStudent.sourceId (Person.personID) Teacher or Administrator: EmployeeAssignment.personID Guardian or Relative: UserAccount.personID | Returns the user's PersonID prepended by a letter indicating the user's role:
|
| status | Returns an indication of whether the user is active. | |
| Student: Student Information > General > Enrollments > End Date Enrollment.endDate | Students are considered active if they have an active Enrollment according to the enrollment End Date. | |
| Teacher or Administrator: Census > People > District Assignment > End Date EmploymentAssignment.endDate | Teachers and Administrators are considered active if they have an active District Assignment according to assignment End Date. | |
| Guardian or Relative: Census > People > Relationships > Start Date, End Date RelatedPair.startDate, RelatedPair.endDate | Guardians and Relatives are considered active if they have an active Relationship record. | |
| dateLastModified | Returns the last Modified Date according to the user's role, or as 1970-01-01 if null. | |
| Students: Enrollment.modifiedDate, Identity.modifiedDate, UserAccount.modifiedDate, Contact.modifiedDate | For students, reports the last modified date of their Enrollment, Identity, User Account, or Contact record. | |
| Teacher or Administrator: EmploymentAssignment.modifiedDate | For Teacher or Administrators, reports from their District Assignment. | |
| Guardian or Relative: Identity.modifedDate, UserAccount.modifiedDate, Contact.modifiedDate | For Guardians or Relatives, returns from their Identity, User Account, or Contact records. | |
| username | User Account > Username Students: UserAccount.userName, UserAccount.homepage, UserAccount.disable, UserAccount.expiresDate, UserAccount.userID All Others: UserAccount.userName, UserAccount.homepage, UserAccount.userID | Returns the username of the user. If multiple user accounts exist for a students, returns the username of the account with a homepage set to Student Portal and the lowest userID that is not displayed or expired. If multiple user accounts exist for another type of user, returns the username based on the Homepage of the User Account with the highest userID. Homepage priority is as follows:
|
| userIds | N/A | N/A |
| type | Census > People > Demographics > Person Identifiers > Student State ID | For students, returns as the stateID. |
| Census > People > Demographics > Person Identifiers > Staff State ID | For teachers or administrators, returns staffStateID. | |
| identifier | Census > People > Identities > Student State ID or Staff State ID Student: Person.stateID Teacher or Administrator: Person.staffStateID | Note: relatives and guardians do not have identifiers |
| enabledUser | Always returns as 'true'. | Note: user account must be active to return. If multiple user accounts exist for a user, returns the most recently create account that is active. |
| givenName | Census > People > Identities > First Name Identity.firstName | First Name |
| familyName | Census > People > Identities > Last Name Identity.lastName | Last Name |
| middleName | Census > People > Identities > Middle Name Identity.middleName | Middle Name |
| role | Campus supports user roles of teacher, student, administrator, relative, and guardian. | |
| Student: Student Information > General > Enrollment (in active Calendar) | Indicates student role | |
| Teacher: Census > People > District Assignment > Teacher checkbox marked | Indicates teacher role | |
| Admin: Census > People > District Assignment > Employment Assignment Information > any checkboxes other than Teacher marked | Indicates administrator role | |
| Relative/Guardian: Census > People > Relationships > Relative or Guardian checkboxes marked | Indicates relative or guardian role | |
| identifier | Census > People > Identities > Local Student Number or Local Staff Number Student: Person.studentNumber Teacher or Administrator: Person.staffNumber | Identification number of the person Note: relatives and guardians do not have identifiers |
| Census > People > Demographics > Personal Contact Information > Email Contact.email OR Contact.secondaryEmail | Email Address Note: districts may elect to use the Secondary Email Address using the email setting in the Learning Interoperability/Digital Learning Applications Configuration tool. Some vendors require all users to have an email address. | |
| sms | N/A | N/A |
| phone | Census > People > Demographics > Person Contact Information > Other Phone Contact.homePhone | Phone Number |
| agents | Census > People > Relationships > Portal RelatedPair.portal | Returns as list of the Guardians and Relatives of the student who have access to the Campus Parent Portal. |
| orgs | Students: Student Information > General > Enrollments > No Show, End Date Enrollment.noShow, Enrollment.endDate | Returns the GUID of the Org if the end date falls within the current active school year. |
| Teachers: Census > People > District Assignment> End Date EmploymentAssignment.endDate | Returns the GUID of the Org if the end date falls within the current active school year. | |
| grades | Student Information > General > Enrollments > Grade; System Administration > Resources > Grade Level Definitions GradeLevel.stateGrade | Returns a list of SCED Grade Level mapped to the grade level in which the students are enrolled. Only returns for students. |
| password | N/A | Returns as null. |
Demographics
Returns based on the current active identity for the person. Only one Identity may be active at a time.
This endpoint can be turned off for connections using OAuth 2.
| Data Element Name in OneRoster Spec | Campus Interface & Database Location | Description & Notes |
| sourcedId | Census > People > Identities > PersonID Identity.personID | Returns the personID prepended by a role prefix:
e.g. A Teacher with a personID of 1234 returns as t1234. |
| status | N/A | Returns as 'active' |
| dateLastModified | Census > People > Demographics/Identities > Modified Date Identities.modifiedDate | The Modified Date on the Identity record. If null, returns 1970-01-01. Modified Date also displays on Census > People > Demographics and Student Information > General. |
| birthDate | Census > People > Identities > Birth Date Identity.birthDate | Birth Date |
| sex | Census > People > Identities > Gender Identity.gender | The OneRoster specification only supports genders of M and F. If Gender is M, returns Male. If Gender is F, returns Female. Otherwise returns as null. |
| americanIndianOr AlaskaNative | Census > People > Identities > Race/Ethnicity > American Indian or Alaska Native Identity.raceEthnicityFed = 2 | If Race/Ethnicity is American Indian or Alaska Native, returns Yes. Otherwise returns No. Returns as No if Hispanic/Latino returns as Yes. |
| asian | Census > People > Identities > Race/Ethnicity > Asian Identity.raceEthnicityFed = 3 | If Race/Ethnicity is Asian, returns Yes. Otherwise returns No. Returns as No if Hispanic/Latino returns as Yes. |
| blackOrAfricanAmerican | Census > People > Identities > Race/Ethnicity > Black or African American Identity.raceEthnicityFed = 4 | If Race/Ethnicity is Black or African American, returns Yes. Otherwise returns No. Returns as No if Hispanic/Latino returns as Yes. |
| nativeHawaiianOr OtherPacificIslander | Census > People > Identities > Race/Ethnicity > Native Hawaiian or Other Pacific Islander Identity.raceEthnicityFed = 5 | If Race/Ethnicity is Native Hawaiian or Other Pacific Islander, returns Yes. Otherwise returns No. Returns as No if Hispanic/Latino returns as Yes. |
| white | Census > People > Identities > Race/Ethnicity > White Identity.raceEthnicityFed = 6 | If Race/Ethnicity is White, returns Yes. Otherwise returns No. Returns as No if Hispanic/Latino returns as Yes. |
| demographicRaceTwo OrMoreRaces | Census > People > Identities > Race/Ethnicity Identity.raceEthnicityFed | Indicates if the student identifies with two or more races. Returns as No if Hispanic/Latino returns as Yes. |
| hispanicOrLatinoEthnicity | Census > People > Identities > Race/Ethnicity > Is the individual Hispanic/Latino? Identity.hispanicEthnicity | If Y is selected for the Hispanic/Latino question, returns Yes. Otherwise returns No. If this attribute returns as Yes, all other Race/Ethnicity fields return as No. See IPEDS Guidance for more information. |
| countryOfBirthCode | Census > People > Identities > Birth Country Identity.countryOfBirthCode | Country of Birth |
| stateOfBirthAbbreviation | Census > People > Identities > Birth State Identity.stateOfBirthAbbreviation | Abbreviation of the State of Birth |
| cityOfBirth | Census > People > Identities > Birth City Identity.cityOfBirth | City of Birth |
| publicSchool ResidenceStatus | N/A | Returns as null. |
Enrollments
Only returns for students and teachers. OneRoster and Campus define 'enrollment' differently. In OneRoster, an 'enrollment' indicates membership in a class. In Campus, this data is stored in the Schedule for students and the Staff History tab for Teachers.
Follows External LMS Exclude logic.
| Data Element Name in OneRoster Spec | Campus Interface & Database Location | Description & Notes |
| sourcedId | Does not display in Campus UI. 's' + Roster.rosterID | For students, returns the letter 's' prepended to the RosterID. e.g. s123453678 |
| Does not display in Campus UI. 't' + SectionStaffHistory.historyID | For teachers, returns the letter 't' prepended to the Staff History ID.e.g. t123456 | |
| status | Students: Student Information > General > Schedule > Walk-in Scheduler > Section > End Date Roster.endDate | For students, if the Roster End Date is null or after the current date, returns 'active'. Otherwise returns 'tobedeleted'. |
| Teachers: Scheduling > Courses > Section > Staff History > End Date SectionStaffHistory.endDate | For teachers, if the Staff History End Date is null or after the current date, returns 'active'. Otherwise returns 'tobedeleted'. | |
| dateLastModified | Student: Student Information > General > Schedule > Walk-In Scheduler > select a roster Roster.modifiedDate or Roster.createdDate | Returns the Modified Date, or the Created Date if null. Note: Created Date does not display in the Campus UI. |
Teacher: Scheduling > Courses > Section > Staff History > Staff History Detail > Modified SectionStaffHistory.modifiedDate or SectionStaffHistory.createdDate | ||
| user | Census > People > Identities > Person ID 's' + Identity.personID 't' + Identity.personID | Returns the PersonID of the person this record pertains to, prepended by an 's' for students or a 't' for teachers. e.g. If the teacher's PersonID is 1234, returns as 't1234' |
| class | Scheduling > Courses > Section > SectionID Section.sectionID | The Section ID of the class the person is enrolled in. |
| school | Does not display in the Campus UI. School.schoolGUID | Returns the SchoolGUID associated with the section. |
| role | N/A | Identifies the type of enrollment record being returned. Returns as 'student' or 'teacher'. |
| primary | Students: N/A | A value does not return for students. |
Teachers: Scheduling > Courses > Section > Staff History > Staff Type SectionStaffHistory.staffType | For teachers, returns as TRUE if the teacher is designated as the Primary teacher of the section. Otherwise returns as FALSE. | |
| beginDate | Students: Student Information > General > Schedule > Walk-In Scheduler > Start Date Roster.startDate | For students, returns the Roster Start Date. If a date is not listed, returns as null. |
| Teachers: Scheduling > Courses > Section > Staff History > Access Date, Start Date SectionStaffHistory.accessStartDate SectionStaffHistory.startDate | For teachers, returns the Access Date from the Staff History record, if entered, or the Start Date of the Staff History record. If a date is not listed, returns as null. | |
| endDate | Student Information > General > Schedule > Walk-In Scheduler > End Date Roster.endDate | For students, returns the Roster End Date. |
Scheduling > Courses > Section > Staff History > Access End Date, End Date SectionStaffHistory.accessEndDate SectionStaffHistory.endDate | For teachers, returns the Access End Date from the Staff History record, if entered, or the End Date of the Staff History record. | |
| If an End Date is entered in Campus, a value of endDate + one day returns. One day is added because dates are inclusive in Campus (access ends at the end of the endDate) whereas in OneRoster, dates are exclusive (access ends at the beginning of the endDate). | ||
Classes
Note: The Classes endpoint is cached hourly. See the Caching OneRoster Data section for more information.
Follows External LMS Exclude logic.
| Data Element Name in OneRoster Spec | Campus Interface & Database Location | Description & Notes |
| sourcedId | Scheduling > Courses > Section > Section ID Section.sectionID | Returns the SectionID of the class. |
| status | Returns as 'active' | |
| dateLastModified | Scheduling > Courses > Section > Modified Date Section.modifiedDate | Date the section record was last modified. |
| title | Scheduling > Courses > Course > Name, Number; Section > Number | Returns in a format of "<course.number> <section.number> <course.name>" e.g. 101 2 Math |
| classCode | Scheduling > Courses > Section > Teacher Display Name Section.teacherDisplayName | Returns the Teacher Display Name. |
| classType | Scheduling > Courses > Section > Homeroom checkbox | Returns as 'homeroom' if the class is marked as Homeroom. Otherwise returns as 'scheduled'. |
| location | Scheduling > Courses > Section > Room Room.name | Room where the class takes place. |
| grades | N/A | Not supported. In Campus, grade level data is not stored fro sections (classes). |
| subjects | Scheduling > Courses > Course > Subject Type, Core Academic Class If Subject Type is CORE: Course.coreSubject Otherwise Course.subjectType | On the Course tab, if the Subject Type of CORE is selected, the Core Academic Class dropdown list displays and this attribute returns the value selected for that field. Otherwise returns the Subject Type. Note: Only one value returns for this attribute. Is often returns as blank. |
| course | Scheduling > Courses > Course > CourseID Course.courseID | The Course ID of the section's (class's) parent course. |
| school | Does not display in the Campus UI. School.schoolGUID | The GUID of the School for the Calendar that the Course is in. |
| terms | Scheduling > Courses > Section > Section Schedule Placement SectionPlacement.termName | Returns the terms that the section is scheduled into, according to the Section Schedule Placement. |
| subjectCodes | Scheduling > Courses > Course > Course ID, NCES Data > NCES Code Course.scedSubjectArea Course.Courseid | Returns the SCED Subject Area + Course ID. If either is null, returns as null. Only one value returns. |
| periods | Scheduling > Courses > Section > Section Schedule Placement SectionPlacement.termName SectionPlacement.periodScheduleName sectionPlacement.name | Returns a list of periods, likely containing a period for each term, in the following format: "<sectionPlacement.termName>-<sectionPlacement.periodScheduleName>-<sectionPlacement.name>". e.g. "Q1-Daily-1" |
| resources | N/A | N/A |
Courses
Follows External LMS Exclude logic.
Note that if a school use Course Masters to manage course information, course details may change as a result of data being pushed from the Master. Data is returned via the API from Course Information so changes made at the Course Master level that have not been pushed to the Course are not reflected in the API. Likewise, if fields in Course Information are locked from editing at the Course Catalog level, edits must be made to the Course Master and then pushed to the course.
| Data Element Name in OneRoster Spec | Campus Interface & Database Location | Description & Notes |
| sourcedId | Scheduling > Courses > Course > Course ID Course.courseID | e.g. 12345 |
| status | Returns as 'active' | |
| dateLastModified | Scheduling > Courses > Course > Modified Date Course.modifiedDate | Date the course record was last modified. |
| title | Scheduling > Courses > Course > Name Course.name | Course Name |
| schoolYear | N/A | N/A |
| courseCode | Scheduling > Courses > Course > Number Course.number | Course Number |
| grades | N/A | N/A |
| subjects | Scheduling > Courses > Course > Subject Type, Core Academic Class If Subject Type is CORE: Course.coreSubject Otherwise Course.subjectType | On the Course tab, if the Subject Type of CORE is selected, the Core Academic Class dropdown list displays and this attribute returns the value selected for that field. Otherwise returns the Subject Type. Note: Only one value returns for this attribute. Is often returns as blank. |
| org | Does not display in the Campus UI. School.schoolGUID | Returns the sourcedId of the calendar's school. |
| sujbectCodes | Scheduling > Courses > Course > NCES Data > NCES Code Course.schedSubjectArea Course.scedCourseID | Returns the SCED Subject Area + SCED Course ID Identifier. If either is null, returns null. e.g. SCED Subject Area = 02: Mathematics and SCED Course Identifier = 051: Pre-Algebra, returns as 02051. |
| resources | N/A | N/A |
Orgs (Districts & Schools)
The Campus implementation of the OneRoster specification returns districts and schools as orgs because the specification does not have a place for returning district-level information. Schools marked as External LMS Exclude are not returned.
District and school records are differentiated using the type element. Orgs returns as three endpoints:
- /districts: Returns one record for the district
- /schools: Returns a record for each school
- /orgs: Returns a combination of records for the district and each school.
If desired, vendors have the option of only returning the /schools endpoint to exclude district information.
| Data Element Name in OneRoster Spec | Campus Interface & Database Location | Description & Notes |
| sourcedId | Does not display in the Campus UI. School.schoolGUID District.districtGUID | e.g. 882ed49c-f895-4fa2-9003-ce2fb524b747 |
| status | Returns as 'active' | |
| dateLastModified | System Administration > Resources > School > Modified Date School.modifiedDate | Date the school record was last modified. |
| System Administration > Resources > District Information > Modified Date District.modifiedDate | Date the district record was last modified. | |
| metadata | Schools School & District Settings > Schools > School Information > Address fields School.address, city, state, zip | Can optionally include address data for the School/District based on OneRoster connection settings. "ic_address" contains:
|
| District School & District Settings > District > District Information > Address fields District.address, city, state, zip | ||
| name | System Administration > Resources > School > Name School.name | School Name |
| System Administration > Resources > District Information > Name District.name | District Name | |
| type | Returns as 'school' for schools and 'district' for districts. | |
| identifier | District: System Administration > Resources > District Information > State District Number District.number | State District Number |
| School: System Administration > Resources > School > State School Number School.number | State School Number | |
| parent | Does not display in the Campus UI. District.discrictGUID | Returns the District's sourcedId, which is the districtGUID |
| children | Does not display in the Campus UI. School.schoolGUID | Returns a list of school sourcedIds, which are the schoolGUID values. |
Terms
| Data Element Name in OneRoster Spec | Campus Interface & Database Location | Description & Notes |
| sourcedId | Does not display in the Campus UI. Term.termID | e.g. 1234 |
| status | N/A | Returns as 'active'. Campus does not support inactive terms. |
| dateLastModified | N/A | Returns as 'now'. Campus does not stores Last Modified dates for Terms. |
| title | System Administration > Calendar > Term > Name Term.name | Term Name |
| startDate | System Administration > Calendar > Term > Start Date Term.startDate | Start Date |
| endDate | System Administration > Calendar > Term > End Date Term.endDate | End Date |
| type | N/A | Returns as 'term' |
| parent | N/A | N/A - Term records do not have parents in Campus. |
| children | Does not display in the Campus UI. Term.termGUID | This field returns the sourcedId for the associated Grading Period, which is the TermGUID. |
| schoolYear | System Administration > Calendar > School Years > select Active year > End Year, Active SchoolYear.endYear | Returns the End Year of the term's school year. |
Grading Periods
In Campus, Grading Periods is the same thing as Terms. This endpoint returns the same records as the Terms endpoint, with additional records for One-Time Grading Tasks and their associated Terms.
| Data Element Name in OneRoster Spec | Campus Interface & Database Location | Description & Notes |
| sourceId | Does not display in the Campus UI. Term: Term.termGUID One-Time Grading Task: ScheduleStructure.structureGUID | e.g. 882ed49c-f895-4fa2-9003-ce2fb524b747 |
| status | N/A | Returns as 'active'. Campus does not support inactive terms |
| dateLastModified | N/A | Returns as 'now'. Campus does not stores Last Modified dates for Terms. |
| title | Terms: System Administration > Calendar > Term > Name Term.name | For Term-related Grading Periods, returns Term Name. |
| One-Time Grading Tasks: System Administration > Calendar > Name; Schedule Structure > Name Calendar.name, ScheduleStructure.name | For One-Time Grading Task Grading Periods, returns the following: <calendar.name> <scheduleStructure.name> e.g. 'OneTime: 21-22 Harrison High Main' | |
| startDate | System Administration > Calendar > Term > Start Date Term.startDate | For Term-related Grading Periods, returns the Start Date. For One-Time Grading Task Grading Periods, returns the earliest Start Date for any Term in the term schedule. |
| endDate | System Administration > Calendar > Term > End Date Term.endDate | For Term-related Grading Periods, returns the End Date. For One-Time Grading Task Grading Periods, returns the latest End Date for any Term in the term schedule. |
| type | N/A | Returns as 'gradingperiod'. |
| parent | Terms: Does not display in the Campus UI. Term.termID | Returns the sourceId of the associated Term record, which is the term's TermID. |
| One-Time Grading Tasks: N/A | N/A | |
| children | N/A | N/A |
| schoolYear | System Administration > Calendar > School Years > End Year, Active SchoolYear.endYear | Returns the End Year of the term's school year. |
Academic Sessions
Academic Sessions are a combination of all possible terms and grading periods for the section. Follows External LMS Exclude logic.
The Academic Sessions endpoint returns the same data as the Terms and Grading Periods endpoints documented above.
LineItems (Assignments)
Note: Assignments returned via OneRoster can only be scored using points. No data received from the vendor program can be edited on an assignment, but other data can be.
| Support Information: Assignments received via the OneRoster API have a version shown in the bottom-right corner of the assignment. Click to view additional information about the assignment. |
| Data Element Name in OneRoster Spec | Campus Interface & Database Location | Description & Notes |
| sourcedId | Instruction > Grade Book > select assignment > hidden support information, described above IMLearningObjectSection.externalLMSSourcedId | If the assignment was created in the external LMS, returns the identifier assigned by that program. If created in Campus, returns the Campus-created assignment GUID. If an assignment is associated with multiple sections, each instance gets its own unique sourcedId. |
| status | N/A | Returns as 'active'. |
| dateLastModified | Instruction > Grade Book > select assignment > hidden support information, described above IMLearningObject.modifiedDate | For imported assignments, returns the date the assignment was last modified, which is either the date of the most recent change to the assignment made in Campus or the date the vendor last modified the synced assignment. The Created Date is the date the vendor first synced the assignment. |
| metadata | ||
| title | Instruction > Grade Book > select assignment > Name | Note: Campus limits assignment name to 255 characters |
| description | Instruction > Grade Book > select assignment > Summary IMLearningObjectBlob.content | Returns the assignment description provided by the LMS, if any. |
| assignDate | Instruction > Grade Book > select assignment > Start Date IMLearningObjectSection.startDate | Note: Vendors must send an assignDate that is at least one minute before the dueDate to correctly create an assignment. |
| dueDate | Instruction > Grade Book > select assignment > End Date IMLearningObjectSection.endDate | Note: This date must fall within the term. |
| class | Does not display in the Campus UI. IMLearningObjectSection.sectionID | Returns the SectionID for a the section an assignment is in, according to information provided by the vendor. An assignment can only be aligned to one section. |
| category | N/A | Returns a value of '11111111-1111-1111-1111-111111111111'. |
| gradingPeriod | Does not display in the Campus UI. Term.termGUID OneRosterClass.structureID (ScheduleStructure.structureID) | If the assignment is aligned to a Category within a Term, returns the TermGUID. Otherwise, returns the StructureGUID of the Schedule Structure |
| resultValueMin | N/A | Returns as '0'. This value is not recorded in Campus |
| resultValueMax | Instruction > Grade Book > select assignment > Grading > Points LessonPlanGroupActivity.totalPoints | Points possible on the assignment. |
Results
| Data Element Name in OneRoster Spec | Campus Interface & Database Location | Description & Notes |
| sourcedId | Does not display in the Campus UI LessonPlanScore.externalLMSSourcedID | Format determined by vendor. |
| status | N/A | Returns as 'active'. |
| dateLastModified | Does not display in the Campus UI. LessonPlanScore.modifiedDate | Returns the Modified Date of the record. If null, returns '1/1/1970'. |
| lineItem | Instruction > Grade Book > assignment > Support Information (see LineItems for more information) IMLearningObjectSection.externalLMSSourcedId | Returns the sourceId of the lineItem that is being created or updated. |
| student | Does not display in the Campus UI. LessonPlanScore.personID | Returns the studentId of the associated student prepended with 's'. |
| scoreStatus | Instruction > Grade Book > score and flag(s) for an assignment LessonPlanScore.exempt, LessonPlanScore.missing, LessonPlanScore.score | Score flags are mapped as follows:
|
| score | Instruction > Grade Book > an assignment score LessonPlanScore.score | If the score is a numeric value, returns the float value of the score. Otherwise returns as null. A 440 error is generated if a non-numeric score is entered. |
| scoreDate | Does not display in the Campus UI. LessonPlanScore.modifiedDate | Returns the Modified Date of the score, or as 'now' if null. This field does not return the LessonPlanScore.scoreDate. |
| comment | Instruction > Grade Book > assignment score comment LessonPlanScore.comments | Note: Campus limits comments to 250 characters. |
Categories
How categories are handled by OneRoster depends on vendor setup. If the vendor program is set up to receive categories from Campus, refer to the first table of logic below. If not, refer to the second table.
Vendors Using Categories
| Data Element Name in OneRoster Spec | Campus Interface & Database Location | Description & Notes |
| sourcedId | LessonPlanGroup.groupID | eg. 12345 |
| status | N/A | Returns as 'active'. |
| dateLastModified | LessonPlanGroup.modifiedDate | Last modified date if available, otherwise 1970-01-01. |
| metadata | classId: string | classId is the class sourcedId for the category (sectionID) eg. 12345 |
| title | LessonPlanGroup.name | Returns the name of category |
| weight | LessonPlanGroup.weight | Weight of the category in grading. |
Vendors Not Using Categories
| Data Element Name in OneRoster Spec | Campus Interface & Database Location | Description & Notes |
| sourcedId | N/A | Returns a value of '11111111-1111-1111-1111-111111111111'. |
| status | N/A | Returns as 'active'. |
| dateLastModified | N/A | Always returns as '1-1-1970'. |
| title | N/A | Returns as 'Grade Book Score'. |
Class Groups
Class groups is a OneRoster extension. In Campus, teachers are allowed to create cross-section Section Groups. These are represented in OneRoster as Class Groups.
| Data Element Name in OneRoster Spec | Campus Interface & Database Location | Description & Notes |
|---|---|---|
| sourcedId | Does not display in the Campus UI. SectionGroup.sectionGroupID | eg. 12345 |
| status | N/A | Returns as 'active'. |
| dateLastModified | N/A | Returns the current date/time. |
| metadata | N/A | N/A |
| title | Instruction > Grades > Grade Book > Settings > Section Groups > Name SectionGroup.name | Returns the name of the section group. |
| groupType | Does not display in the Campus UI. SectionGroup.autogenerated | If the group is auto-generated, returns 'cross-listed'. Otherwise returns 'Cohort'. |
| classes | OneRosterClass.sectionID | Returns a list of sectionIDs for sections included in the Class Group. |
FAQs
How do I know the OneRoster connection is working on the Campus end? How do I know what data is being retrieved from Campus?
Use the OneRoster API Documentation to verify your Campus connection to the OneRoster API and show what data the API is collecting for various endpoints. The API documentation also allows you to query specific data in OneRoster via the sourceId. See the What are sourcedIds? section above for more information.
Why is a user not being retrieved from Campus?
For OneRoster 1.1, users need user accounts to be included in OneRoster. User accounts can be created individually, en masse, or automatically.
Teachers need a District Assignment with a Role of Teacher marked.
Non-Teachers staff members need a District Assignment with a Role other than or in addition to Teacher marked.
Who populates a student's "Agents" list?
The Agents list includes all Guardians and Relatives who have access to Campus Parent and a Guardian or non-Guardian relationship (respectively) to a student in the current year. Grade Book sync must be enabled for the OneRoster connection to return this information.
Digital Learning Partners
This section provides additional information about Digital Learning Partners (DLP).
Digital Learning Partners - Tips & Troubleshooting
Troubleshooting tips for specific Digital Learning Applications.
This article provides additional information, instructions, and tips for specific Digital Learning Partners (DLPs). Expand a section below to view more information.
The Digital Learning Applications article provides more information about these connections, including instructions for setting them up. |
Google Classroom
As of July 1, 2024, Google makes this sync available to specific editions of Google Workspace. If you have any questions about what edition of Google Workspace your district licenses and whether the Google Classroom sync is available for your district, please reach out to Google.
Additional troubleshooting information and tips for using Google Classroom is available in this Google Classroom Connections article.
Supported Hosting Models
Google Classroom has provided the following information about supported hosting models:
"Google Classroom supports exporting grades to Infinite Campus customers that use a SaaS solution that Infinite Campus fully hosts and manages (Campus Cloud or Campus Cloud Choice). Google is unable to provide support to districts that are Self-Hosted or In-District Hosted. When the Infinite Campus service is running on servers that are managed by a district-hosted deployment or any other non-SIS provider such as AWS/GCP, instead of on servers that are managed by Infinite Campus, Infinite Campus is not in control of the maintenance and configuration of those servers. This means that things like firewalls, query throughput and latency differences, and other factors may vary between deployments; furthermore the ability to debug fully is generally spread across multiple organizations and admin groups. Google is unable to support all of these variations across district-hosted deployments at scale. You can learn more about Google’s eligibility requirements and connecting Classroom to Infinite Campus here." |
Districts who are not Cloud or Cloud Choice should be aware that, while connections to Google Classroom are possible and may function properly, the connection will not be supported by the Google Classroom support team and irreconcilable bugs or configuration issues may occur.
Troubleshooting
- Emails: All students and teachers must have their Google account email entered on the Demographics tab. Multiple users (teachers or students) should not share the same Primary email address in Campus.
- Teacher Email Addresses: Currently, classes cannot be linked to Google Classroom if the teacher's email address contains an apostrophe. The user who manages admin.google.com should update the user's email to remove the apostrophe (the prior email is maintained as an alias) and update the Email field on the Demographics tab to remove the apostrophe.
- Staff History: To sync from Google Classroom, teachers must be listed as a Primary teacher in Staff History in Campus, not just a Teacher. Google Classroom requires that teachers have active Staff History assignments as well: Assignment Start and End Dates affect access. Take care when pre-populating these dates.
- Roster: Google Classroom requires that student be actively enrolled in a class when the sync is performed. These dates are visible on the Requests and Rosters tool in Sections. Take care when pre-populating these dates.
- User Accounts: All users for whom data is synced, both teachers and students, must have user accounts in Campus. This is true of all connections that use OneRoster 1.1.
- External LMS Exclude: In Campus, there is an External LMS Exclude checkbox for Sections, Courses, Calendars, Schools, student Enrollments, and teacher District Assignments. Marking this checkbox excludes that data from the OneRoster API from which Google Classroom gets its Campus data. See the External LMS Exclude section for more information, including the hierarchy logic that applies to this field (for example, excluding a Course excludes all of its Sections).
Linking Classes between Campus and Google Classroom
It's very important to link the correct Google Classroom class to a Campus section. If this link is not correct, scores will not sync properly.
Verify that the link is correct by:
- comparing the list of students for a section in your Campus Grade Book or Roster to the class in Google Classroom and make sure the lists match.
- using the Teacher Schedule in Instruction or the Teacher Schedule in Census to verify which sections meet during which periods for a given day, which can help clarify if you've named Google Classroom classes based on period.
If Section Links are Incorrect
Follow these steps if a Google Classroom class is linked to the wrong section Campus.
- In your Campus Grade Book, find the section that is incorrectly linked to the Google Classroom class.
- In your Campus Grade Book, delete all assignments synced from Google Classroom - they are for the wrong class and don't apply to this section.
- In Google Classroom, unlink the Google Classroom class from the incorrect Campus section number and recreate the link to the correct section number.
If you don't see the correct section number to link to, verify that you haven't already linked it to another Campus section, including in an archived class.
Best Practices for Teachers
- When creating assignments when class is not in session, don't click Assign in Google Classroom, click Schedule and enter a date within the Term Dates of the class. Check Term Dates in the Terms dropdown list at the top of the Campus Grade Book. If teachers click Assign when class is not in session, Google Classroom will never properly sync that assignment.
- To delete an assignment that has been synced to Campus, delete it in Google Classroom and sync to remove it from Campus. Do not delete synced assignments in Campus.
- When transitioning a class from one teacher to another, the current teacher should invite the new one to the Google Classroom class as a teacher. Alternately, if the new teacher has set up their own Google Classroom classes from scratch, the current teacher must unlink their Google Classroom from the section so that the new teacher can link to it. Google Classroom only allows the Primary Teacher (as indicated in Campus) to perform syncing, so the new teacher must be listed as an active Primary Teacher in the section's Staff History.
- If archiving or deleting a Google Classroom class, always unlink it in Google Classroom from its Campus section first.
Retroactive Syncing
Google Classroom employs an "active-as-of-right-now" logic when syncing and does not consider historical roster or staff history records. Thus, Google Classroom does not support retroactive syncing and will not sync scores in the following scenarios:
- Inactive Student: The student has dropped the class and has a Roster End Date, or no longer attends the school and has an Enrollment End Date.
- Inactive Teacher: The teacher's time as a Primary Teacher of the class is over or has not begun. This scenario occurs if the sync is attempted outside the Assignment Start and End Dates on the teacher's Staff History record.
- TermDates: Assignments cannot be synced outside of the term, as determined by the Term Start and End Dates for the term(s) selected in the Section Schedule Placement on the Sections tool.
- After the Last Day of School: Google Classroom does not allow assignments to be created with an earlier Posted Date. Therefore, assignments created after the last day of school will not sync.
Scheduling Outside of Term Dates: If creating assignments outside of term dates, such as between terms on days when no sections are in session, teachers must select Schedule in Google Classroom, not Assign, and schedule the assignment to post on a future date when the section is in session. If an assignment is created by clicking Assign when the class is not in session, the assignment will never sync.
Illuminate DnA
Illuminate DnA can be configured as an LTI connection, a OneRoster connection with Grade Book Sync, or both. The connection to OneRoster is currently in pilot mode and is therefore not available in all districts.
LTI | OneRoster |
Use an LTI connection teachers primarily manage assignments and scores in Campus. An LTI connection also add the partner program to the Learning Tools list for teachers and students. | Use a OneRoster connection if teachers primarily manage assignments and scores in the partner program. |
For more information about the differences between these types of connections, see What's the Difference Between LTI and OneRoster? or contact Campus Support for assistance.
Kimono (Canvas)
Tips:
- Canvas does not support a single class being in multiple terms. Thus, Canvas does not use the term Start and End Dates data provided by the Infinite Campus API.
- Infinite Campus and Instructure (Canvas Support) both partner with Kimono to accomplish Score Passback. If Canvas needs an issue investigated, their team should coordinate with Kimono on the issue. Kimono is in communication with Campus Development to work out issues on our side.
LockDown Browser (Respondus)
LockDown Browser is a program provided by Respondus. If a district has a LockDown Browser license and a connection has been configured, teachers have the option of enabling LockDown Browser for a quiz. When a student opens a LockDown Browser quiz, they are prevented from using other programs on that device. For example, LockDown Browser would prevent a student from looking up answers to the quiz online.
Connections to LockDown Browser are configured as LTI connections using LTI 1.3. See the Enable LockDown Browser article for instructions on using LockDown Browser from a teacher's perspective.
Naiku
Naiku can be configured as an LTI connection, a OneRoster connection with Grade Book Sync, or both. Generally, districts would enable one or the other, but because Naiku is strictly an assessment provider and does not have it's own grade book, districts may want to enable both LTI and OneRoster connections.
This table describes the workflow for teachers based on the type of connection:
LTI Enabled | OneRoster |
|
|
For more information about the differences between these types of connections, see What's the Difference Between LTI and OneRoster? or contact Campus Support for assistance.
When would my district need both kinds of connections?
Enabling both types of connections would be helpful in the following scenarios:
- Teachers want to create and manage assignments in the Campus Grade Book and associate them with assessments in Naiku (LTI), but rely on a OneRoster connection to sync roster data. This scenario would require an LTI connection and a OneRoster connection with Roster Sync, but Grade Book Sync can be toggled off.
- Teachers want to create and manage assessments only in Naiku (OneRoster), but also want students to be able to launch Naiku securely from Campus Student through the Learning Tools list (LTI). This scenario would require a OneRoster connection with Grade Book Sync and an LTI connection.
Schoology
Tips:
- Schoology does not support special characters (@ symbol, spaces) in usernames. Keep this in mind when your district is implementing Single Sign On as it may affect the format required for Campus usernames.
- Schoology is not current making use of roster Start and End Dates that Infinite Campus includes in the API data.
- If you encounter the message "Your adapter credentials are invalid, please try to reconnect or enter new information." when setting up a Schoology connection using OneRoster 1.1, remove '/ims/oneroster/v1p1/' from the end of your URL and try again.
TAMS
TAMS (the Trusted Apps Management Suite) is a tool that allows districts to share a verified list of applications that teachers can use in their classrooms. TAMS allows districts to foreground reliable, secure applications and provide status information to communicate apps that have been approved or denied and those preferred by the district.
Access to TAMS is configured using the same process as other LTI connections. Apps in the Suite are vetted by 1EdTech and TAMS is a benefit provided to 1EdTech members. Visit 1EdTech for more information.
When configured, the list of apps displays in a dashboard that teachers access via Learning Tools.
Teams
When enabling a connection to Teams, be aware that the integration is with Microsoft's School Data Sync, which has its own support team and documentation.
Configure and Manage Google Classroom Connections
Setup and manage Google Classroom connections that allow teachers to sync assignments and scores entered from Google Classroom into their Campus Grade Book.
As of July 1, 2024, Google makes this sync available to specific editions of Google Workspace. If you have any questions about what edition of Google Workspace your district licenses and whether the Google Classroom sync is available for your district, please reach out to Google.
Integration with Google Classroom allows teachers to sync assignments and scores entered in Google Classroom into their Campus Grade Book. A grading connection does not sync roster data with Google Classroom, such as sections, teachers, and students rosters. This type of connection requires a Campus Learning license. Google Classroom connections have been available since August 2020. Data is synced via the OneRoster API.
Additional troubleshooting information and tips for using Google Classroom is available in this Digital Learning Partners article.
Establishing a Google Classroom Connection
Tool Search: Digital Learning Applications Configuration
Connections are managed through the Learning Interoperability tool. See the Configuring OneRoster Connections article for a full description of the process.
To create a Google Classroom connection, click Add Application and select Google Classroom from the list of partners that display. Do not create the connection by clicking to Connect to Other Applications. If a user clicks Add Application and does not see the Browse Applications screen where Google Classroom is an option, check your district's Campus Learning license or try again in a few seconds.
Generate a connection to OneRoster by clicking Generate New OneRoster Connection and selecting OneRoster 1.2 or OneRoster 1.1 with OAuth 2.0. The administrator of your district's Google Workspace account can then copy the credentials - Key, Secret, and OneRoster Base URL - into classroom.google.com/admin.
Once created, the connection in the Learning Interoperability tool should have the official Google Classroom logo and the green checkmark, indicating that the connection is with an approved Digital Learning Partner. If the connection doesn't have these features, assignments/scores cannot be synced.
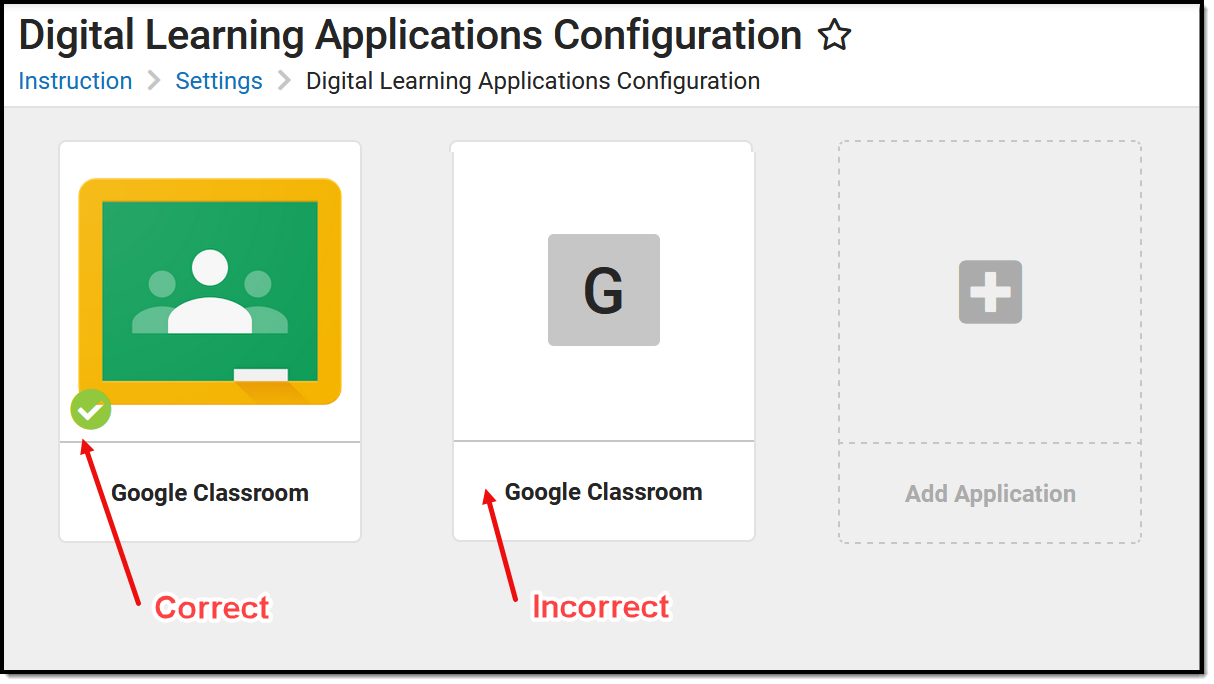 Connections to verified partners (green checkmark) support assignment/score syncing. The second connection does not support assignment/score syncing.
Verifying the Google Classroom Connection
- Is your district's Campus Learning license Active or Pending?
- Does the Google Classroom tile in the Learning Interoperability tool match the "correct" example in the image above?
- Is the connection set up correctly? Click on the Google Drive tile in Learning Interoperability and verify that:
- Enabled: YES
- Grade Book: YES (The Grade Book toggle is not available for unsupported connections, as in the "Incorrect" example in the image above)
- Expiration Date: Should be in the future. If not, click Renew.
- Is the School Year Active? (If not, data will not sync.)
Changes to Campus URLs
At times, districts may need to update their Campus URL, such as changing your district's hosting model or domain name. If a URL changes and your district has already set up and started using Google Sync, follow the instructions below to update the URL in the Google admin portal.
DO use the Update on the Google SIS Setup screen. In the Digital Learning Application Configuration tool, click Google Classroom and then Editand then update the following fields in the Google SIS Setup screen with the values from Campus:
Click Update when finished. | Do NOT click Remove on the Google SIS Setup screen. Deleting and re-adding a connection causes Google's system to send duplicate assignments to Campus. If a connection is removed and re-added, resulting in duplicate assignments, your district is responsible for data cleanup. |
Troubleshooting
Teachers Cannot Link Classes
Issue applies to specific classes for a teacher
If the link for a specific section is not working or available, consider the following:
| Check in Campus (Admin) | Check in Google Classroom (Teacher) |
| Once a Google Classroom class has been linked to a section in Campus, the Campus section displays in gray text in the Link Class dropdown list in Google Classroom. Sections can only be linked to one class. Have the teacher verify the following:
|
Issue applies to all classes for a teacher
If a user is seeing an error in Google Classroom that says "Can't load SIS classes. Try again in a few minutes," verify that the connection has been set up correctly, as described in the Establishing a Connection instructions above. Specifically, verify that the connection has not expired, that is is enabled, that the Grade Book connection is enabled, and that the connection is to a supported Google Classroom instance (green checkmark).
Teacher sees a "No classes available to link" message in Google Classroom
If a teacher sees this message, verify the following setup:
- Email: The teacher's email address entered on Demographics must match their Google Workspace account. By default, this is the teacher's primary Email address, unless the Setting to use Secondary Email is set in the Learning Interoperability tool for OneRoster 1.1 connections. Note: teacher emails cannot have apostrophes (such as o'daniel@district.edu). If the teacher's email address has an apostrophe, edit both the Demographics record and the teacher's email in admin.google.com. Google retains the prior email as an alias, so this is a low impact change.
- Shared Email: Check that no one else at your district shares the teacher's Email address. Check using an Ad hoc Filter:
- Create a filter in the Filter Designer. Filter Type: Query Wizard, Data Type: Census/Staff.
- Select these fields: Census > Person Contacts > Email and Demographics > personID, lastName, and firstName.
- In the Filter Parameters, set the filter pcontact.email = the email address of the teacher.
- Click Save & Test. If any other users share the email address, update accounts to match Google email addresses.
- Username: The teacher must have a staff account to Campus with a username.
- Staff History: The teacher must have a role of Primary Teacher, not just Teacher, on the Staff History record for the section.
Scores Do Not Sync
If the assignment syncs correctly but scores do not, consider the following:
- Email: The student's Google email used for Google Classroom and the Email (not Secondary Email) entered on the Demographics tab must match. Teachers can verify emails match in Campus by clicking the student's name in the Roster and viewing their email address and in Google Classroom by going to the People tab in the class and clicking Email Student.
- Shared Email: Check that the student does not share an email address with any other users. See instructions for checking via Ad hoc Reporting in the section above.
- Usernames: Students must have User Accounts to the Campus Student Portal.
- Rosters: Verify that the correct Campus section is linked to the Google Classroom class by comparing rosters.
- "Returned" Scores: Any scores in 'draft' status in Google Classroom do not sync. Teachers must 'return' scores before they can be synced.
Assignments Do Not Sync
None of a teacher's assignments sync
If none of a teacher's assignments sync from Google Classroom, consider the following:
- Email: The teacher's email address entered on the Demographics must match their Google Workspace account. By default, this is the teacher's primary Email address, unless the Setting to use Secondary Email is set in the Learning Interoperability tool for OneRoster 1.1 connections.
- Username: The teacher must have a staff account to Campus with a username.
- Section: Verify that the assignment is aligned to the correct Term.
- Uncategorized Assignments: Verify that the assignment is waiting to be categorized before it will display in the Grade Book. See the Uncategorized Assignments article for more information.
- Setup: Verify that the connection has been setup correctly, as described in the Establishing the Connection section at the beginning of this document.
Specific assignments do not sync
Any assignments created and posted within Google Classroom prior to the Term Start Date in Campus will not sync. Teachers can check the posted date by going to the Google Classroom class, clicking Classwork, then the assignment that is not syncing, and noting the Posted date. Verify that the Posted date falls on or after the Term Start Date, which is visible in the Term dropdown list at the top of the Grade Book.
Posted dates cannot be changed in Google Classroom. If the posted date of an assignment is prior to the Term Start Date, the assignment must be deleted and recreated in order to sync. To avoid this issue in the future, teachers can schedule assignments for a future date if they need to create them prior to the start of school. To schedule an assignment, click the arrow next to the Assign button on the Google Classroom assignment and click Schedule. Select a date on or after the Term Start Date.
Schoology - Configuration and Tips
Schoology is a learning management system that is part of the Infinite Campus Digital Learning Partner program. Connections to Schoology are configured in the Digital Learning Applications Configuration tool.
Discussions
Discussions (System Administration)
From the Discussions tool in System Administration, users can view all discussions for the selected school, post in discussions, and resolve flags.
This tool is available as part of the Campus Learning premium offering.
Tool Search: Discussions
The Discussions tool allows users to view all discussions for the selected school, post in discussions, and resolve flags. Discussions cannot be created here, but users can interact with existing discussions. This tool was designed to provide a view of how discussions are being used in sections and to resolve time-sensitive flags if teachers are unavailable.
Admins can view discussions, create posts, and resolve flags.
See the Instruction Settings Tool Rights article for more information.
Discussions that have passed their End Date display in gray text and are sorted to the bottom of the list.
Teachers create discussions by aligning them to an curriculum item. Two kinds of discussions are available in Instruction, scored discussions that are aligned to an assignment and discussions that are not scored and are aligned to a resource.
Students respond to discussions through Campus Student.
View and Post in Discussions
Click a discussion to view the prompt and student posts. Click Create a Post or Reply to participate in the discussion, or click Print to view a printable version. Flag a post if it contains inappropriate content that should be reviewed.
Click a discussion to view the teacher's prompt and student responses.
Flagged Posts
Inappropriate posts can be flagged by the teacher or by another student. Discussions with a flagged post are indicated by a ![]() . A notification is also sent to teachers when a post has been flagged.
. A notification is also sent to teachers when a post has been flagged.
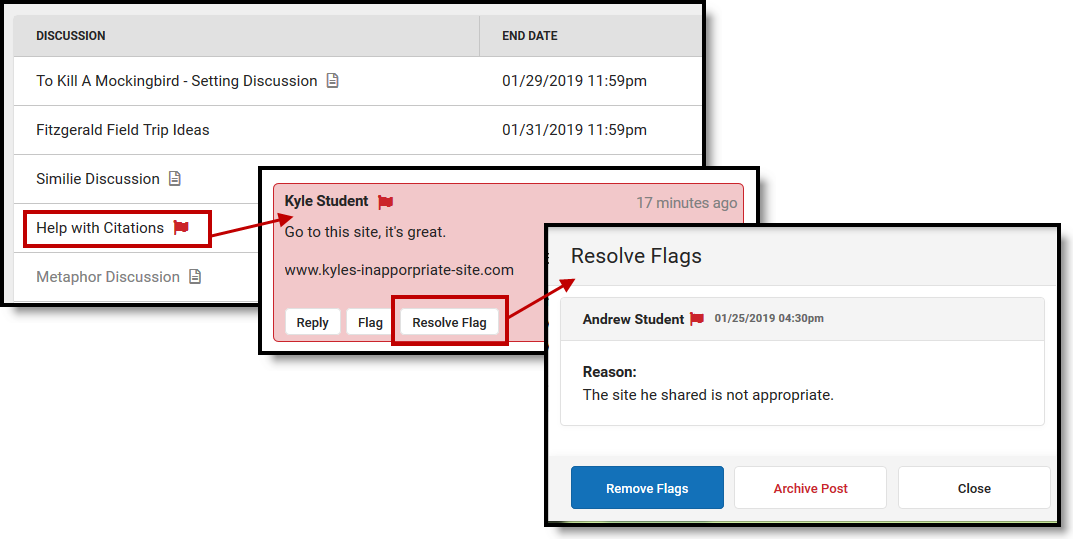
Resolve flags on post by removing the flag or archiving the post.
Flagged posts display highlighted in red. Click ![]() to view the reason the post was flagged and resolve it.
to view the reason the post was flagged and resolve it.
- Remove Flag removes the flag from the post and leaves it in the discussion.
- Archive Post removes the post from the discussion. All replies to that post are also archived.
- Close returns to the discussion without resolving the flag.
Engagement Check-In Administration
Engagement Check-In Administration
The Engagement Check-In Administration tool allows administrators to view past, current, and future check-ins and student responses.
This tool is available as part of the Campus Learning premium offering.
Tool Search: Engagement Check-In Administration
Engagement Check-In help teachers gauge student well-being and engagement in their classes and with curriculum. Questions relate to overall well-being, engagement in class, and feelings about specific assignments and curriculum. Teachers create Check-Ins from the Teaching Center. Check-Ins display on the Today screen in Campus Student. Check-Ins are not visible in Campus Parent.
The Engagement Check-In Administration tool displays all past, current, and future Check-Ins for the selected calendar.
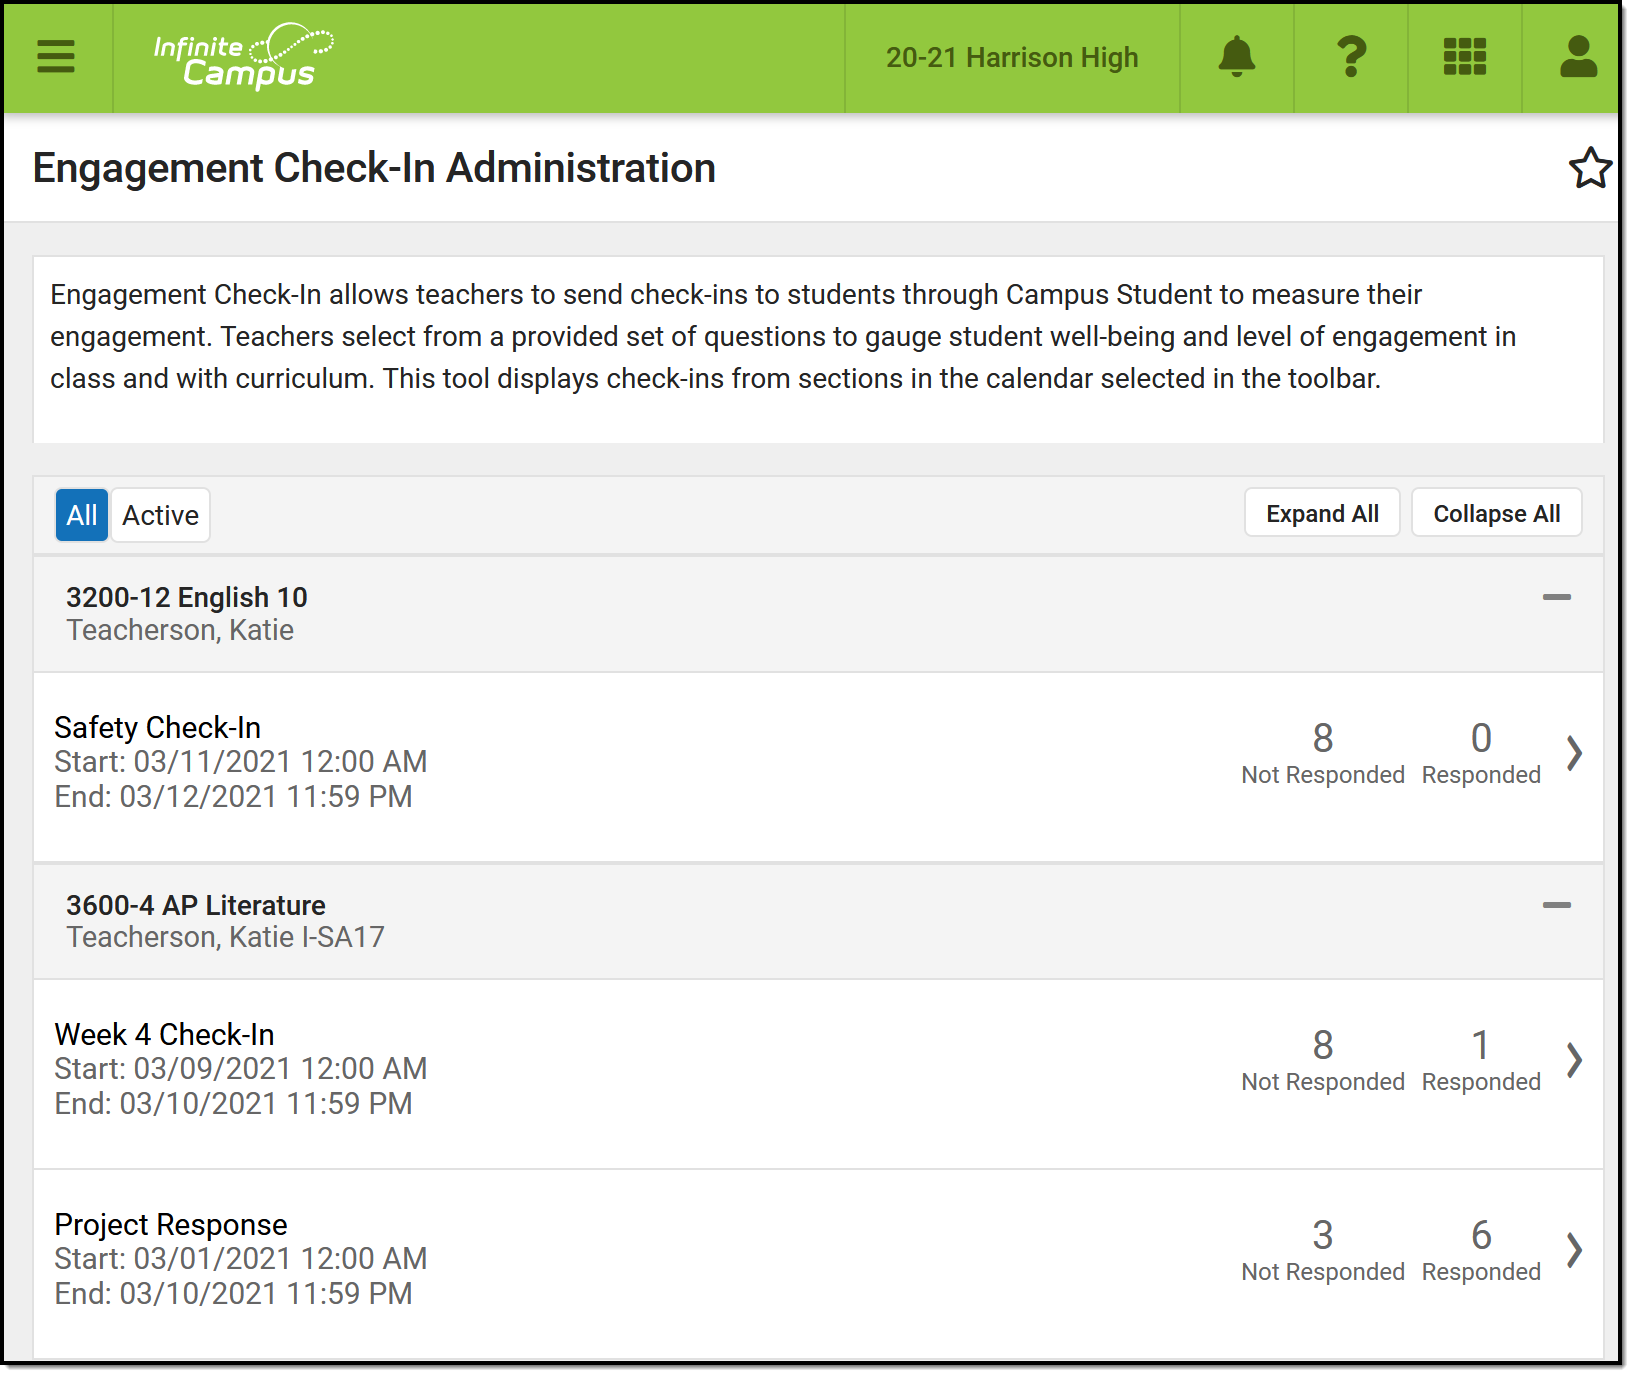 The Engagement Check-In Administration tool lists all Check-Ins for the selected calendar.
Check-Ins display sorted by course section. Filter between All and Active Check-Ins using the buttons at the top. A Check-In is Active when today's date falls within the Check-In's date range.
Tool rights for this administration tool are under Instruction > Settings > Engagement Check-In Administration. Rights for the teacher version of the tool are found in the Additional Access Rights section at the bottom of the Tool Rights tool under Instruction Tools > Engagement Check-In.
See the Instruction Tool Rights articles and the Instruction Settings Tool Rights article for more information.
In Campus Student
In Campus Student, students access Check-Ins from the Today screen. Students can only respond to Check-Ins between the Start and End Date entered by the teacher.
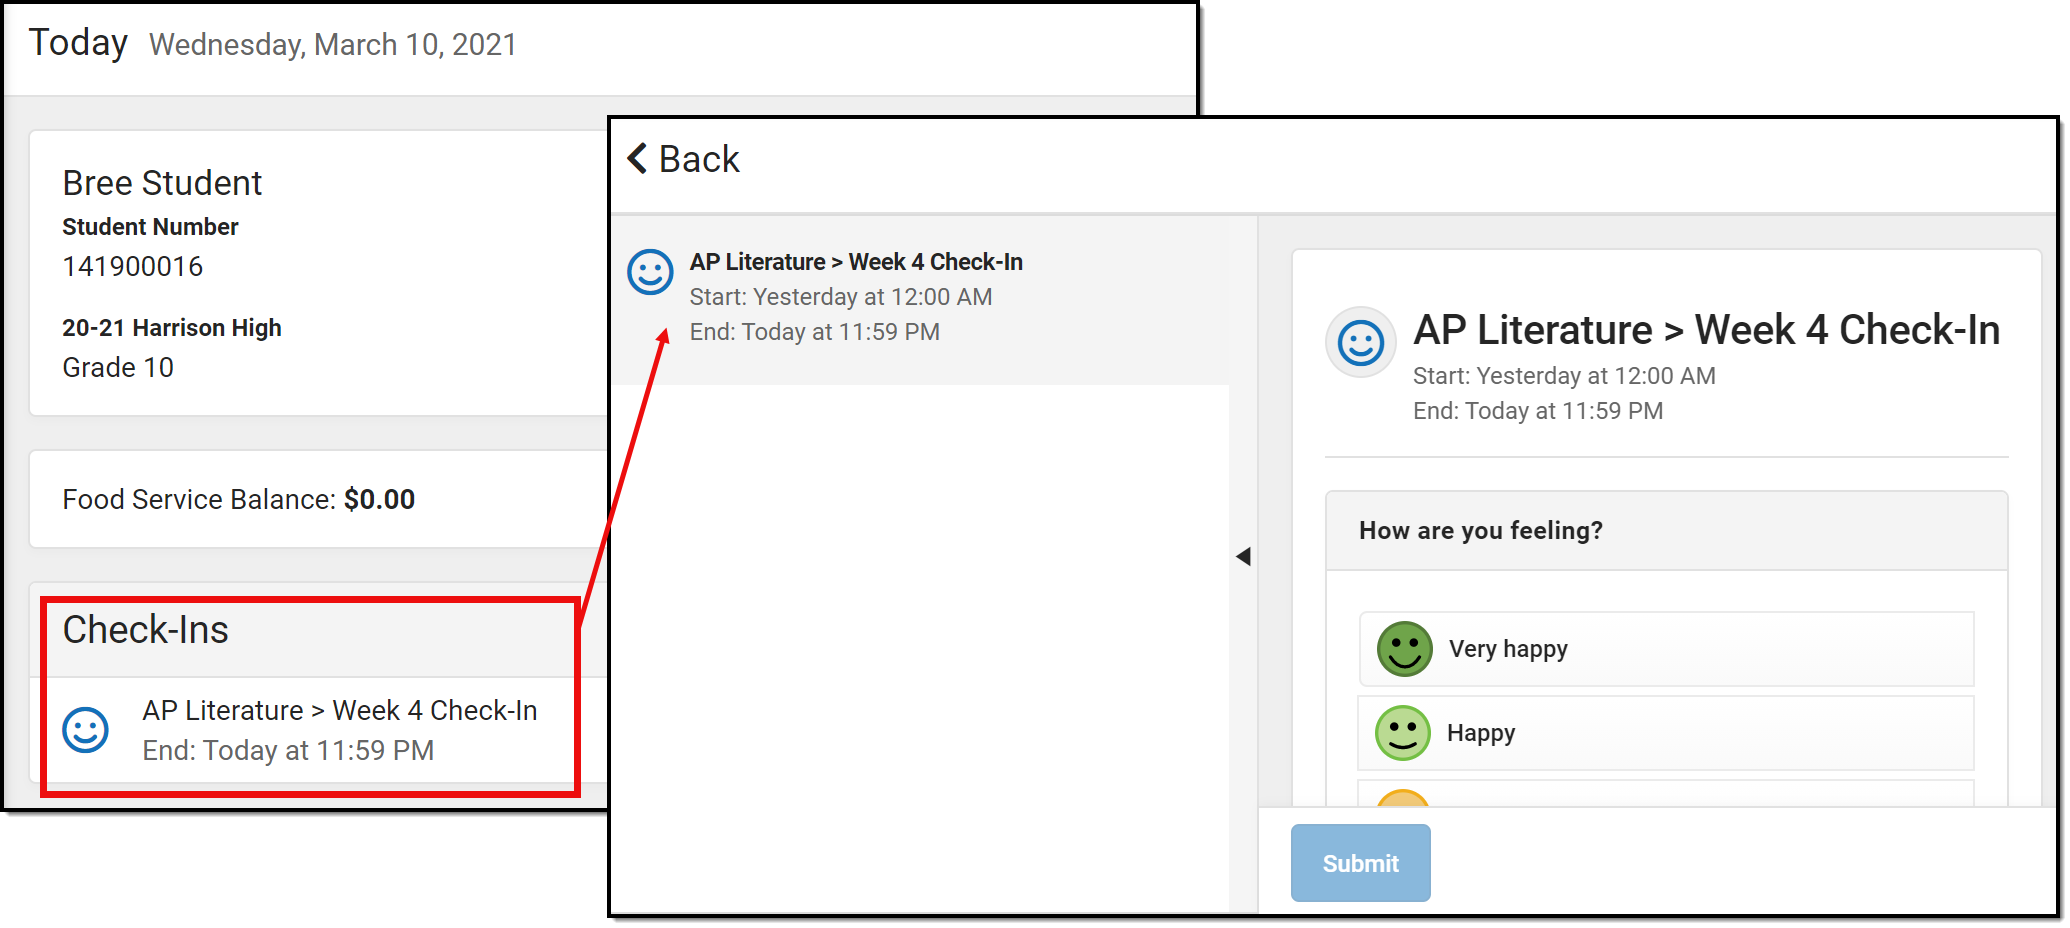 Students access Check-Ins from Campus Student.
View Check-In Results
Open a Check-In to view results. Three tabs display: Detail, Response Summary, and Student Response.
Detail
The Detail tab shows a read only view of the Check-In.
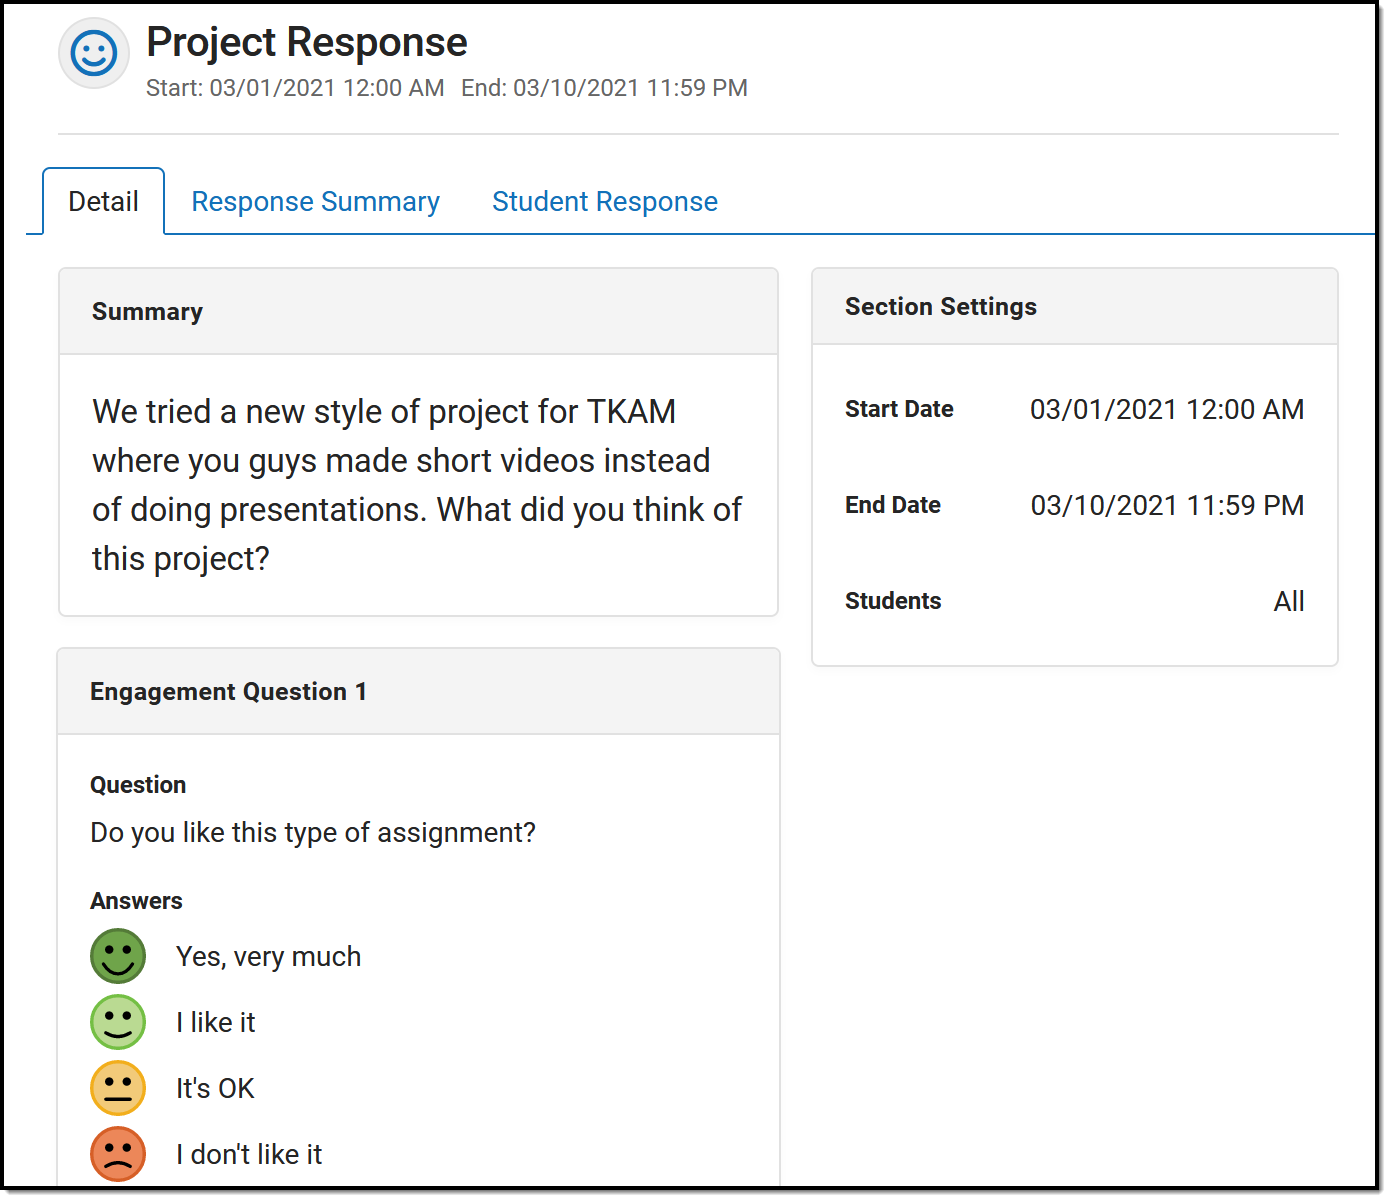 |
Check-Ins are only available to students within the Date range entered by the teacher. Teachers also have the option of limiting the students who receive the Check-In.
Teachers select questions from a provided set of questions. Questions are grouped by well-being, followed by Classroom and Curriculum. Possible answers display below the question. If selecting a Curriculum question, teachers choose specific piece of curriculum, an assignment or resource, that the question is related to. Individualized assignments and those that are not visible to the class (Hidden) are indicated.
Follow-Up Questions allow students to respond in a text box.
Teachers can include multiple questions in a single Check-In. |
Response Summary
The Response Summary tab summarizes the number of students who have and have not responded and shows a distribution of answers per question.
The Total Assigned section shows the number of students who received the Check-In. The totals of who have responded, who have not responded but have viewed the Check-In, and who have not responded or viewed the Check-In also display.
For each question, the total number of students who selected each answer is displayed. Hover over a response and then the eye icon that displays to see a tooltip listing the students who selected that response. If the Check-In included a Follow-Up question, the total is the number of students who responded to that question.
Click on any total or response to view a filtered version of the Student Response tab. |
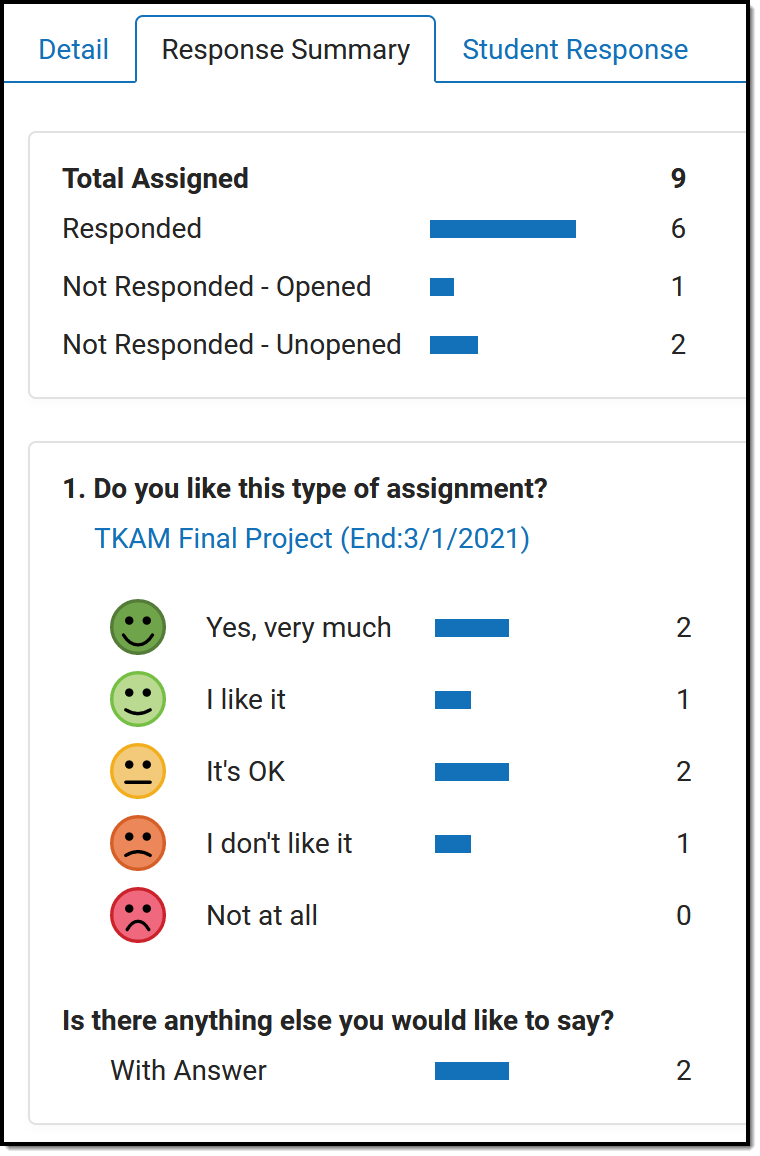 |
Student Response
The Student Response tab shows responses by student.
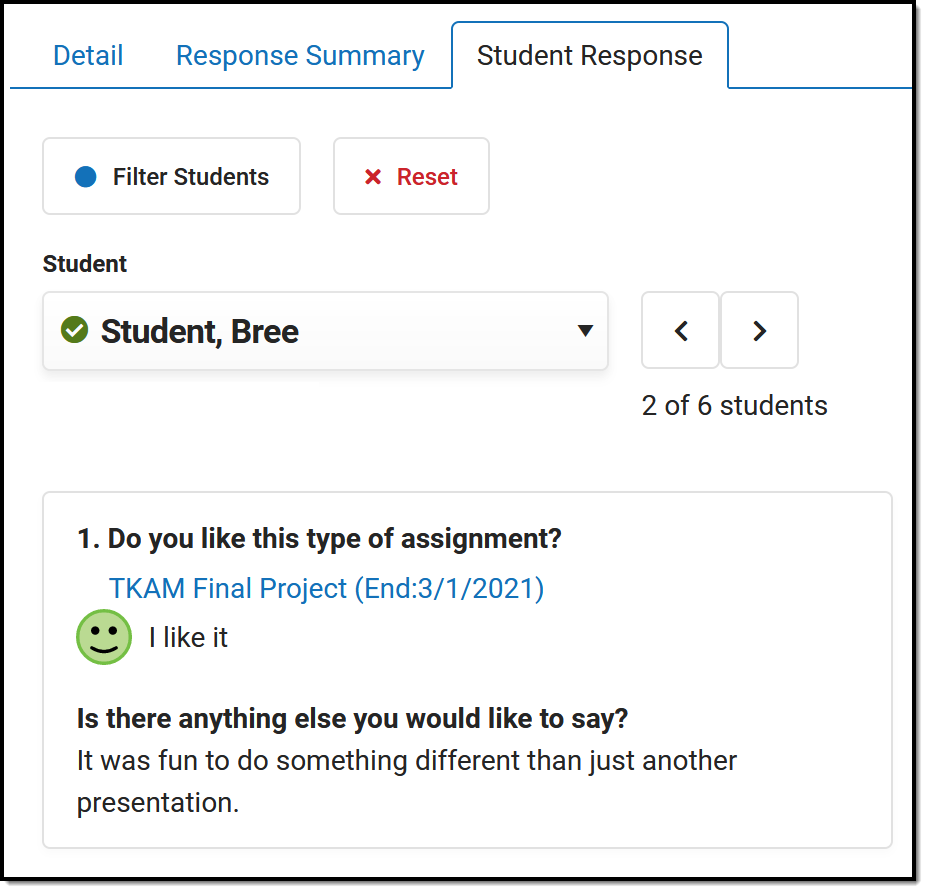 |
Navigate between students using the Student dropdown list or the arrow buttons next to it. The selected student's response displays.
Filters Click Filter Students to limit the Student dropdown list to only those who meet the selected criteria. For example, filter the list to only students who had negative responses or those who responded to the Follow-Up question. Click Reset to clear the filter. |
Engagement Check-Ins are included as part of the Campus Learning Suite premium offering. Visit the Campus Learning Suite page to learn more.
The Engagement Check-In Administration tool allows administrators to view past, current, and future check-ins and student responses. In this video, you will learn how to view engagement check-ins and student responses.
Google Drive
Google Drive can be integrated with Infinite Campus to allow teachers and students to use Google Drive files in the classroom.
Integrating Campus with Google Drive allows teachers and students to use Google Drive files in the classroom. Drive files can be used in the following ways:
- Attaching a Drive file to an assignment that students can open and interact with based on the teacher's sharing preferences.
- Allowing students to attach and submit Drive files to assignments in Campus Student.
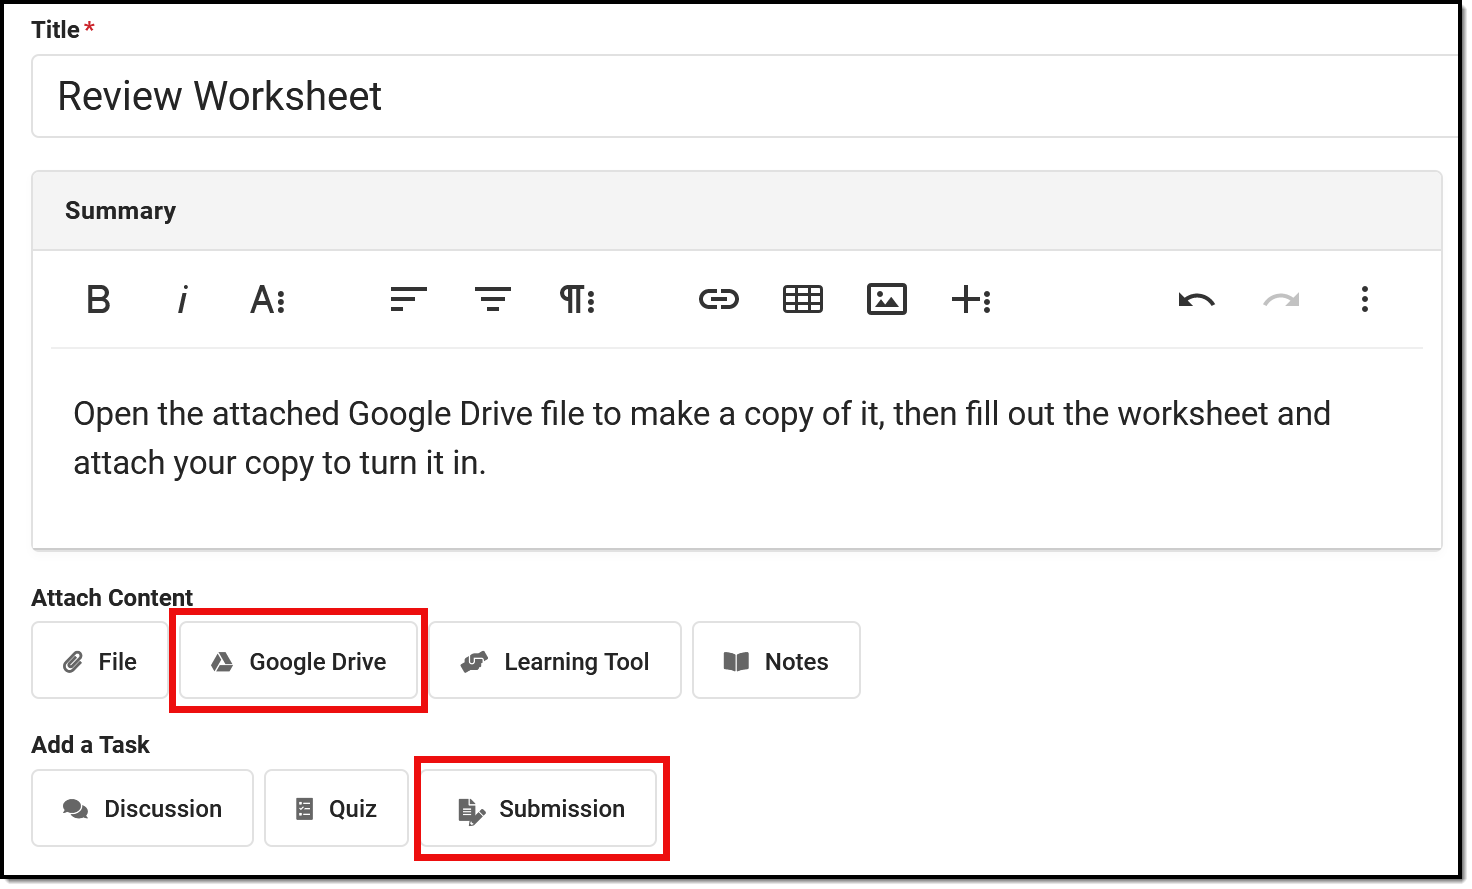
Prior to using Google Drive, the Campus administrator must complete the Configuration process and enter Preferences. See the Google Drive Integration Troubleshooting article if you're having issues.
This Attach Content article describes using these options as a teacher.
Teachers must be given the Google Drive tool right in Campus Instruction to have access to these options.
Google Drive Configuration
The Google Drive Configuration tool allows administrators to configure the integration of Google Drive files with assignments in Infinite Campus.
Tool Search: Google Drive Configuration
Google Drive integration provides a workflow where teachers can deliver assignments and documents to students and allow students to submit responses back to the teacher. Using Google Drive has a number of advantages over our existing CDR based workflow, such as the ability to use collaboration features and a much higher per user limit on document sizes.
The configuration process requires Campus administrators to extract information from their Google Developer Console and the Google Workspace for Education Domain and input that information into Campus. This article provides you with step-by-step instructions for finding these values. See the Google Drive Integration Troubleshooting article for troubleshooting tips if you're having issues with an existing connection.
Use this tool to configure the integration of google drive files with assignments in Campus. Google Workspace for Education can also be added as a Digital Learning Partner through the Digital Learning Applications Configuration tool.
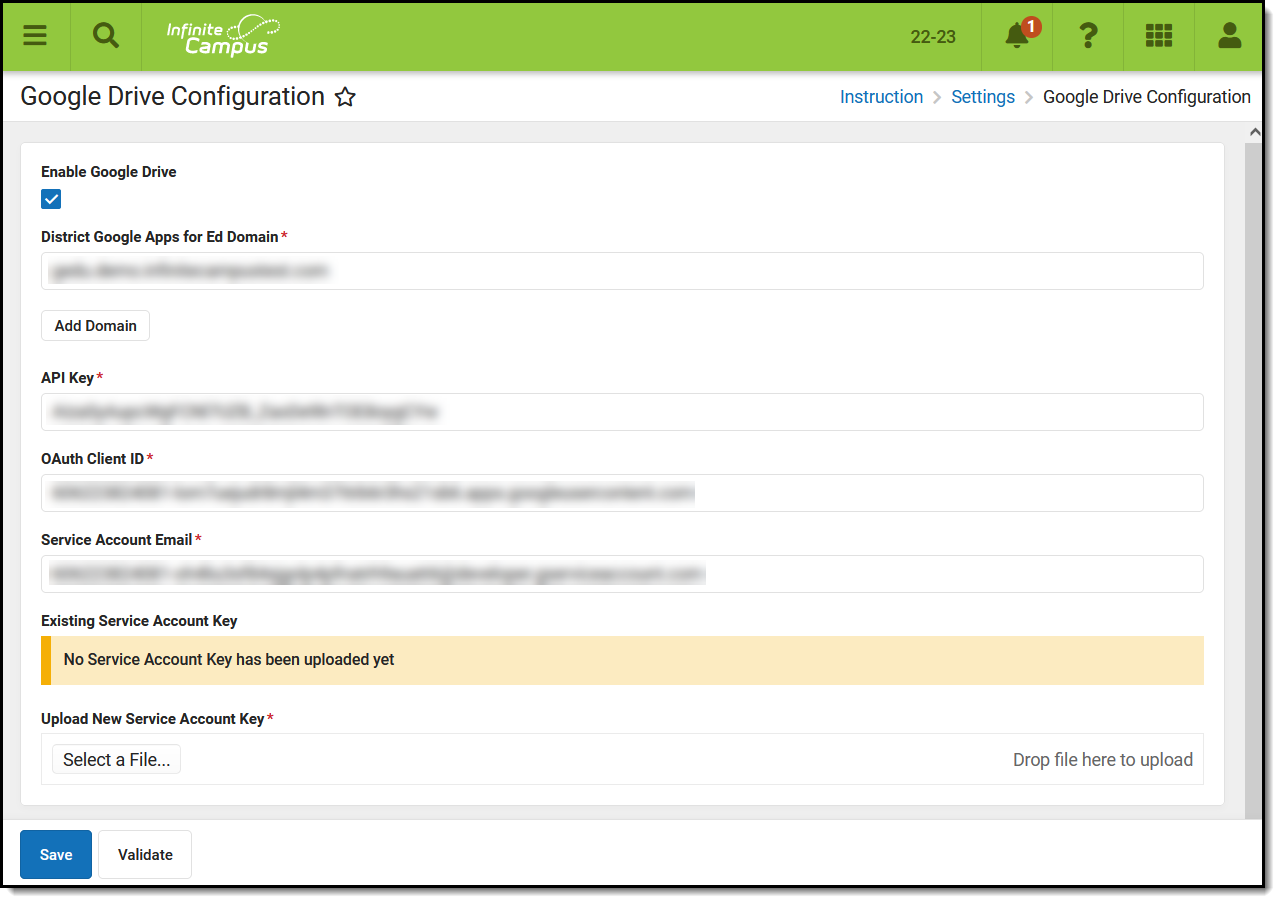
Google Drive Configuration Tab
To complete these configuration steps, the administrator configuring the Google project needs the following access within the Google Workspace project. Access can be granted by your district's Google administrator:
- admin.google.com > Apps > Additional Google Services > Google Cloud Platform must be enabled (it's enabled by default)
- admin.google.com > Apps > Additional Google Services > Google Cloud Platform > Project Creation Settings > Allow users to create projects must be turned on
See the Instruction Tool Rights articles and the Instruction Settings Tool Rights article for more information.
Currently, Campus supports Google Workspace for Education accounts with a single domain or multiple domain setup.The legacy option of separate Google Workspace accounts is not supported.
Complete the following steps to set up both single and multiple domain accounts. Additional information for multiple domain accounts is available at the end of the document.
The Campus Digital Repository (CDR) does not need to be enabled to configure Google Drive Integration.
Prior to beginning the configuration process, it may be helpful to collect the following pieces of information to streamline the configuration process:
- District’s Google Workspace For Ed Domain Name
- Admin user login to Google Workspace For Ed Domain (or team up with a District Admin who has this)
- District’s Infinite Campus URL
- District’s Name
As you configure the Google Dev Console, you'll be instructed to collect the following pieces of information from Google that you'll paste into the Google Drive Configuration tool in Campus:
- District’s Google Workspace For Ed Domain Name
- API Key
- OAuth 2.0 Client ID
- The saved P12 file
- Service Account Email
Setup the Google Dev Console
To enable the Google Drive workflow, a project must be created in the Google Developer console. This project needs to be defined per district, because the project’s OAuth credentials specify authorized JavaScript origins (which vary per district) and because Google enforces limits on how many requests each project is allowed to make in a given day. Keeping it district-specific allows more requests for that district.
A Google user must own the project. This user should be a district administrator for the Google Workspace For Ed account. Some screenshots in this document are taken from a demo Google Workspace For Ed domain.
Step 1. Go to the Google Developers Console
The first step is to go to the Google Developer Console and log in: https://console.developers.google.com/start
Step 2. Create a New Project
Create a new project from the Select a project dropdown list found in the upper left-hand corner of the screen. Give your project a meaningful Project Name, which is displayed in the Google Dev Console. Select an Organization and Location. If there is already an existing project, that project's name displays instead of "Select a project". In that case, click the project name dropdown list and select New Project.
Once you click Create, the page should refresh within a few seconds with your project name selected at the top. If you still see "Select a Project", open the dropdown list, select the project you just created, and click Open.
Step 3. Disable Default APIs
In the sidebar on the left, expand APIs & Services and click Enabled APIs & services. The list of Enabled APIs includes several automatically enabled APIs. These are not used for Google Drive integration so they can be ignored or disabled by selecting the entry and clicking Disable API.
Step 4. Enable Drive and Google Picker
From the Enabled APIs & Services screen, select +Enable APIs and Services.
In the API Library, search for and enable 2 APIs: Google Drive API and Google Picker API.
- Start by searching for the Google Drive API. The API displays below. Select the Google Drive API result and then Enable API.
- Search for Google Picker API. The Google Picker API displays in the search results below. Select the Google Picker API result and then Enable API.
Step 5. Create Credentials
Throughout this process, these instructions prompt you to record certain fields to enter in the Google Drive Configuration tab in Campus.
- Expand the left menu again by clicking the
 menu and click APIs & Services and then Enabled APIs & services.
 - In the sidebar on the left, select Credentials to create an API Key, a OAuth 2 client, and a Service Account.
API Key
- On the Credentials screen, click Create credentials and then API Key. Click the 3 dots menu button and then Edit API key.
- Under Application restrictions, select Websites.
- Click Add.
- Enter the first part of the district's Infinite Campus URL, starting with https:// up to the top-level domain (such as .com or .edu).
- Click Done and then Save. The entry you created displays.
- Select Show Key to show the API Key.
Record this Key to include in the information entered on the Google Drive Configuration tool in Campus.
Configure Consent Screen
- From the left menu, click Configure consent screen. This screen asks users if they agree to allow data sharing with their district’s Infinite Campus instance.
- For Application type, mark Internal.
- Enter a name in the Application name field, such as "Infinite Campus Google Drive Integration".
- Under Authorized domains, enter your district's Infinite Campus URL without https:// and up to the top-level domain (such as .com or .edu).
- Click Save.
OAuth 2.0 Client ID
- Click Create credentials again and then OAuth client ID. If you have not yet configured the Consent Screen, you will be prompted to do so. See the Configure Consent Screen section above for more information.
- Select an Application Type of Web application.
- You can leave the default Name value or modify it if you prefer.
- Under Authorized Javascript origins, select Add URI. Enter the first part of your Infinite Campus URL, starting with https:// and up to the top-level domain (such as .com or .edu). (Do not include trailing / or /campus path. If running on a non-standard port, the port number must also be included, ex: http://mydistrict.com:8080/).
- Click Create
Your Client ID and Client Secret display. Record the Client ID to enter in the Client ID field on the Google Drive Configuration tool in Campus. This is the OAuth 2.0 Client ID. You do not need to record the Client Secret.
Service Account
- Click Create credentials again and then Service Account key. Enter a Service Account Name and click Create and Continue.
- Click Select a role and choose a Role of Editor. Then click Done.
- Return to the Credentials screen and click the edit pencil icon next to the Service Account you just created.
- Click the Keys tab and then Add Key and Create new key.
- In the pop up that displays, mark P12 and click Create. Do not select JSON.
- Copy this file and save it. This file is uploaded to the Configuration tab. This is called the Service Account Key in Campus. Campus recommends saving this file in a secure location you'll be able to access in the future, in case the file needs to be reuploaded at some point.
- Click the arrow at the top left to return to the Credentials screen.
- Select the Manage Service Accounts link on the right-hand side of the screen to access the Service Accounts screen.
- Copy the Service Account Email to enter into the Google Drive Configuration tool in Campus.
- Under the column OAuth 2 Client ID, a numerical value of about 21 characters displays. Copy this value by hovering over it and clicking Copy to Clipboard. This is the Service Account Client ID and will be used later.
Step 6: Authorize the Service Account Client ID
- Open a new browser tab and navigate to admin.google.com.
- Click Security.
- Scroll down to API controls.
- Select Manage Domain Wide Delegation
- Select Add New and enter the following information:
- In Client Name, enter the Service Account Client ID you copied at the end of step 5.
- In One or More API Scopes, enter: https://www.googleapis.com/auth/drive
- Click Authorize. Verify that the values you entered display correctly.
Step 7: Configure in Campus
Return to the Google Drive Configuration tool in Campus and paste in the values you've collected during the configuration process. Click Save when finished and use the Validate button to verify that the connection is working.
Multiple Domain Accounts
To configure Google Drive Integration for a Google Workspace account with multiple domains, click Use Multiple Domains. Fields for an additional domain display, as well as options to add more domains.

Adding Additional Domains
Enter any additional domains beyond the primary domain. Click Save when finished.
Disable Google Drive Accounts
To disable a configured account, unmark the Enable Google Drive checkbox and save the record.
Validate
Click Validate to log in to a Google Workspace for Education account and verify that the configuration was successful.
Google Drive Preferences
Using Google Drive Preferences, administrators can select which schools should have access to the Google Drive options in their assignments.
Tool Search: Google Drive Preferences
In the Preferences tab, select which schools should have access to the Google Drive options in their assignments.
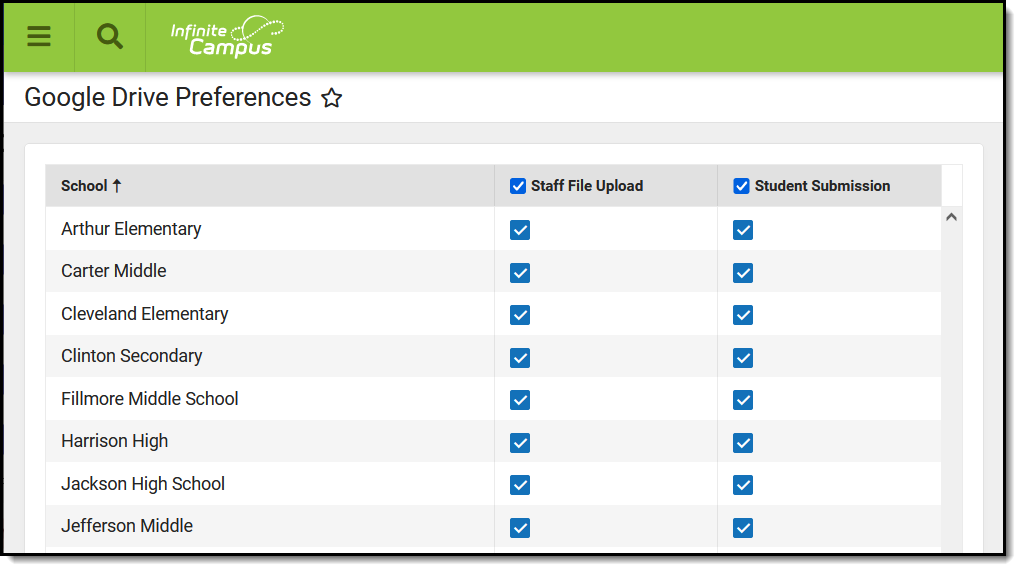
Google Drive Preferences
See the Instruction Settings Tool Rights article for more information.
Allow teachers to upload files from Google Drive to assignments, allow students to submit Google Drive files for assignments through the Portal/Campus Student, or both. Click Save when finished.
Teachers must be given the Google Drive tool right in Campus Instruction to have access to these options.
Save
Save
Using Google Drive Preferences, administrators can select which schools should have access to Google Drive integration options. This video will demonstrate how to establish Google Drive preferences for school districts.
User Menu
From the User Menu, users can access and modify individual settings and preferences.
Account Settings
The Account Settings tool allows teachers to set display preferences for Campus Instruction.
Location: Click the User icon > Instruction Settings
These preferences apply to your entire account.

|
Preference |
Description | ||
|---|---|---|---|
|
Default Application |
The application that loads automatically when you sign in to Campus, either Campus Instruction or Campus Tools. | ||
| Student Display | |||
|
Show Active Students Only |
Mark this preference to prevent dropped students from displaying outside the Roster. If not marked, dropped students display in red text. | ||
|
Show Student Number |
Mark this preference to view students' numbers following student names. | ||
| Show Student Pronouns
|
Mark this preference to display students' pronouns next to their name in the Roster, Seating Chart, Attendance, Positive Attendance, and the student demographics information that displays when you click a student's name.
| ||
|
Show Student Picture |
Mark this preference to view student pictures throughout Campus Instruction. | ||
|
Mark this preference to set the default seating chart as the default view when taking attendance, rather than a roster list. | |||
| Use Canned Comments | Mark this preference to add a Canned Comments link in the Grade Book, which are added via the Report Card Comments column in the Posted Grades section of the Grade Totals, and the Post Grades tool. Canned comments are created in Grading Comments. | ||
| Pass/Fail Coloring |
Used in the Grade Book, Planner, and Progress Monitor. With the release of Campus.1945, these Pass/Fail Coloring settings apply to all of your sections. | ||
| Show Pass/Fail Coloring for Grades | Mark this preference to turn on color coding for students' In Progress Grades and Proficiency Estimates, with passing grades indicated in green and failing grades in red. Grades are considered passing based on the Grading Scales or Rubrics selected in the Grade Calculation Options. | ||
| Show Pass/Fail Coloring for Scores | Mark this preference to turn on color coding for student's scores on individual assignments, with passing grades indicated in green and failing grades in red. Grades are considered passing based on the Grading Scales or Rubrics selected in the Grade Calculation Options, unless there are Assignment Marks aligned to a specific assignment. | ||
| Mute Pass/Fail Coloring |
Mark this preference to use lighter shades to color code student grades and scores. Some users find the muted colors less intrusive, but color-blind users may find these shades more difficult to distinguish.
| ||
Previous Version
Account Settings (Instruction) [.2315 and previous]
The Instruction Settings allows teachers to set display preferences for Campus Instruction. In this video, you will learn how to manage preferences for Campus Instruction.
Previous Versions
Instruction Settings - Video [.2331 - .2415]
View and Manage Notifications
From Notifications, teachers can view and manage their messages.
Location: Notification Bell
Notifications are short, informational messages. See the Process Alerts article for more information about types of notifications sent to other types of Campus users.
Access notifications by clicking on the bell icon.
 Notifications are listed below a link to the Message Center.
Some notifications are text only, while others are links to additional information. Notifications with additional information are indicated by a > symbol on the right margin of the notification, as shown in the image above. When hovering over a clickable notification, your mouse pointer changes to a hand icon and the notification changes color.
Notifications are shown for 30 days and are deleted at 2:00 AM on the 30th day.
Save
Try New Look
Infinite Campus has a new look and feel with big improvements to navigation including favorites, recents, and search. Users can toggle the switch from the User Menu to turn on the new user interface.
Infinite Campus has a new look and feel! This new Infinite Campus experience contains all of the same tools as the current Infinite Campus, but includes several improvements.
The New Look of Infinite Campus permanently replaced Classic Campus in the Campus.2527 (June) Release Pack.
Learn more about the New Look of Infinite Campus here:
Simplified Navigation
Navigation is greatly simplified in the new look of Infinite Campus. Gone are the days of row after row of tabs, tools buried below multiple other tools in the Campus outline, and the frustration of not knowing where to look for a particular set of tools. With the new Infinite Campus interface, all tools within a menu item (i.e., Instruction, Student Information, Behavior) are displayed on a single screen, organized by category. You can quickly and easily see all tools available and understand tool relationships based on their category.
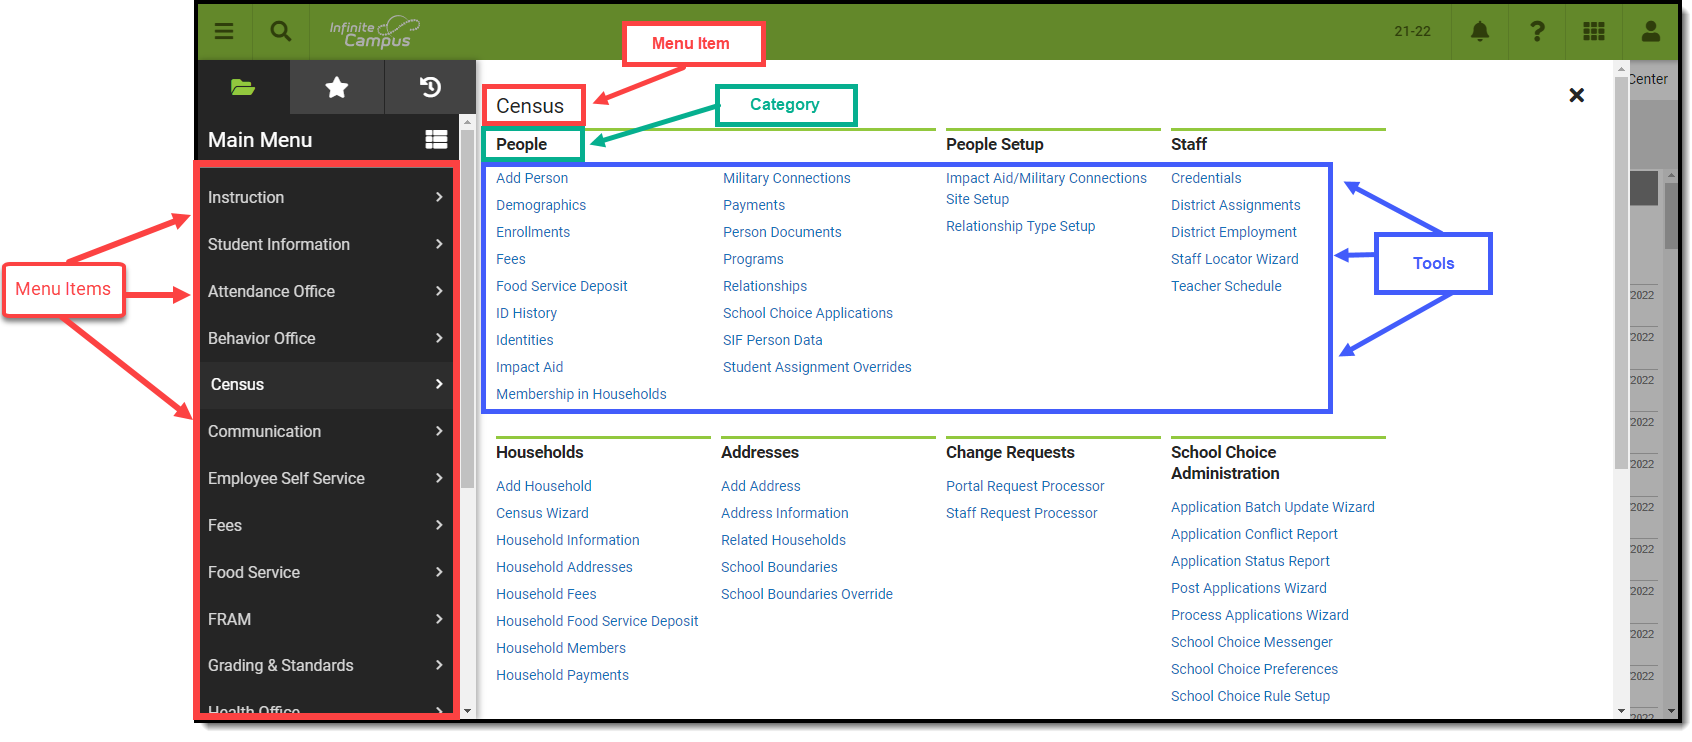
The new Infinite Campus also remembers the last tool you selected, meaning navigating back to the last tool you were working in is as easy as hitting the back button on your browser. Infinite Campus will even retain the student you are currently working on.
For users who access a small number of tools or who prefer a navigation style similar to Classic Campus, you can toggle the Main Menu to display and list tools in a flat, organized list of tools per menu item by clicking the ![]() icon. You can then return to the new navigation style at any time by clicking the
icon. You can then return to the new navigation style at any time by clicking the ![]() button.
button.
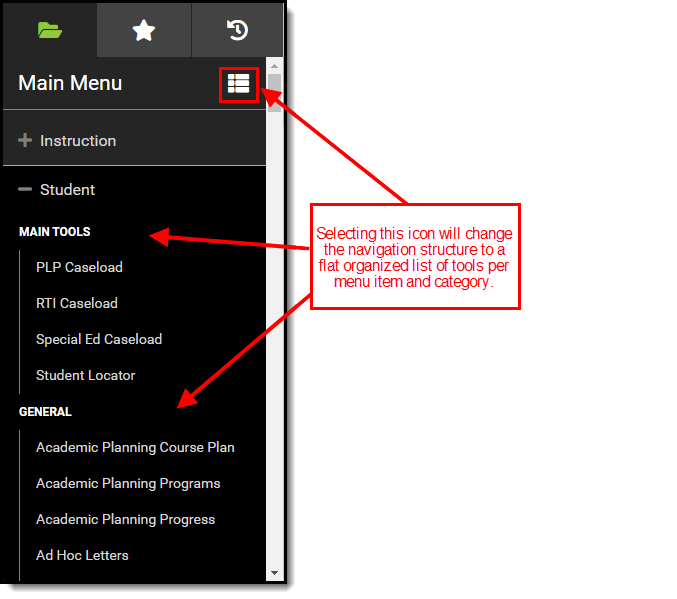
Responsive UI Design
The New Look of Infinite Campus is designed with a responsive UI. This means no matter the size of the screen or device, you will still have access to the same functionality and tooling.
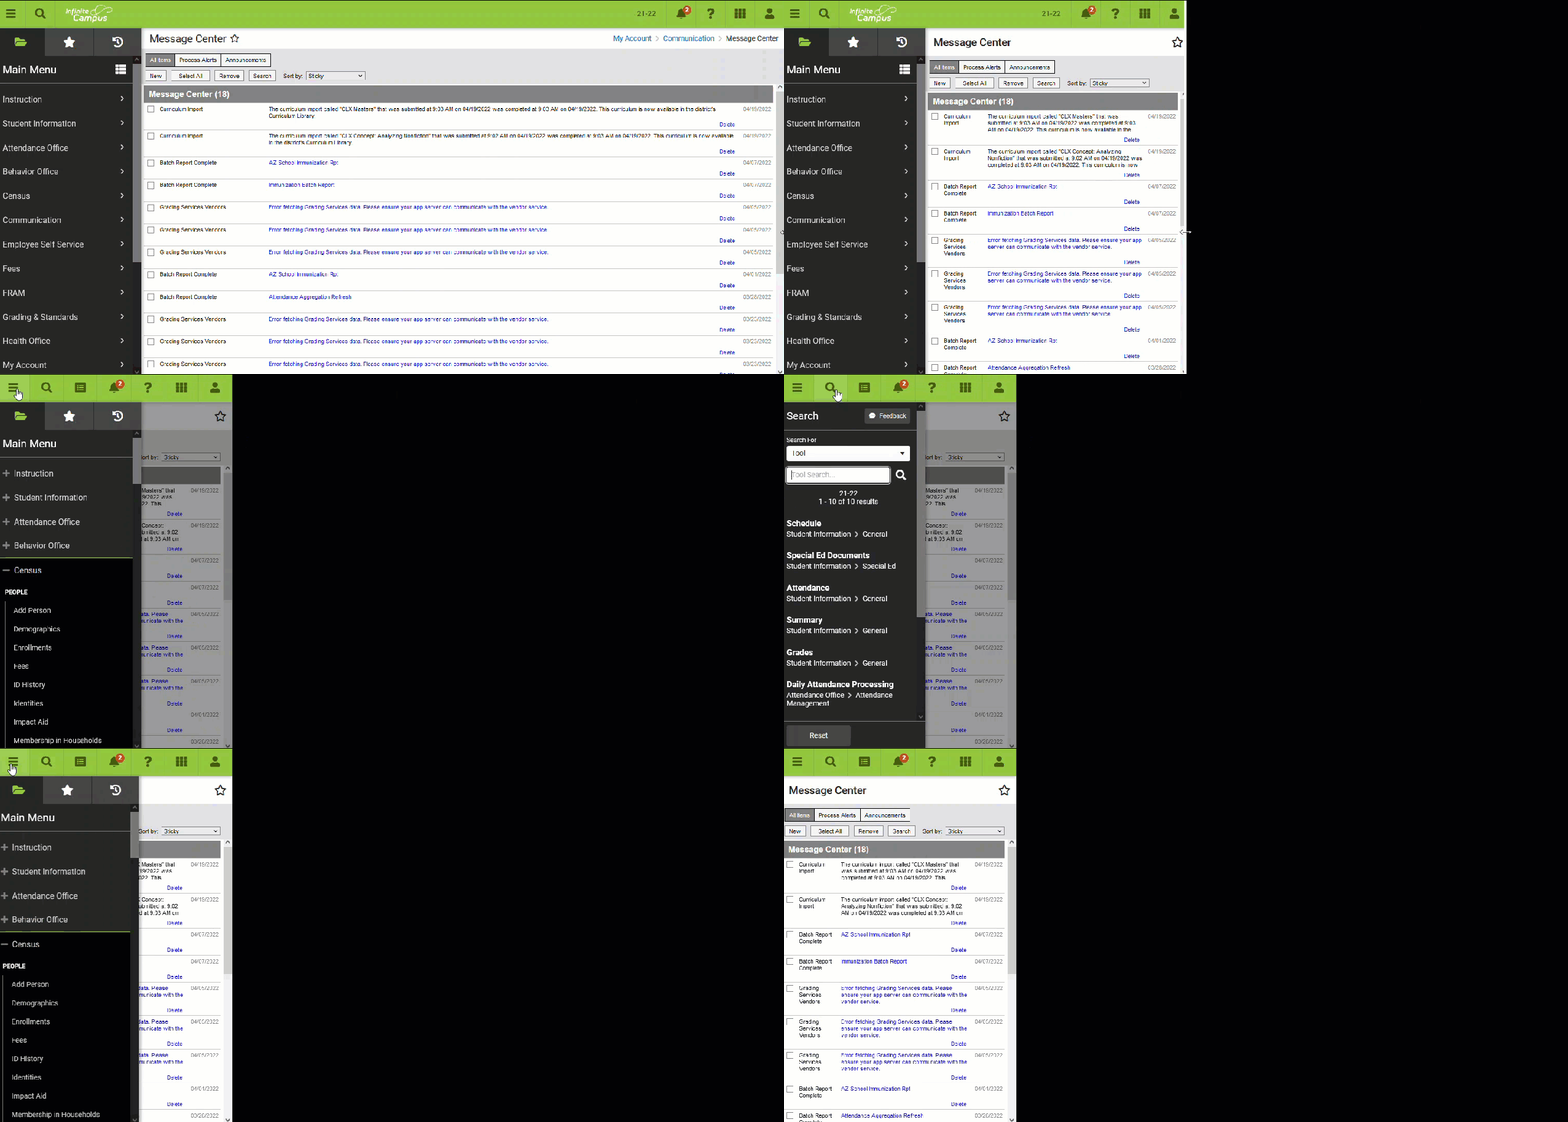
|
As the screen gets smaller, the banner shrinks along with it until it becomes a series of icons. For usability on smaller screens, such as a phone, the Main Menu becomes a flat list of tools. Related Tools are not available on small screens. On smaller screens, flags are visible by selecting the  icon (see image below). icon (see image below).
 |
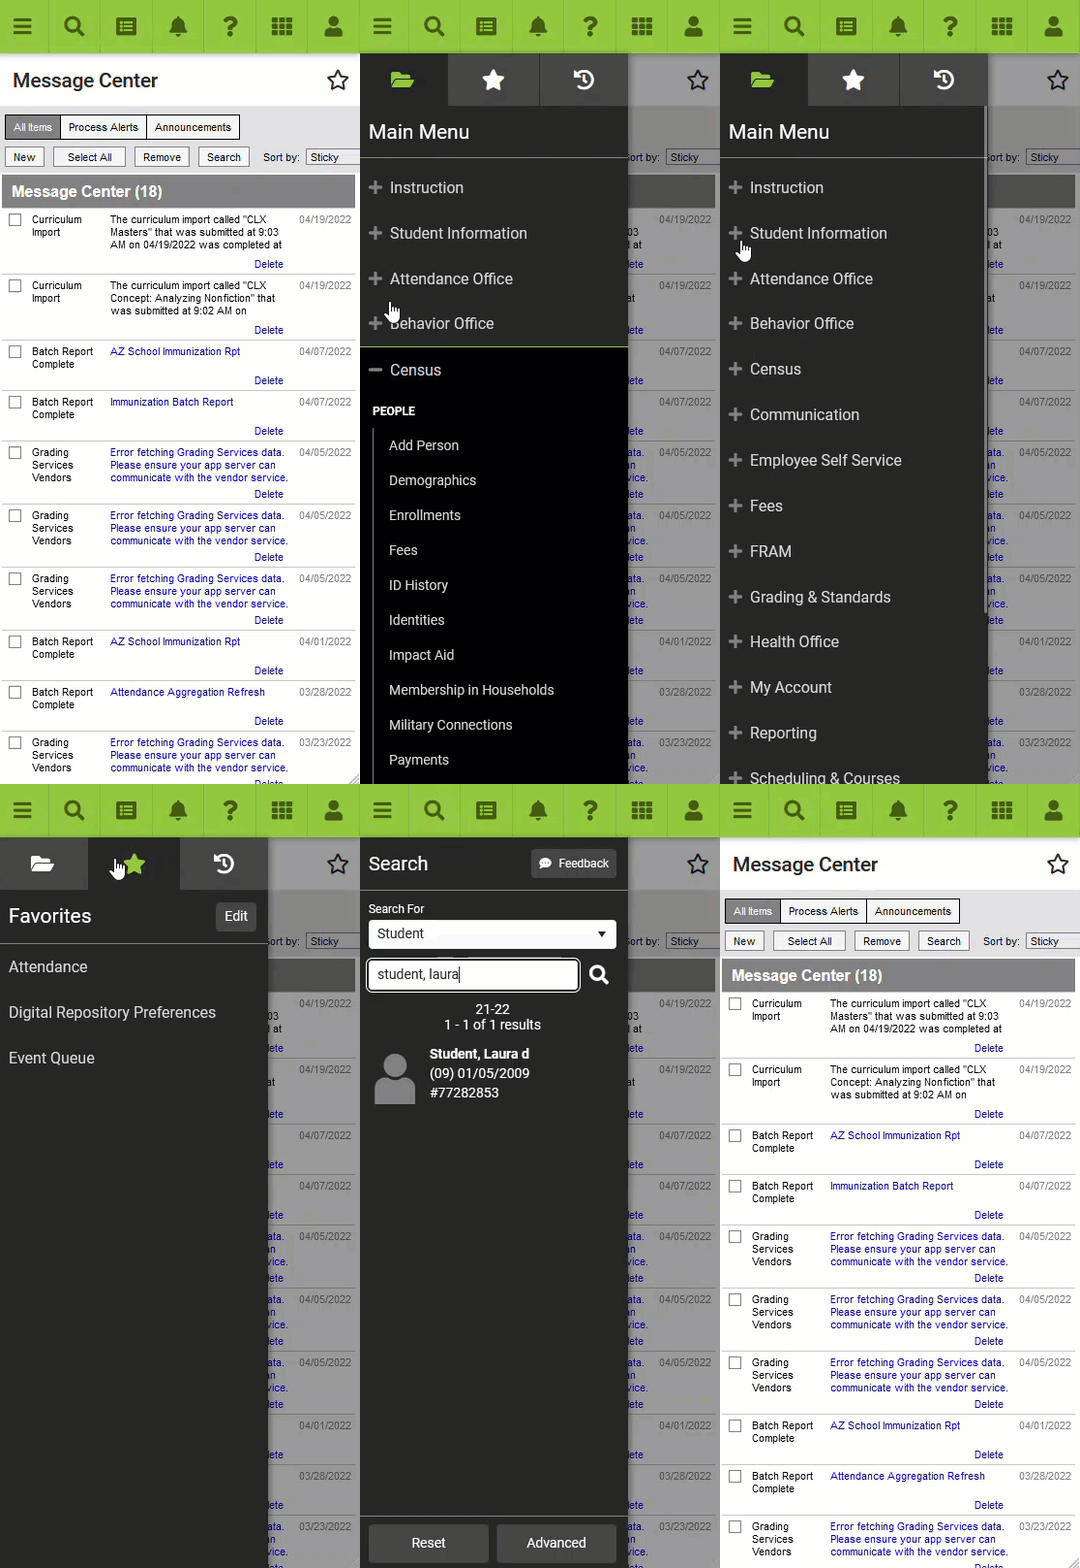 New Look of Infinite Campus - iPhone 12 |
User-Created Menu of Favorite Tools
You can now mark tools as favorites and have these tools populate a separate menu. This allows for easy access to those tools that you find most important and use on a day-to-day basis. To add a tool to your favorites menu, select the ![]() next to the tool name. To edit the order of this menu, click the Edit button.
next to the tool name. To edit the order of this menu, click the Edit button.
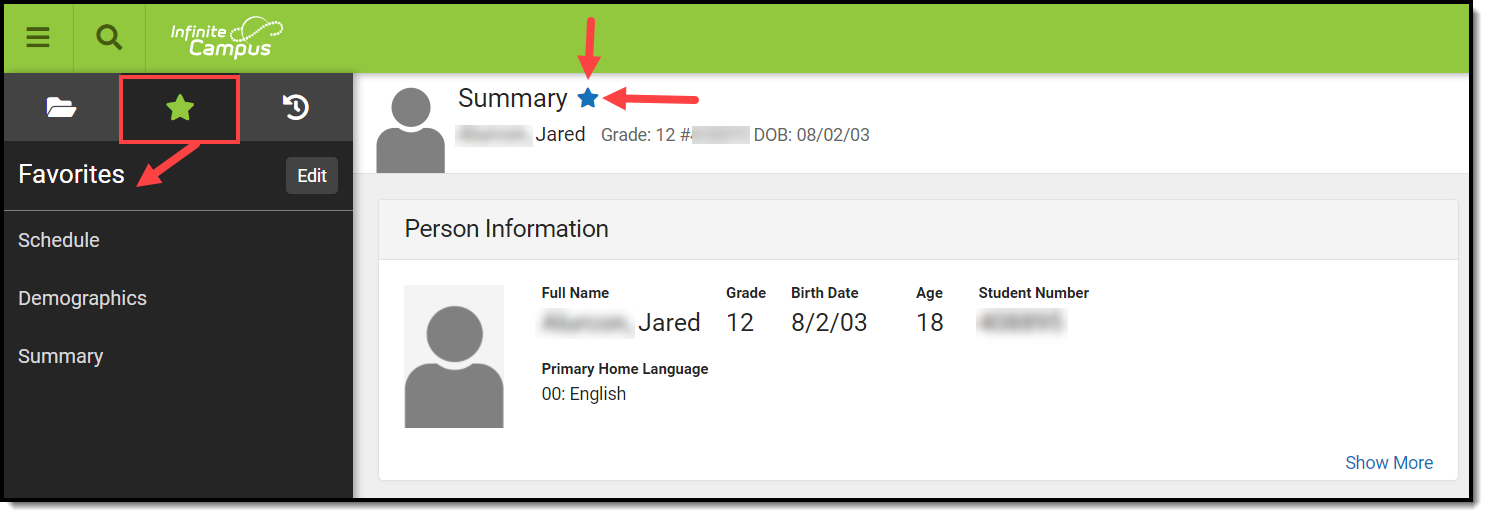
Quick Access to Recently Used Tools
You can also quickly access a menu of recently visited tools by clicking the ![]() icon. This speeds up the process of switching between different tools when working through various workflows.
icon. This speeds up the process of switching between different tools when working through various workflows.
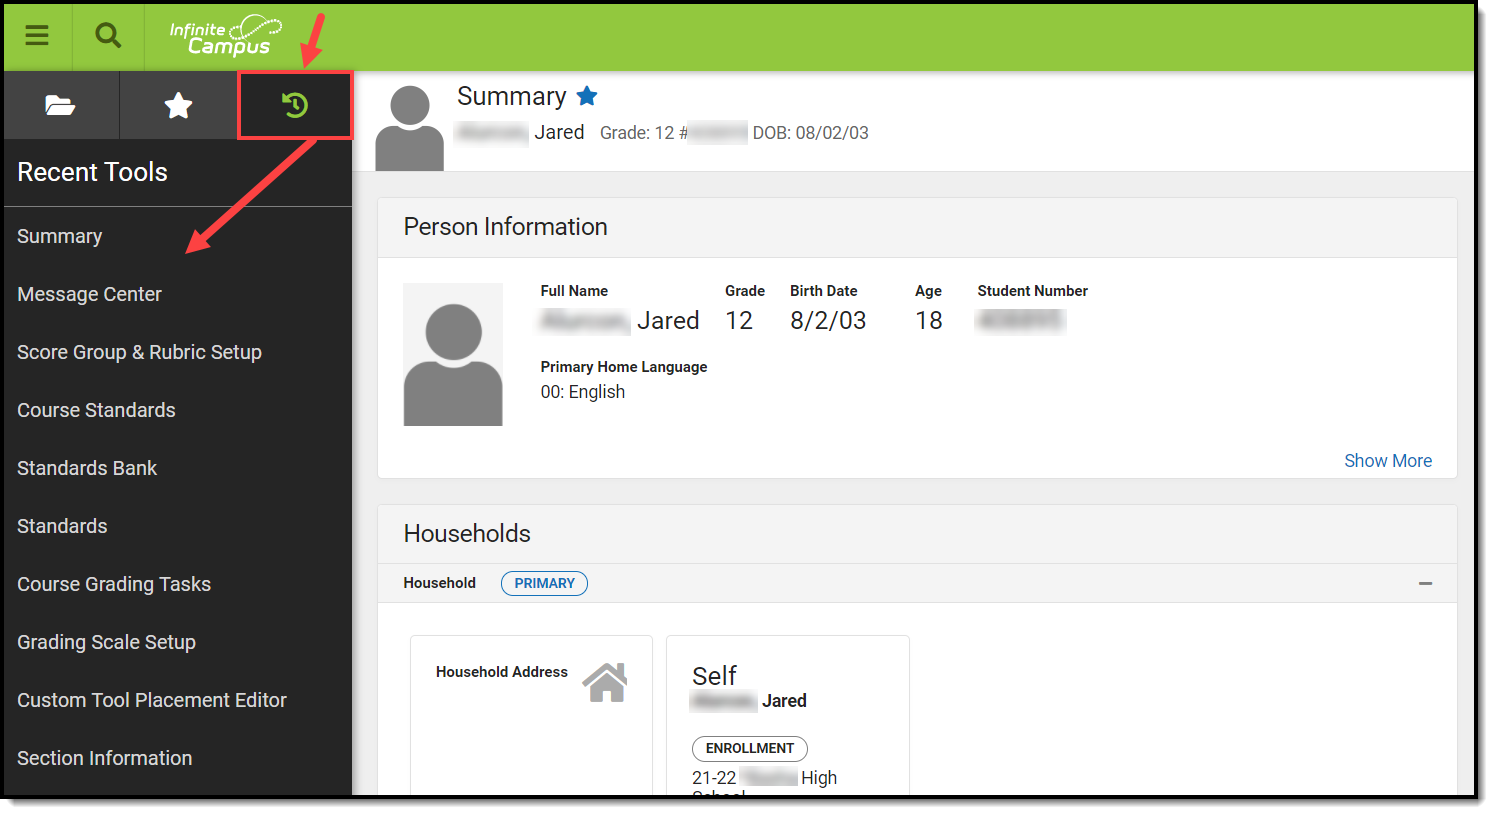
Intuitive Related Tools Toolbar
Many tools throughout the New Look of Infinite Campus provide a Related Tools toolbar on the right-hand side of the screen. This toolbar functions much like how tabs worked in Classic Campus, allowing you to visually see what tools are related to each other and easily navigate to these tools to fill out related data.
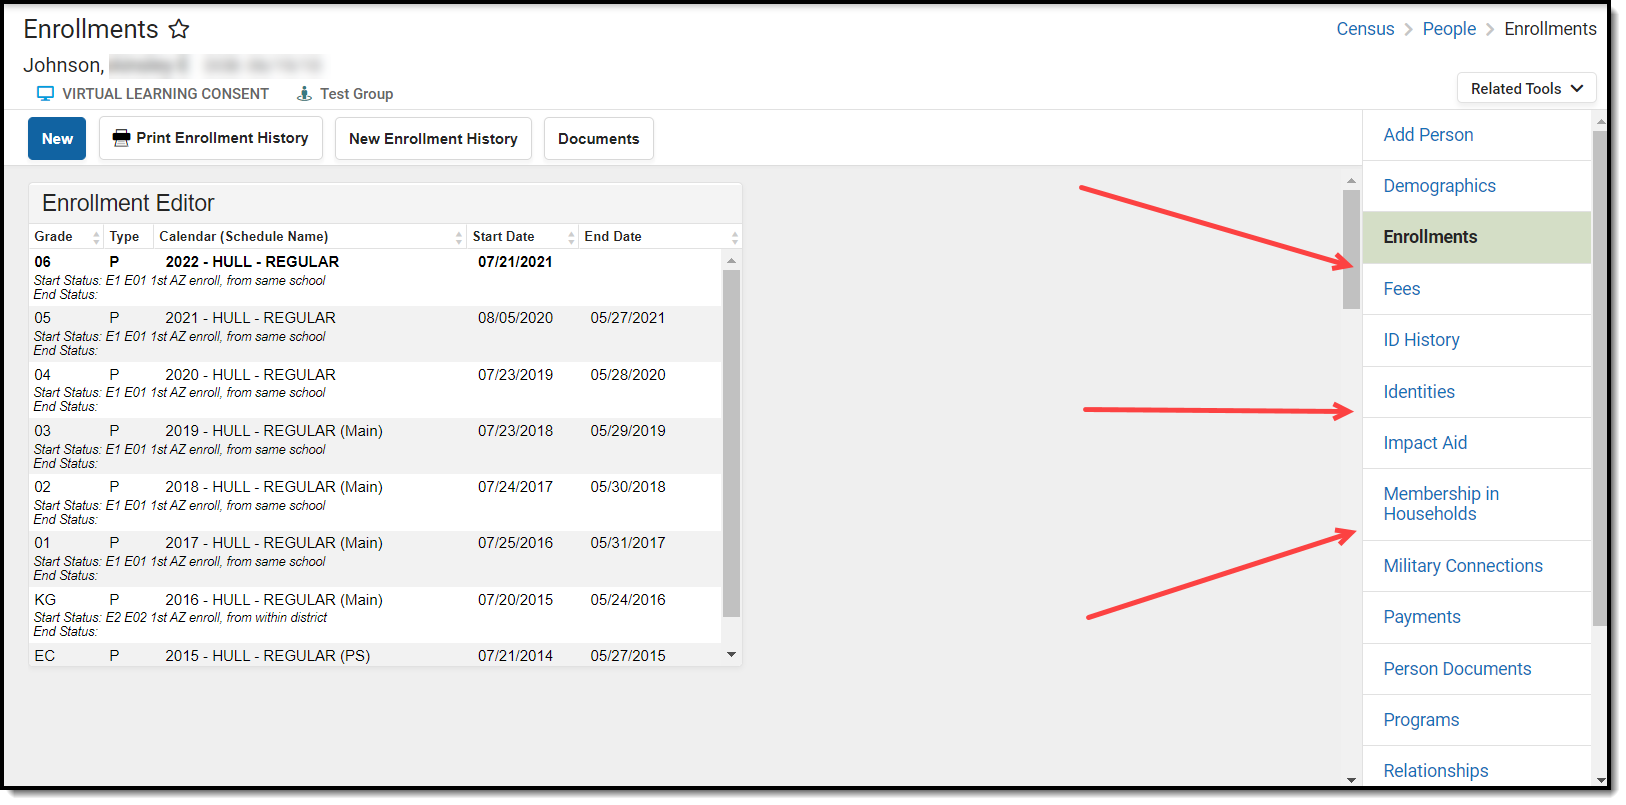
Another useful aspect of the toolbar is its ability to remember the context of what you are working on.
For example, if you are filling out a student's enrollment record, navigating to Demographics automatically goes into that student's Demographics record without the need to search for and select the student again.
Navigable Breadcrumbs
Navigable breadcrumbs are provided on the right-hand side of the screen when working within a tool. Clicking an item in the breadcrumb will send you to the category or menu item selected.

Robust In-Tool Person Search
When selecting a tool that requires a person to be selected, a robust person search prompt is provided, allowing you to search for the person using a variety of options.
Unified Search Menu
The search menu allows you to quickly and easily search a multitude of data within Infinite Campus. Simply click the magnifying glass icon  , select the type of data you wish to search (i.e., Student, Household, Tool, etc), and enter your search criteria. Results will appear below the search box.

Selecting a search result will send you to the appropriate tool for that piece of information.

The search menu also remembers your last search results, allowing you to quickly toggle back and forth between the list of tools within the Main Menu and search results without losing your place in either screen. Search results also remain visible within the left-hand panel while you interact within a tool you got to by selecting a search result.
Advanced Search
Advanced search functionality in the New Look of Infinite Campus functions the same as it does in Classic Campus. To do an advanced search, click the magnifying glass icon, select the search context, and click the Advanced button (see image below).
For more information about this feature, see the Searching in Campus article.
Note: Some search contexts do not have advanced search functionality.

Person Information Card
Tools focused on a specific person now contain a useful information card that, when selected, details important person information as well as a summary of their enrollment record(s) in the active school year. This is especially useful for reviewing enrollment information without the need to navigate away from the tool you are currently working in.
The card is also useful for viewing information no longer shown in the banner because you are using a device with a small screen (such as a phone or tablet).
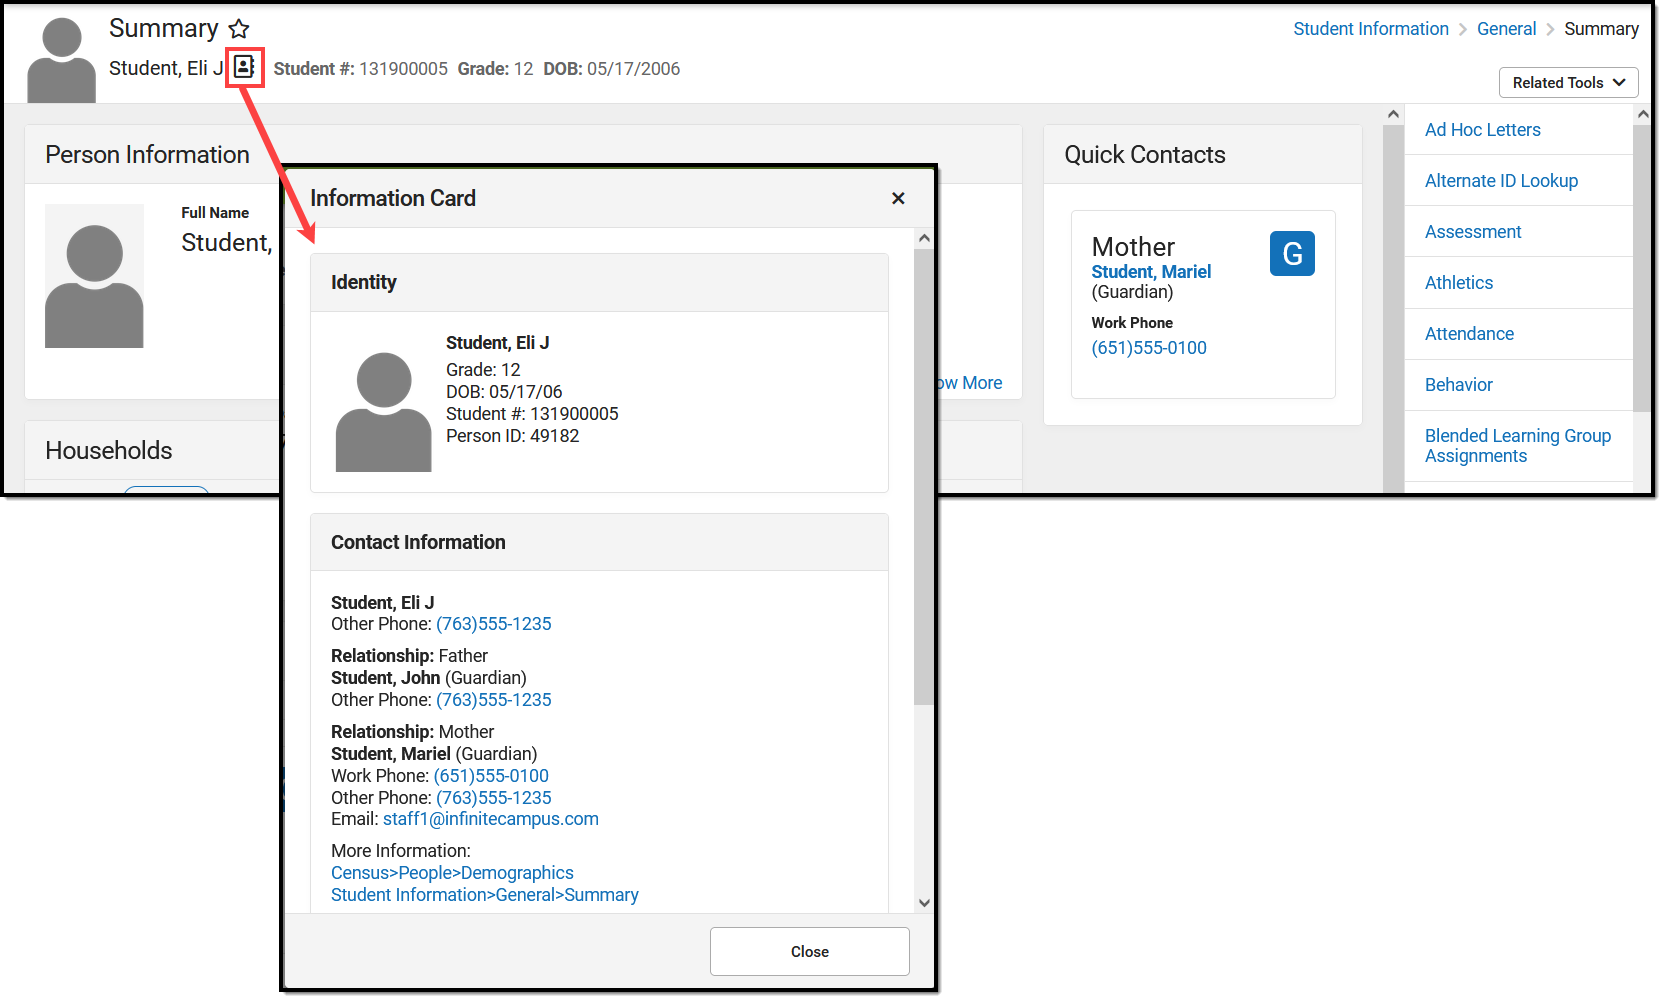
New Look Available in State Edition
The New Look of Infinite Campus is also available in State Editions of our product!
Why is Infinite Campus Making this Change?
We want our users to have a positive experience using our product. When first logging in, it should be easy to find the tools and data you need to complete your job. We believe these new changes will improve your experience and make your job easier.
As a living software system, Infinite Campus doesn't update to a new version quite like other programs do. We release new features and software changes every 4 weeks with our continuous release cycle. This UI change is much bigger than a standard update as it touches all areas of the product and has been years in the making. We're doing a lot of front-end changes for our users, as well as behind-the-scenes changes to bring our product to a new technological platform that keeps our student information system viable into the future.
The new navigation provides a way to modernize our tech stack and show old and new tools side-by-side while supplying a modern platform for new tools in the future. This change allows us to continue to protect our investment in legacy tools while providing the latest features.
Where Did My Campus Instruction Tools Go?
All Campus Instruction tools are available by selecting the Instruction menu item (see image below). The new look and feel of Infinite Campus joins Campus Instruction with the rest of the Campus tools and removes the need to use two separate spaces of Infinite Campus to do your work.
This change modifies how you navigate to Campus Instruction tools but DOES NOT impact their functionality.
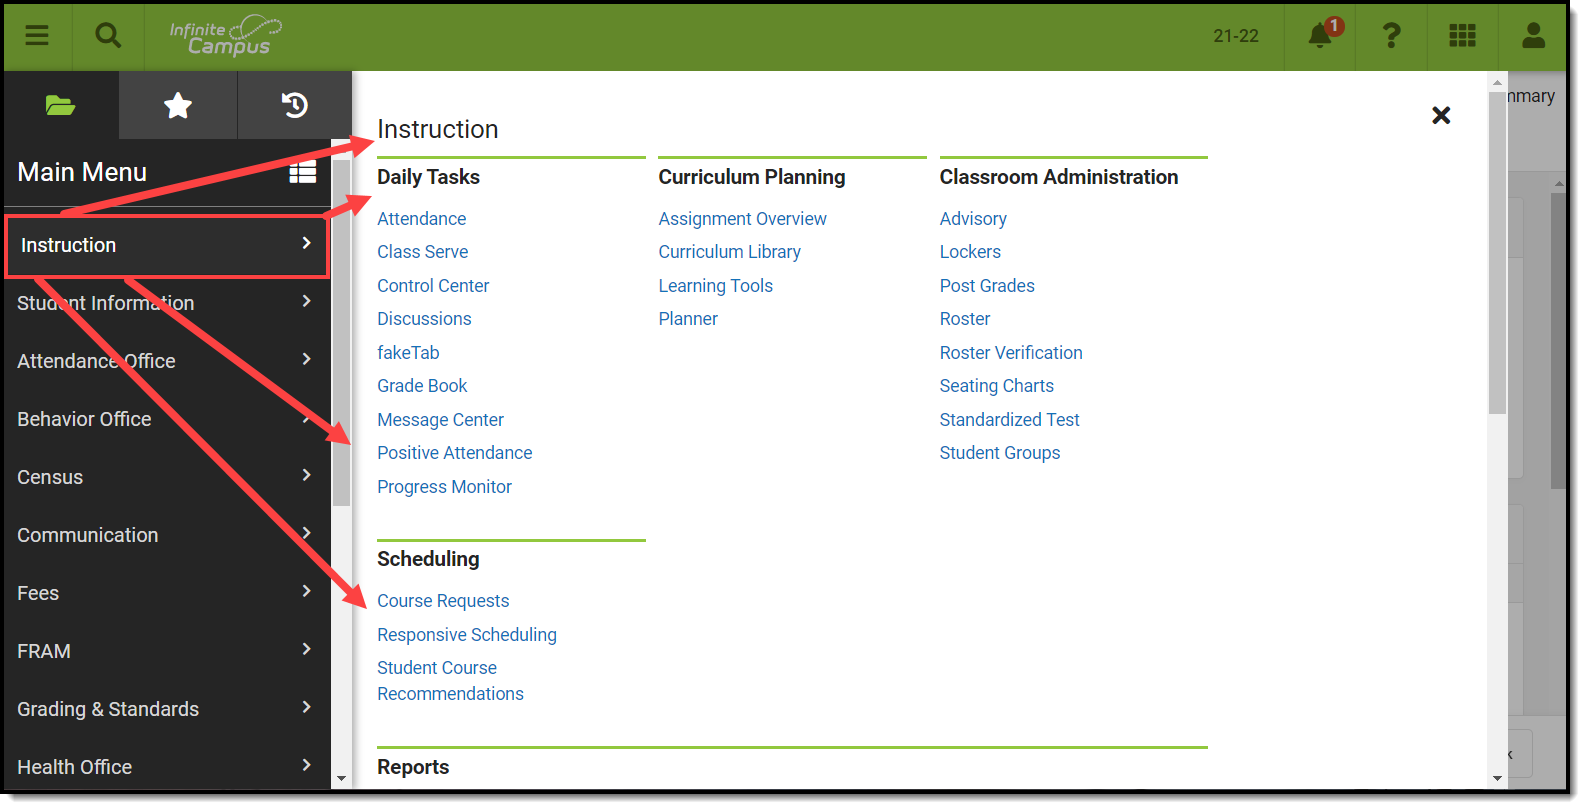
Help! I Can't Find a Tool
We understand that one of the most challenging aspects of the new navigation is finding where tools are now located. To ease this burden, we highly suggest you take advantage of the Tool search within the unified search by selecting the magnifying glass icon  .
.
Click here to access a list of where tools are now located in the New Look of Campus.

You can also find tools quickly and easily by creating your own list of favorites. See the User-Created Menu of Favorite Tools section for more information about this process.
Can I Control Where My Custom Tools/Reports Appear?
Yes! Using Custom Tool Setup, you can customize where in the New Look and Feel of Campus navigation UI your custom tools/reports will live. You can either place custom tools/reports within existing menu items and categories or customize and create your own menu items and categories.
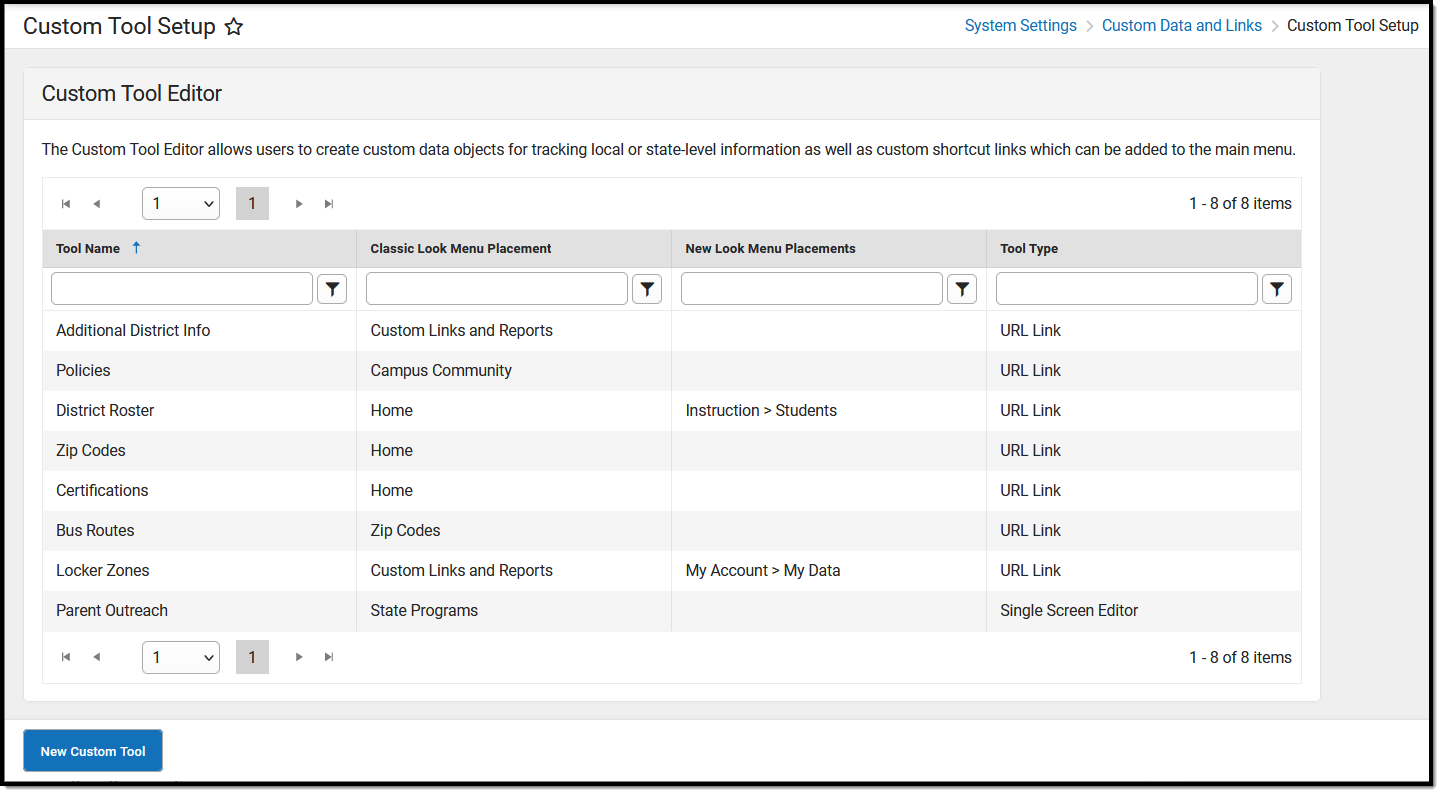
List of Tool Locations in the New Look of Campus
The spreadsheet below provides a list of where tools now exist in the New Look of Campus UI.
Infinite Campus has rolled out a new user interface (UI) with big improvements to navigation including favorites, recents, and search. In this video, teachers will learn about the new look and feel of Campus.

