Tool Search: User Account Letter Designer
The User Account Letter Designer allows you to create custom letters using a WYSIWYG editor. Letter formats created within the Account Letter Designer can be used by the Account Letter Builder to print and send Campus Portal and user account information, including username, and Portal account activation URLs.
Creating a New Letter Format
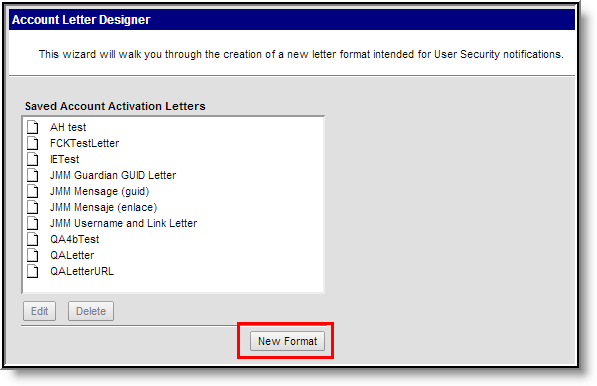
To create a new letter format, click the New Format button. You will be directed to the WYSIWYG editor.
 Creating a New Letter Format
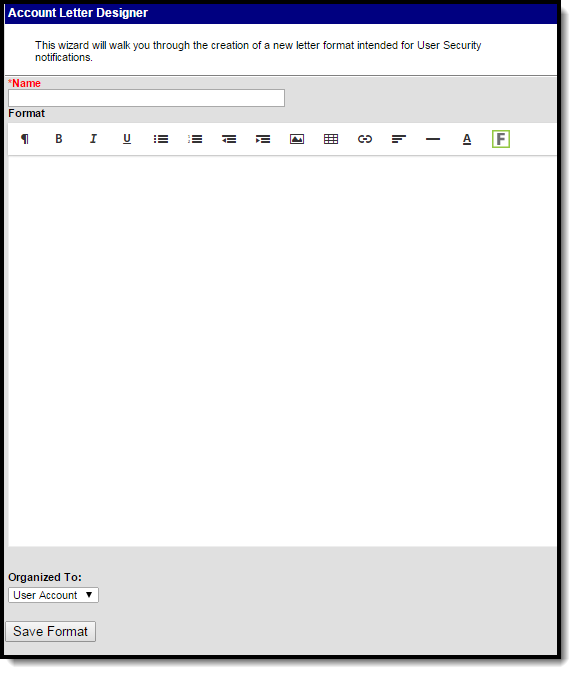
Use the WYSIWYG editor to build the letter format. This editor behaves similarly to other text editors, allowing you to format text, insert URL links, insert pictures and tables, and modify font properties. An important aspect of the WYSIWYG editor is its ability to insert Campus fields within the text. These fields will dynamically insert information for each letter recipient.
Please review the Understanding Campus Field Options section for more information about inserting Campus fields.
Please review the Best Practices for Designing Account Letters and Account Letter Examples/Scenario sections for help in designing account letters.
 Letter Format Editor
Creating a New Account Letter
- Enter a Name. This will identify the letter within the Account Letter Designer and Account Letter Builder tools.
- Select the Font, Size, Font Color, and any other formatting options within the text format bar.
- Begin writing the letter within the text field. To include dynamic Campus Field options and sub-reports, select the two buttons on the far right side of the text format bar. For more information, see the Understanding Campus Field Options section below.
- Select a user group in the Organized To field. This field allows users to designate which user group has rights to view and generate this letter format.
- Select the Save Format button. The report format has been saved and is now available for use in the Letter Builder tool.
Understanding Campus Field Options
One important aspect of the Letter Designer tool is its ability to include Campus fields within letter formats. These options allow reports to dynamically pull and display specific student and person data for each letter recipient.
Any fields displaying in red text have been deactivated. Use the Element Replacement tool to replace them with updated fields.
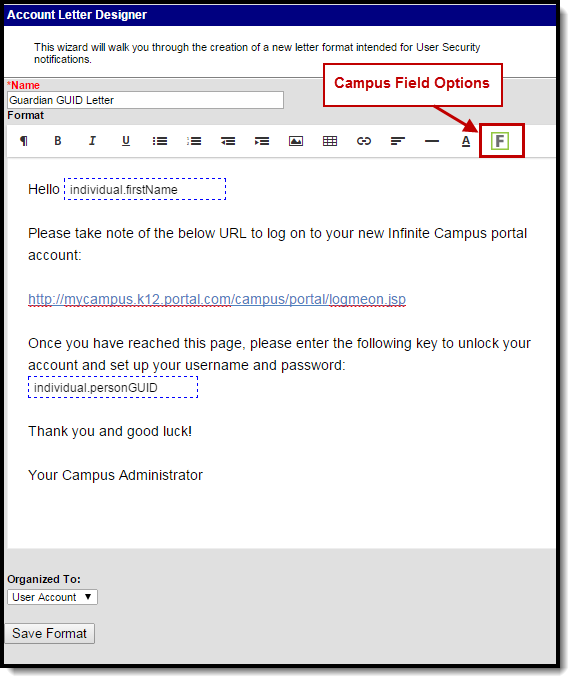
To include Campus fields within a letter, select the small icon on the right-hand side of the text format bar (Image 4).
 Inserting Campus Field Options
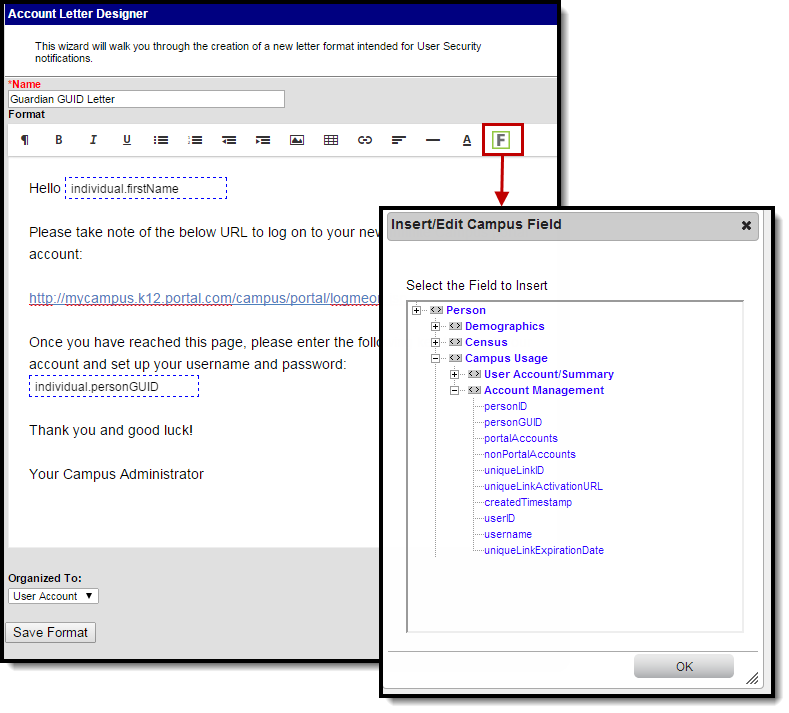
Once the Campus field options icon is selected, users are presented with the Insert/Edit Campus Field editor. As with other Ad hoc field editors, users can select Campus fields related to student/person data.
Select the field from the editor to insert the field within the letter. The selected field will appear within a dotted blue-lined box in the text field.
See the Best Practices for Designing Account Letters and Account Letter Examples/Scenario sections for useful examples of inserted Campus fields.
 Selecting Campus Fields
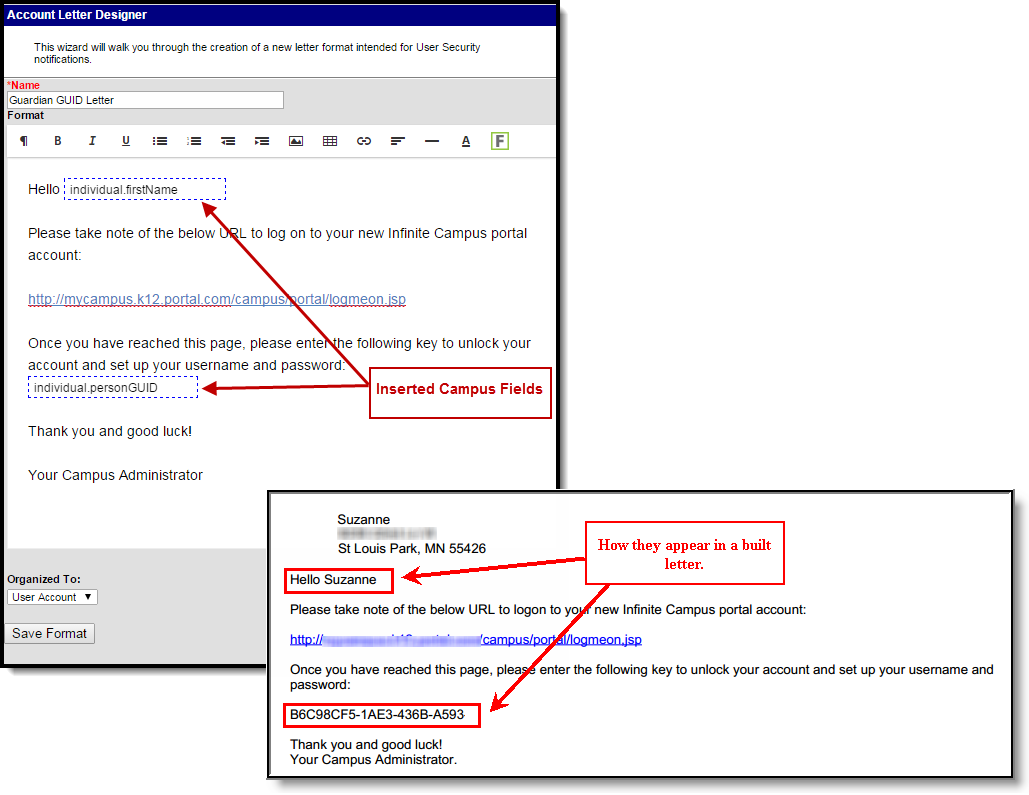
In the example below, a letter was created that began with the recipient's first name (individual.firstName) and explained that they need to unlock their account by following the provided URL and entering their personGUID (individual.personGUID).
Once this letter is built within the Account Letter Builder, the individual.firstName field will generate the first name for each individual letter recipient as well as their personGUID in the individual.personGUID field.
 Identifying Inserted Campus Fields
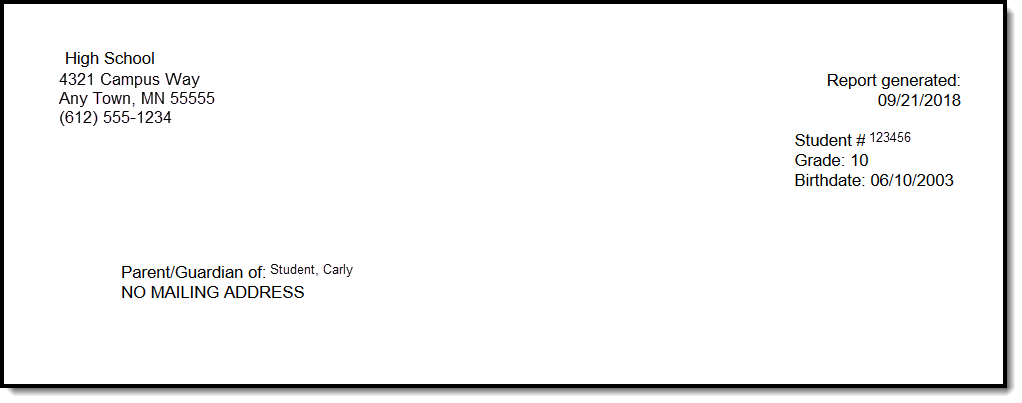
A letter is still generated for students without a mailing address. Like in the Preview of the attendance letters, the student's name is listed on the summary of who receives a letter, but instead of an address, the words NO MAILING ADDRESS display where the address would otherwise display. Letters are printed for the student with the same NO MAILING ADDRESS indication.
 No Mailing Address Displayed on Letter Print
No Mailing Address is determined by the Mailing checkbox marked on the Related Household associated with the Address.
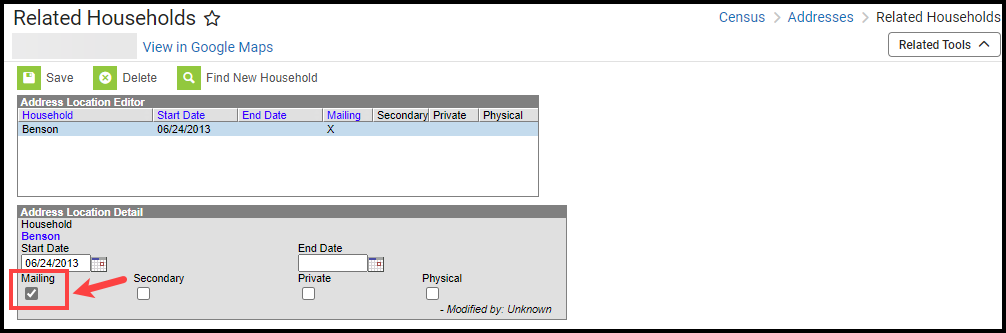 Address Location Detail - Mailing Checkbox
Best Practices for Designing Account Letters
Whenever you include the uniqueLinkActivationURL field within a letter, you should include the UniqueLinkExpirationDate field. By default, Unique Activation URLs expire after 48 hours of being created (for security reasons), thus it is important to include the Unique Link Expiration Date field to indicate to the user when the Unique Activation URL will expire.
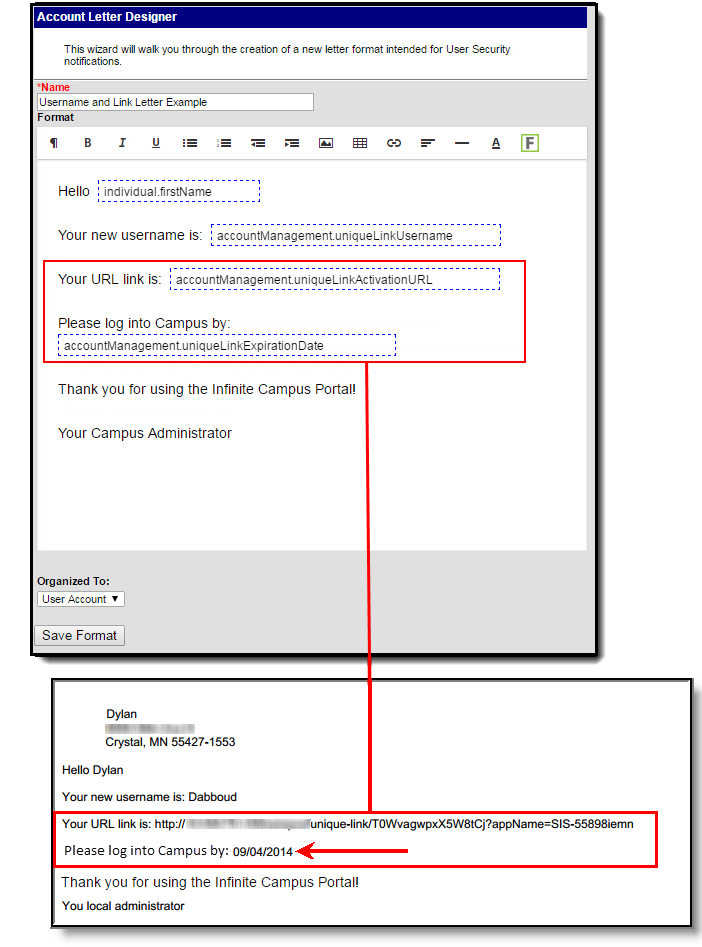 Example Letter Defining URL and Activation Expiration Date
The 48-hour Unique Activation URL expiration window can be modified via the Account Activation URL Expiration Date field found on the Account Letter Builder. The UniqueLinkExpirationDate field will display the value set in this field.
Whenever you include the uniqueLinkActivationURL field in a letter, include a line instructing users what to do if the URL expires and they can no longer activate their account.
The Unique Link Activation URL will only work for a user the first time they select it. If they select the URL but do not complete the process, they will need a new URL sent to them via a new letter or email using the User Account Messenger tool.
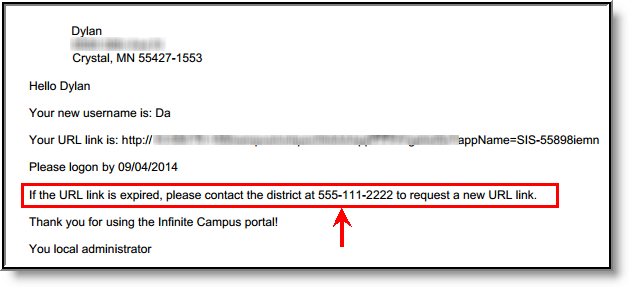 Expired Link Notification
You can provide these users with a new Activation URL by running the same filter within the Account Letter Builder. Original recipients who have activated their account via the URL will not reappear within filter results.
Preferred Language Setup
This format screen allows the entry of the letter's body. Letters can be created in several languages (see the Preferred Language Letter Setup section below). A school can create an Attendance letter in as many languages as needed, but it must first be entered in the selected Default Value.
Infinite Campus does not provide translation services.
Districts must use their own resources when communicating in another language with parents/guardians, students, staff, etc.
Letters must exist in the assigned default language (see Step 1). Text can be entered for additional languages for the district's population. Two things must be done:
- A language must exist in the Attribute/Dictionary and be marked active in the Attribute/Dictionary tool.
- A language must be assigned as the Preferred Language on the Personal Contact Information editor on the Demographics tab.
Existing language codes should not be modified. Access to letters is lost until the original code is recreated. If that language code is assigned to any person, that assignment is lost as well.
Step 1. Enter the Preferred Language Default Value
Tool Search: Attribute Dictionary
Enter the desired Default Value for the Preferred Language. This value shows the Default Language Preview when creating letters in other languages. If no Preferred Language has been assigned to an individual (Step 3), letters are generated in this default language.
- Expand the Contact object.
- Click on the Preferred Language element. A Campus Attribute Detail editor displays.
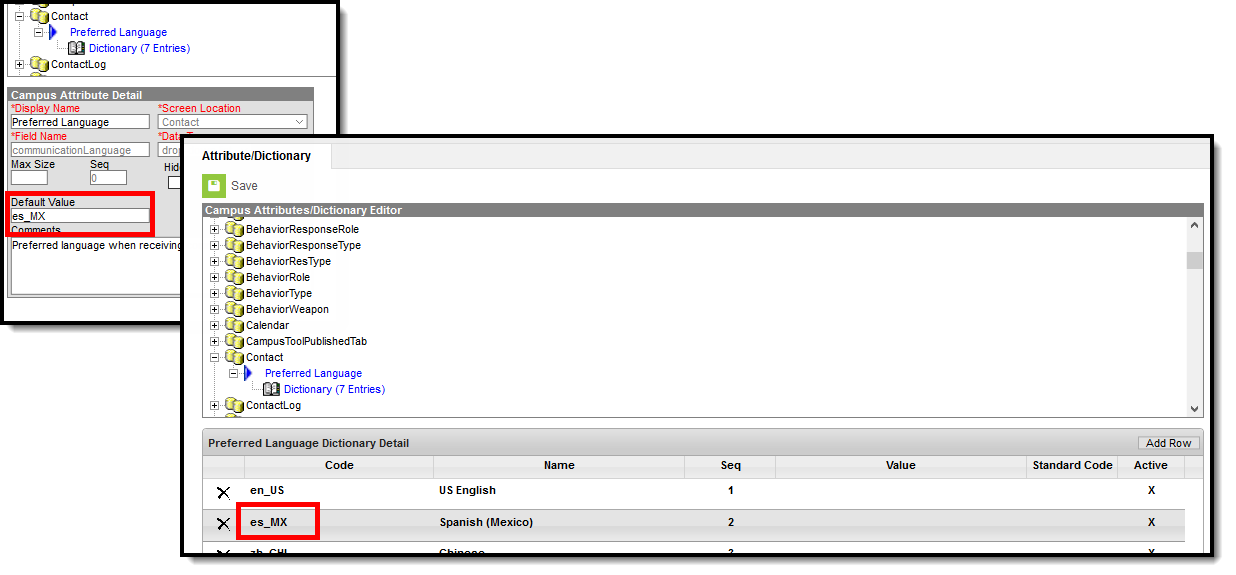
- Enter the appropriate Default Value. This could be en_US, es_MX, or another abbreviation that matches the Code assigned to the Languages entered in the Dictionary list. The entered value must match the Dictionary Code for that language.
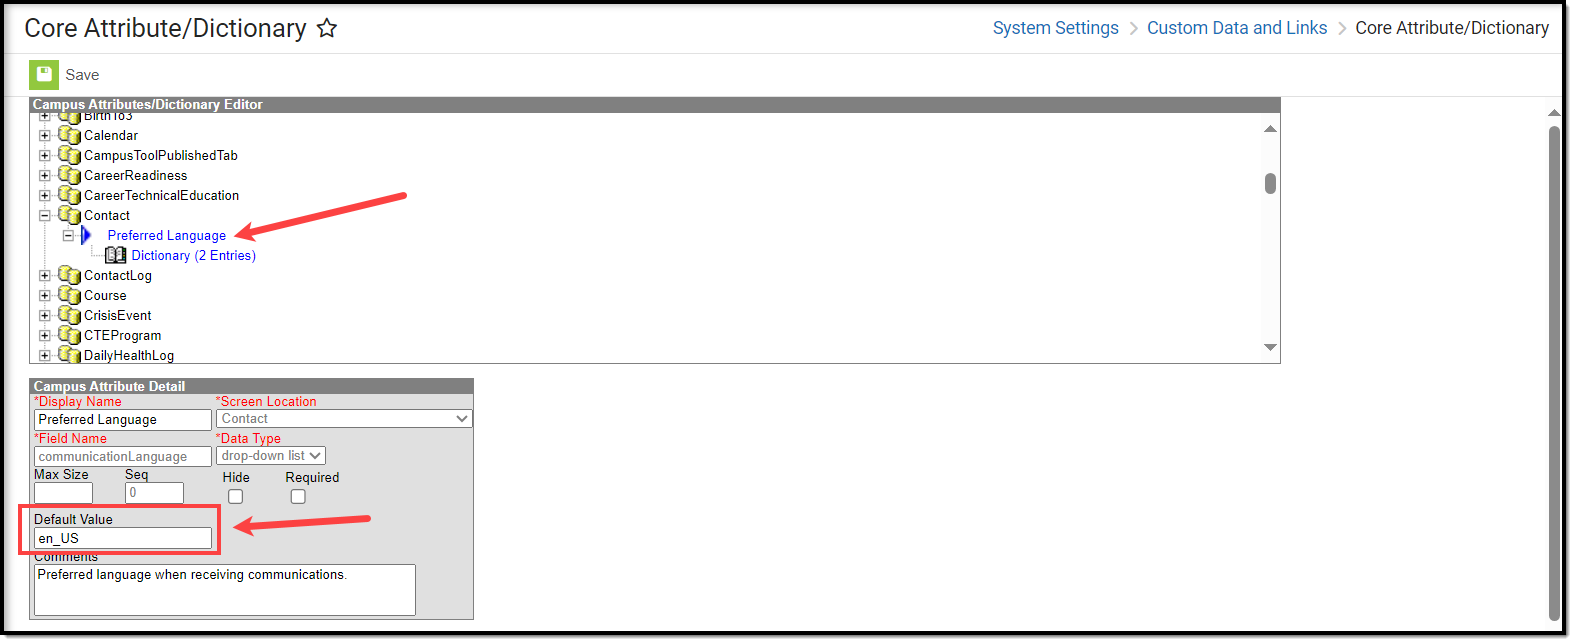 Preferred Language Default Value
 Step 2. Add Language To Attribute/Dictionary
Languages available here are used in the Preferred Language Selector to control the list of languages.
- Expand the Preferred Language attribute and select Dictionary. A Preferred Language Dictionary Detail editor displays.
- Click the Add Row button in the far right corner of the Detail editor.
- Enter a Code, Name, and Sequence for the language.
- Mark the language as Active.
- To add more languages, click the Add Row in the right-hand corner and repeat steps 3 and 4.
- Click the Save icon when finished.
The Language Code can be up to 15 characters in length.
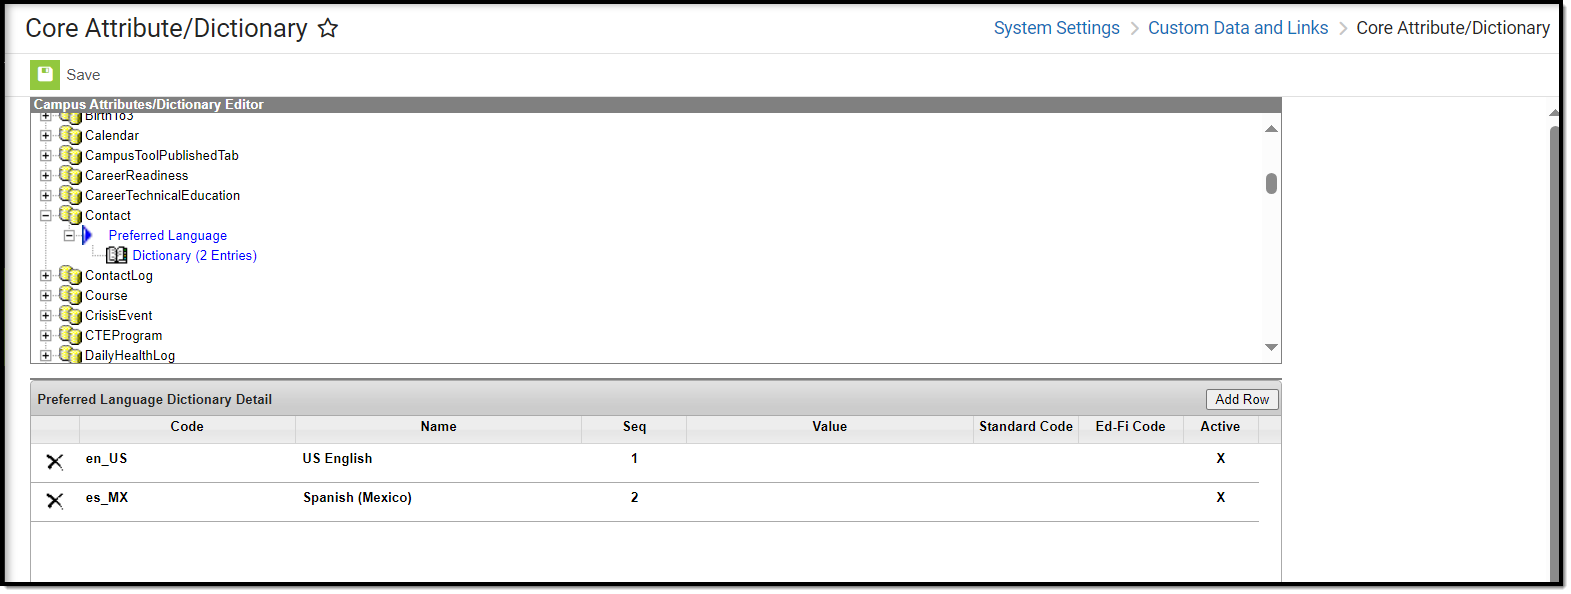 Attribute Dictionary - Preferred Language
All languages except en_US and the language identified in the Default Value field can be added or removed. When an individual does not have a Preferred Language assigned, the default preferred language is assumed. If this language is removed, letters do not generate at all. The Code entered in the Dictionary must match the Default Value.
 Default Value Matches Dictionary Code
Because of a configuration with Email Messenger settings, en_US should never be removed from the Preferred Language Dictionary.
Step 3. Assign Preferred Language to Parent/Guardian
Tool Search: Demographics
Assign the Preferred Language to the parent/guardian who receives an attendance letter. This field can also be assigned to all people in Infinite Campus. It's used to send other messages to parents/guardians, staff, and students.
Parents/guardians can also select the Preferred Contact Language on the Contact Preferences editor in the Campus Portal.
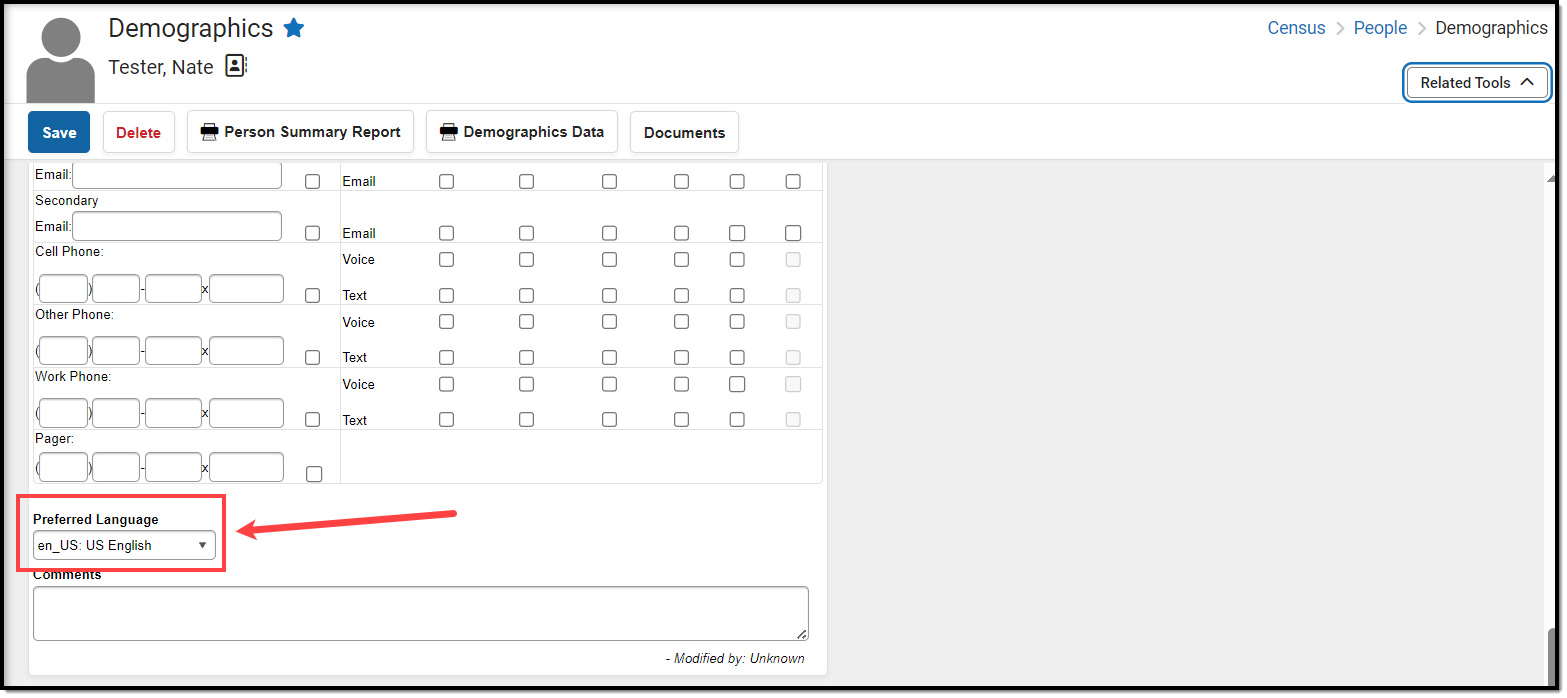 Preferred Language Assignment
Step 4. Create the Letter in the Default Language
Create the letter in the Default Language.
 Preferred Language Display
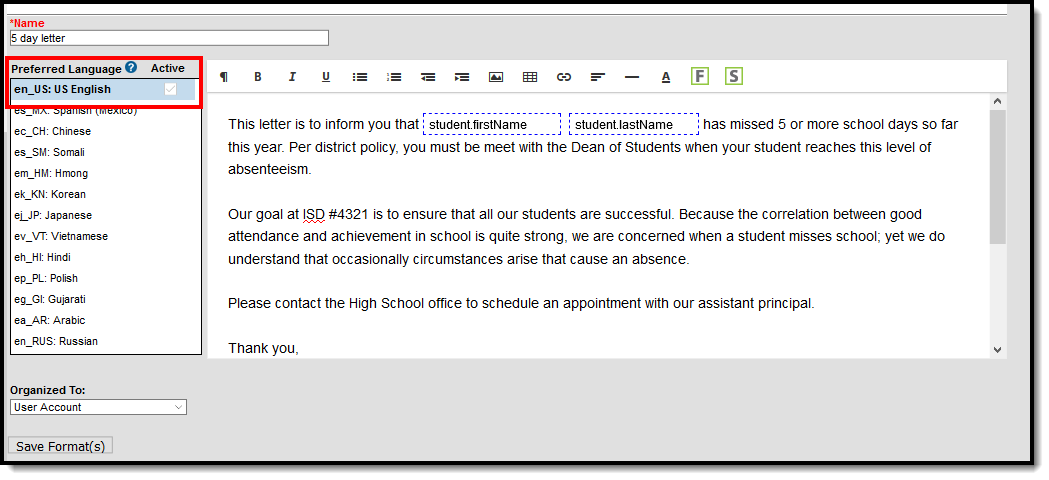
Default Language: English
In the following example, en_US: US English is the Default Language. The Attribute/Dictionary has been entered as follows:
- Preferred Language Default Value: en_US
- Preferred Language Dictionary Value Code: en_US
The English version displays as the Preview when the same letter is created in another language.
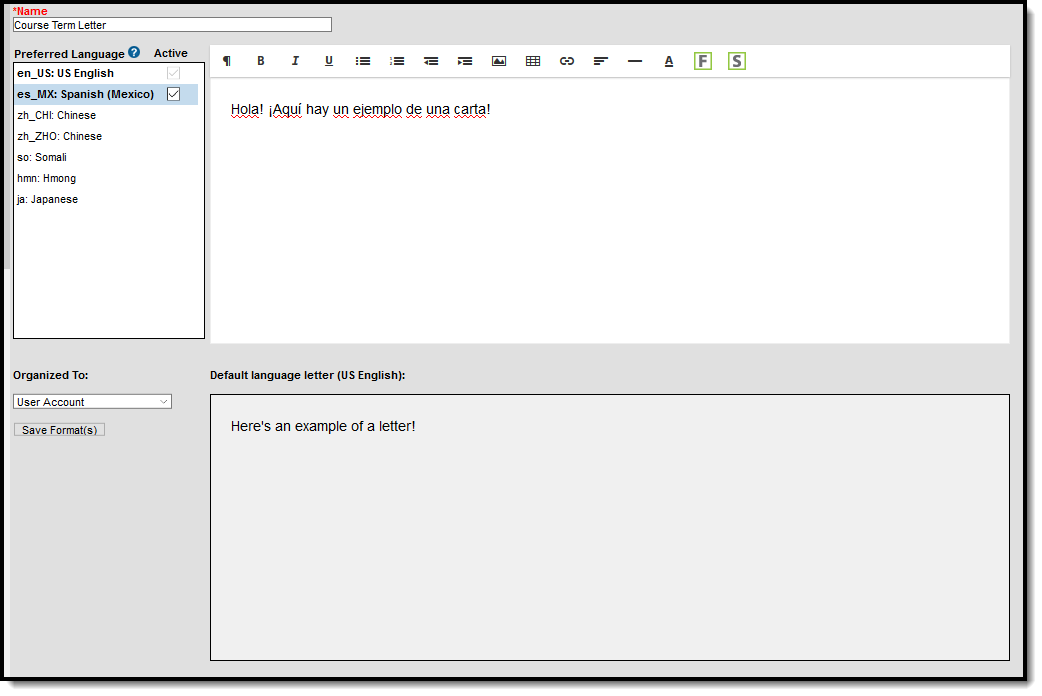
Default Language: es_MX
In the following example, es_MX: Spanish (Mexico) is the Default Language. The Attribute/Dictionary has been entered as follows:
- Preferred Language Default Value: es_MX
- Preferred Language Dictionary Value Code: es:_MX
 Spanish Default Language Setup
When the same letter is created in another language, the Spanish version displays as the Preview.
 Preferred Language in Spanish Letter Preview
When finished, select the appropriate Organized To: option, then click the Save Format button. Follow your district's standard procedure to print and generate attendance letters. Letters in English and letters in non-English generate in the same collection of letters. When a parent/guardian is assigned a Preferred Contact Language that is not English, the letter prints in that language.
Step 5. Create the Letter in Additional Languages
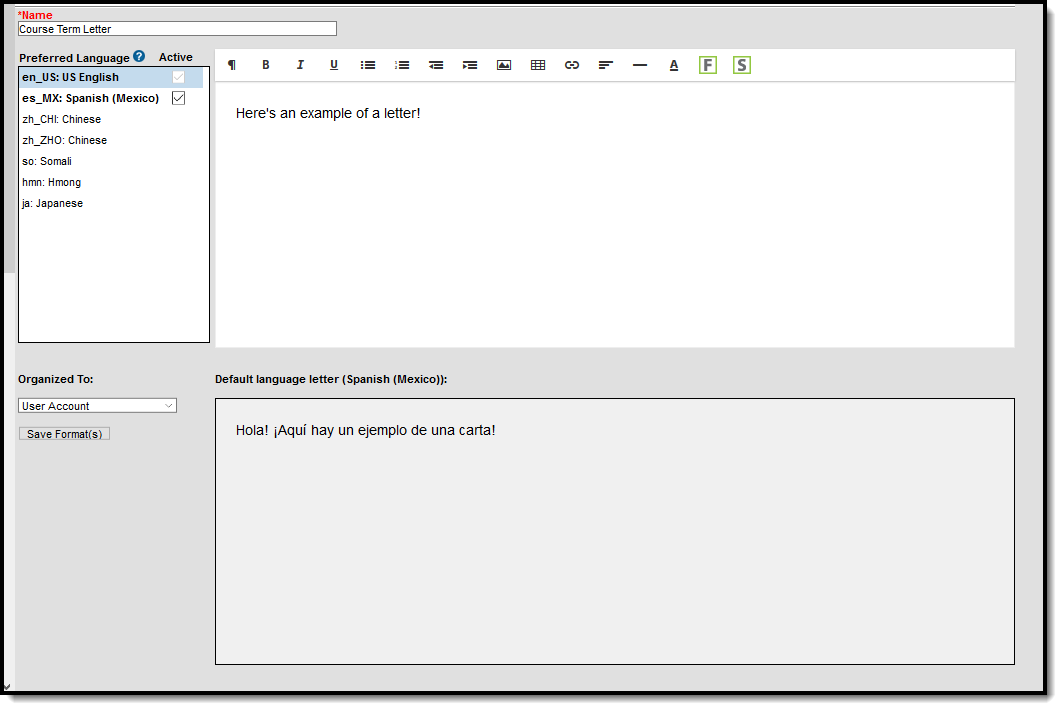
After creating the letter in the Default Language, enter text for this same letter in a different language by selecting the language in the Preferred Language list and typing/pasting the translated text into the WYSIWYG editor. That language becomes bold, and an Active checkbox becomes available. A language version of the letter is only a draft until the Active checkbox is marked.
When it is determined that the draft letter can be sent, mark the Active checkbox to indicate the letter is now ready to print for those individuals assigned that Preferred Language.
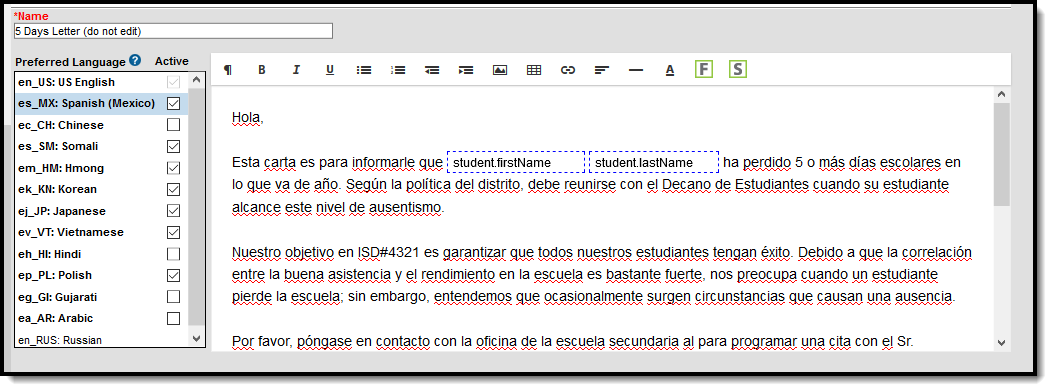 Letter in Spanish
Repeat these steps for the other languages that require letters.
Please adhere to any district policy that may exist for what needs to be included in the letters.
Step 6. Send the Letters
A letter is sent for each distinct Preferred Language associated with the parents/guardians in the household marked to receive mailings. In the example below, one of the student's guardians receives a letter in Spanish because that is the Preferred Contact Language for that guardian, while another guardian at a different mailing address receives the same letter in English. If two parents/guardians in the household are assigned the same Preferred Language, only one letter is generated for the household.
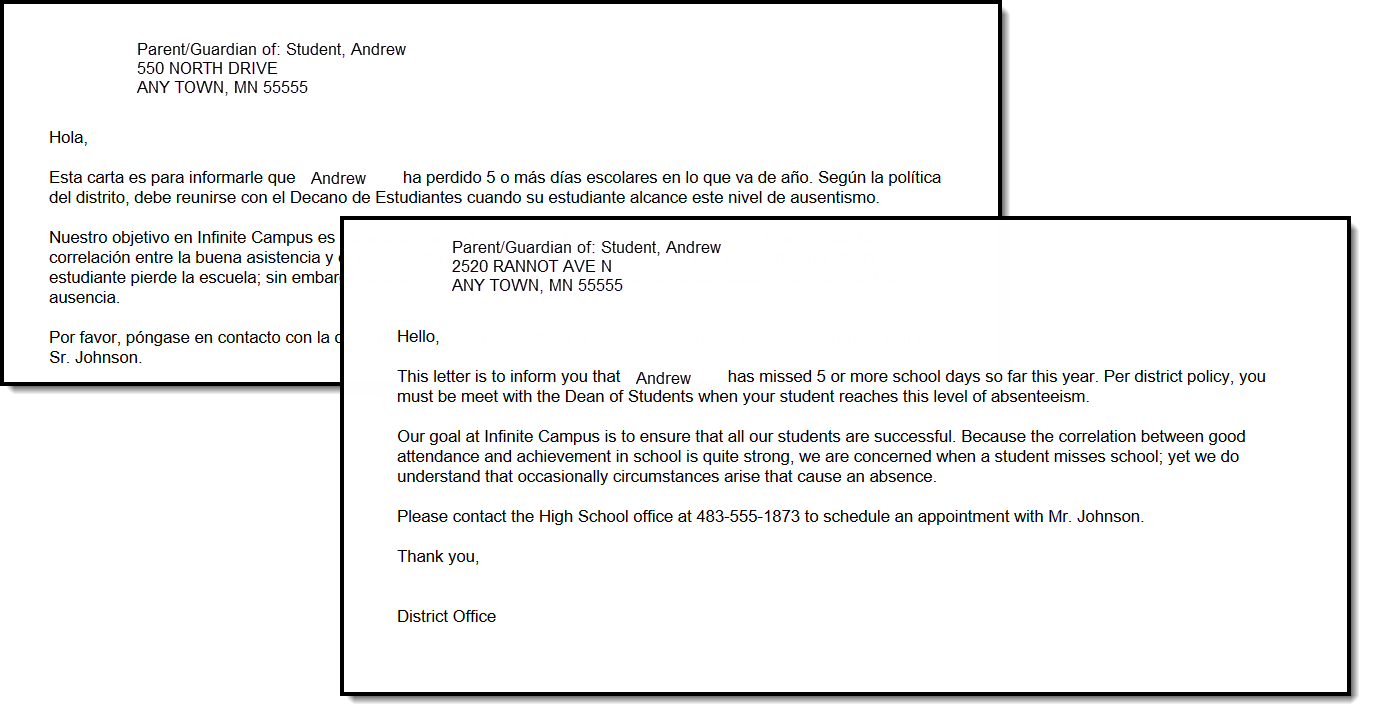 Letters in Multiple Languages
Certain foreign-language characters may not line up properly with other text when using the Campus Fields or when fonts are mixed (e.g., phone numbers alongside non-English characters). Try adding additional returns between lines.
Account Letter Examples and Scenarios
The following are some examples of ways to use the Account Letter Designer to build useful letters.
Sending Portal Activation Letters to Parents/Students
Using Account Management fields, you can create a letter that provides each parent and student (identified by the Ad hoc filter selected in the Account Letter Builder) with a unique Portal account activation URL. This URL is unique to each letter recipient and, once entered into a web browser, guides each user through the steps to activate their new Campus Portal account.
Activation Letter ExampleReminding Parents/Students of their Campus Portal Account Expiration Date
Using the User Account/Summary fields, you can create a letter to be sent to all Portal users, informing them when their Campus Portal account will expire.
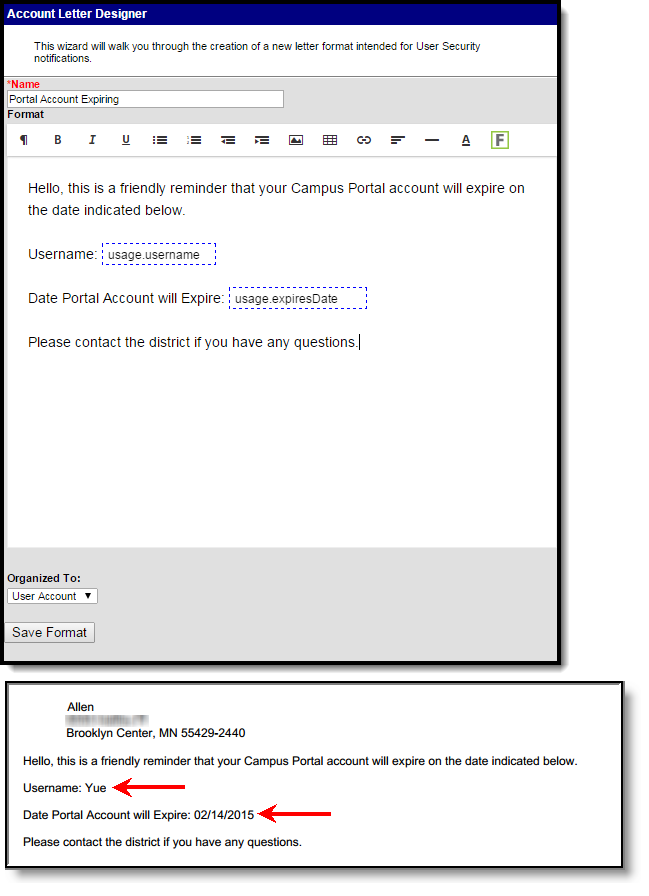 Account Expiration Date Example