Classic View: System Administration > Ed-Fi
Search Terms: Ed-Fi
This article describes the steps you should take to properly move Ed-Fi to the next school year. A free training video is also available via Campus Passport: Minnesota Ed-Fi: Setup 22-23. An active Campus ID / Campus Community account is required to access the recording.
For a general (not Ed-Fi specific) checklist of activities that should be performed within Campus at the beginning of a new school year, please see the Beginning of School Year Process article.
Configuring Ed-Fi for the Next School Year
Step 1. Update to the Most Recent Version of Campus
In order to have the schema and logic in place, it is critical you update to the most recent version of Campus. Failure to do this will result in an inability to properly report data for the 2022-2023 school year.
Step 2. Enable Ed-Fi Functionality
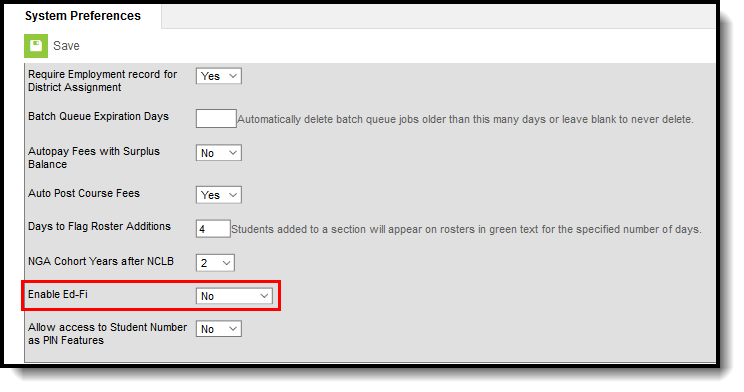
Enable Ed-Fi functionality via the Enable Ed-Fi system preference (System Administration > Preferences > System Preferences > Enable Ed-Fi).
- Yes = Ed-Fi functionality is enabled and Ed-Fi data will sync from Campus to the Ed-Fi system (if properly enabled via Ed-Fi Configuration tools).
Tools Only = You are able to fill out Ed-Fi fields (such as Ed-Fi ID) within Campus but this data will not sync to the Ed-Fi system until this field is set to Yes. This is especially useful when setting up Ed-Fi IDs for students within a school or district so that data properly syncs between Campus and Ed-Fi prior to enabling it.
No = Ed-Fi functionality is not enabled for the district and users cannot access Ed-Fi tools within Campus.
Step 3. Create a New Ed-Fi Configuration for 2022-2023
You will need to create a new Ed-Fi configuration for the 2022-2023 school year.
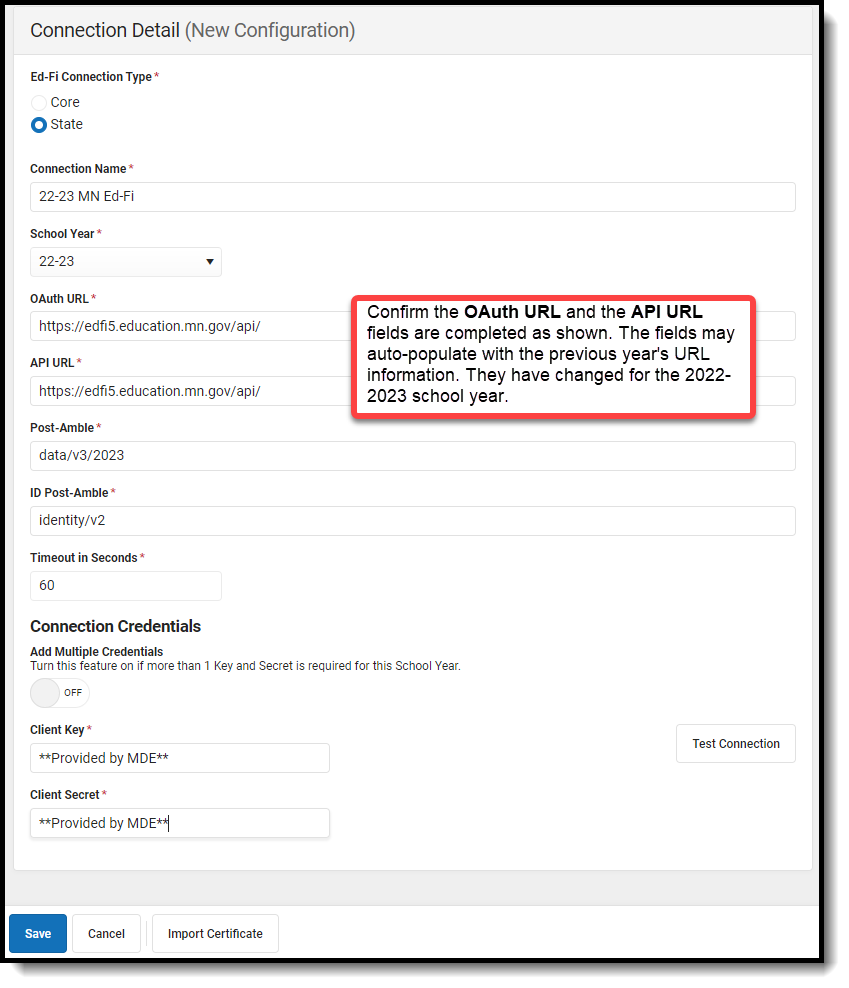 Ed-Fi Connection Detail
To do this:
- Navigate to the Ed-Fi Connection Configuration tool (System Administration > Ed-Fi > Ed-Fi Configuration > Connection).
- Click the New button. The Connection Detail editor will appear.
- Select the Connection Type, options are Core or State.
- Enter the Connection Name.
- Select the School Year 2022-23.
- Enter the following values:
Field Value O-Auth URL https://edfi5.education.mn.gov/api/ API URL https://edfi5.education.mn.gov/api/ Post-Amble data/v3/2023 ID Post Amble identity/v2 Timeout in Seconds This field defaults to a value of 60 seconds and determines (in seconds) the amount of time allowed to pass before the connection between Campus and Ed-Fi is considered timed out and Ed-Fi events are not processed. These Ed-Fi events are then re-processed the next time a quartz job runs. Client Key The Client Key will be provided by the Minnesota Department of Education. Client Secret The Client Secret will be provided by the Minnesota Department of Education. - If desired, a certificate can be imported for the Ed-Fi configuration. For more information, please see the 'Import Certificates' section of the Ed-Fi Configuration article.
- Click the Save button.
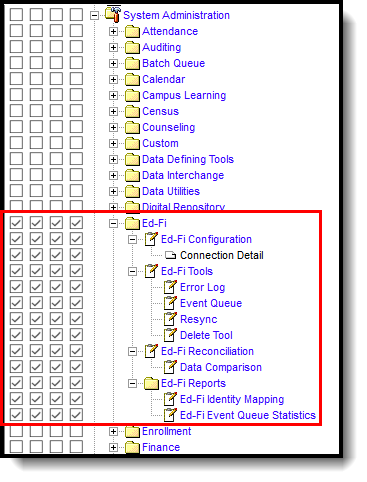
Step 4. Set Ed-Fi Tool Rights
System Administration > User Security > Users/User Groups > Tool Rights
Review the Ed-Fi Tool Rights article for more information.
Step 5. Update the Active Year to 2022-2023
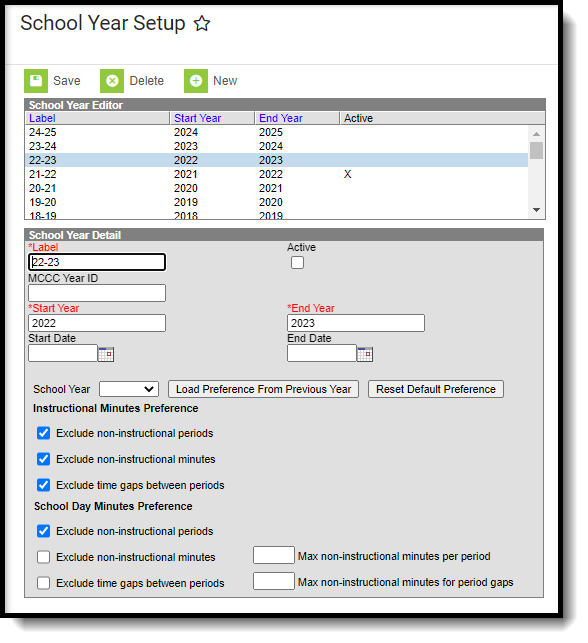
Make 2022-2023 the active school year within the School Years tool. If you have already set 2022-2023 as the active school year, skip to the next step.
To do this:
- Navigate to the School Years tool (System Administration > Calendar > School Year).
- Select the 2022-2023 school year in the School Years Editor window.
- Mark the Active checkbox.
- Click the Save icon.
Step 6. Verify Current District and School Data
Verify that the State District Number, District Type, School Number, and Site Classification are correct.
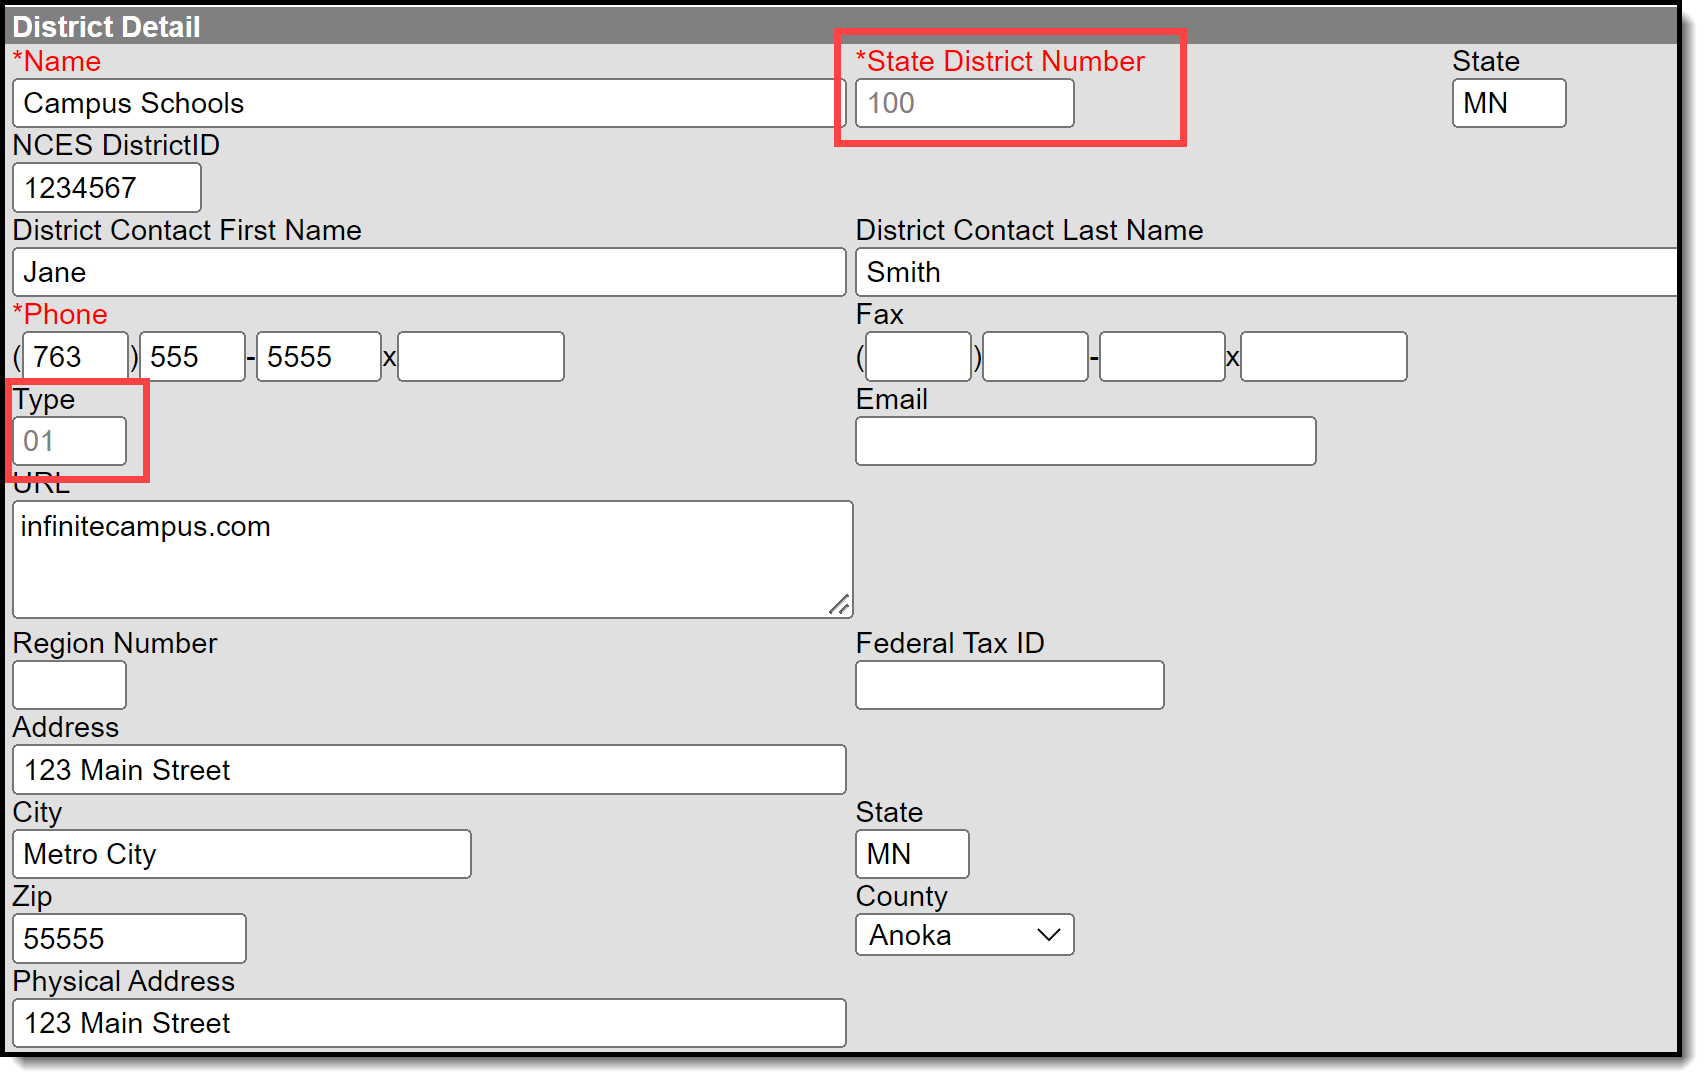 District Detail
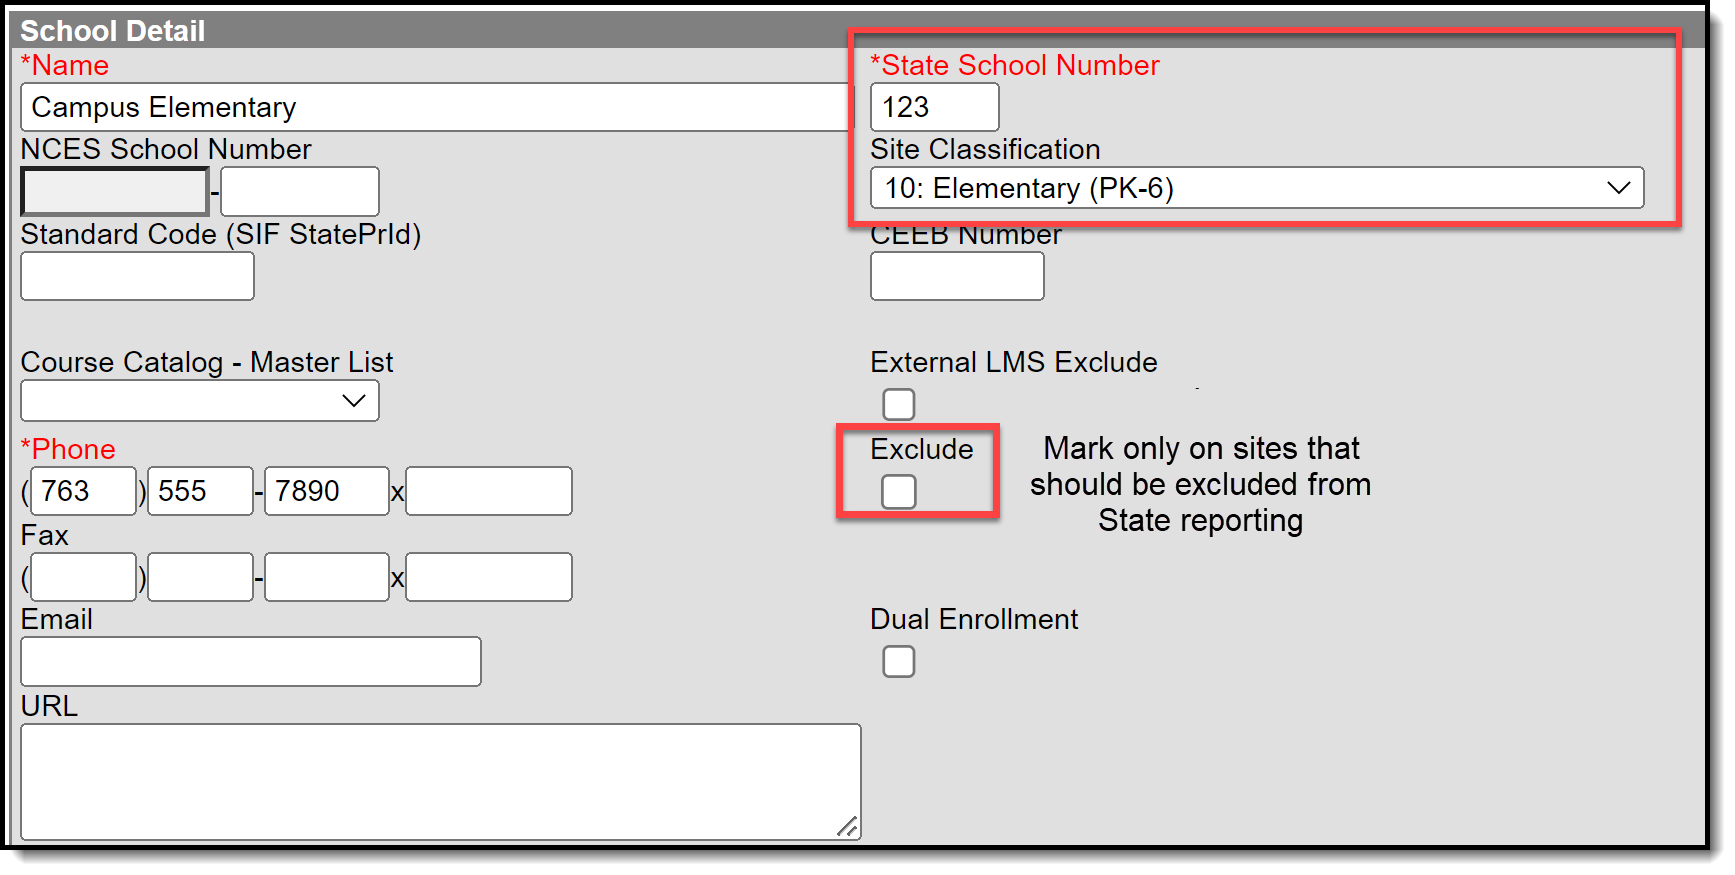 School Detail
To do this:
- Navigate to the District Detail page (System Admin > Resources > District Information > District Detail) AND the School Detail page (System Admin > Resources > School > School Detail ).
- Verify that the State District Number, District Type, School Number, and Site Classification are correct. This information is assigned by the Minnesota Department of Education. Refer to MDE's website for confirmation.
- Mark the 'Exclude' checkbox on sites that should be excluded from State Reporting.
- Click Save.
Step 7. Set Resource Preferences
Set all Resources to 'Off' and map the Ed-Fi Codes to Campus Codes (System Administration > Ed-Fi > Ed-Fi Configuration > Resource Preferences). Refer to the Minnesota Ed-Fi v3.1 - Set Resource Preferences article for more information.
Note: Records are not sent if the Calendar Grade Level "Exclude from State Reporting" checkbox is selected for the grade level tied to the student's enrollment.
- If one calendar is mapped to another calendar, and any grade levels are shared between the two calendars, the "mapped-to" calendar governs the "Exclude from State Reporting" status.
Step 8. Assign Ed-Fi IDs
Assign Student Ed-Fi IDs (Census > People > Demographics > Person Identifiers).
Ed-Fi ID values are the MARSS IDs that you assign to each student, saved in the Student State ID field.
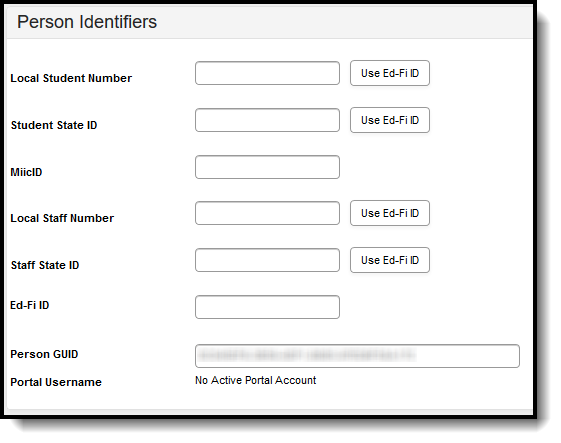 Person Identifiers
Step 9. Toggle Resource Preferences to On (Begin Manual Resync Process for MARSS-B Comparison)
Toggle Resources to 'On' in Resource Preferences once all data setup is complete. Refer to the Minnesota Ed-Fi v3.1 - Set Resource Preferences article for more information.
Step 10. Perform an Ed-Fi Resync for the 2022-2023 Scope Year
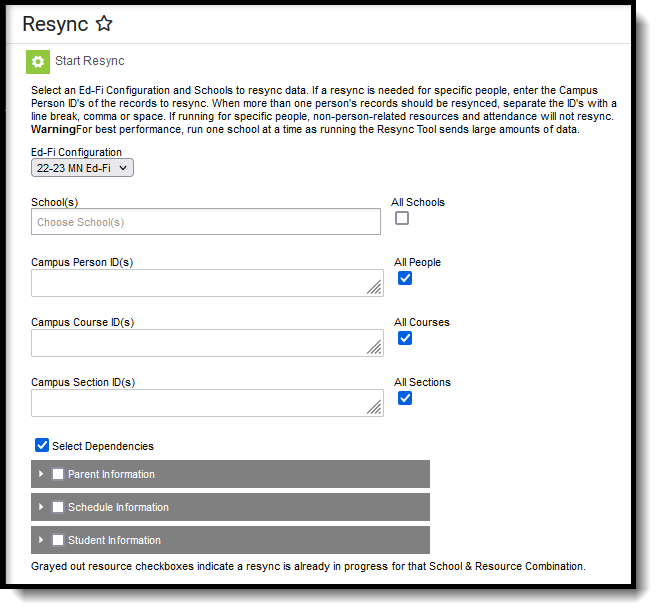
Once the 2022-2023 Ed-Fi configuration is in place and data has been properly reviewed, an ordered resync should be completed as the first resync of the year. This is completed using the Resync tool.
To do this:
- Navigate to the Resync tool (System Administration > Ed-Fi > Ed-Fi Tools > Resync).
- Select the appropriate Configuration.
- Select all of the Student Information resources and scope the resync to the schools you wish to send to MDE via Ed-Fi.
Step 11. Review the Event Queue
Navigate to the Event Queue (System Administration > Ed-Fi > Ed-Fi Tools > Event Queue). Wait until all records have processed in the Event Queue (when it reads “0 records total” as seen below). Once there are no events in the Event Queue, turn off all Resource Preferences.
Step 12. Review the Error Log
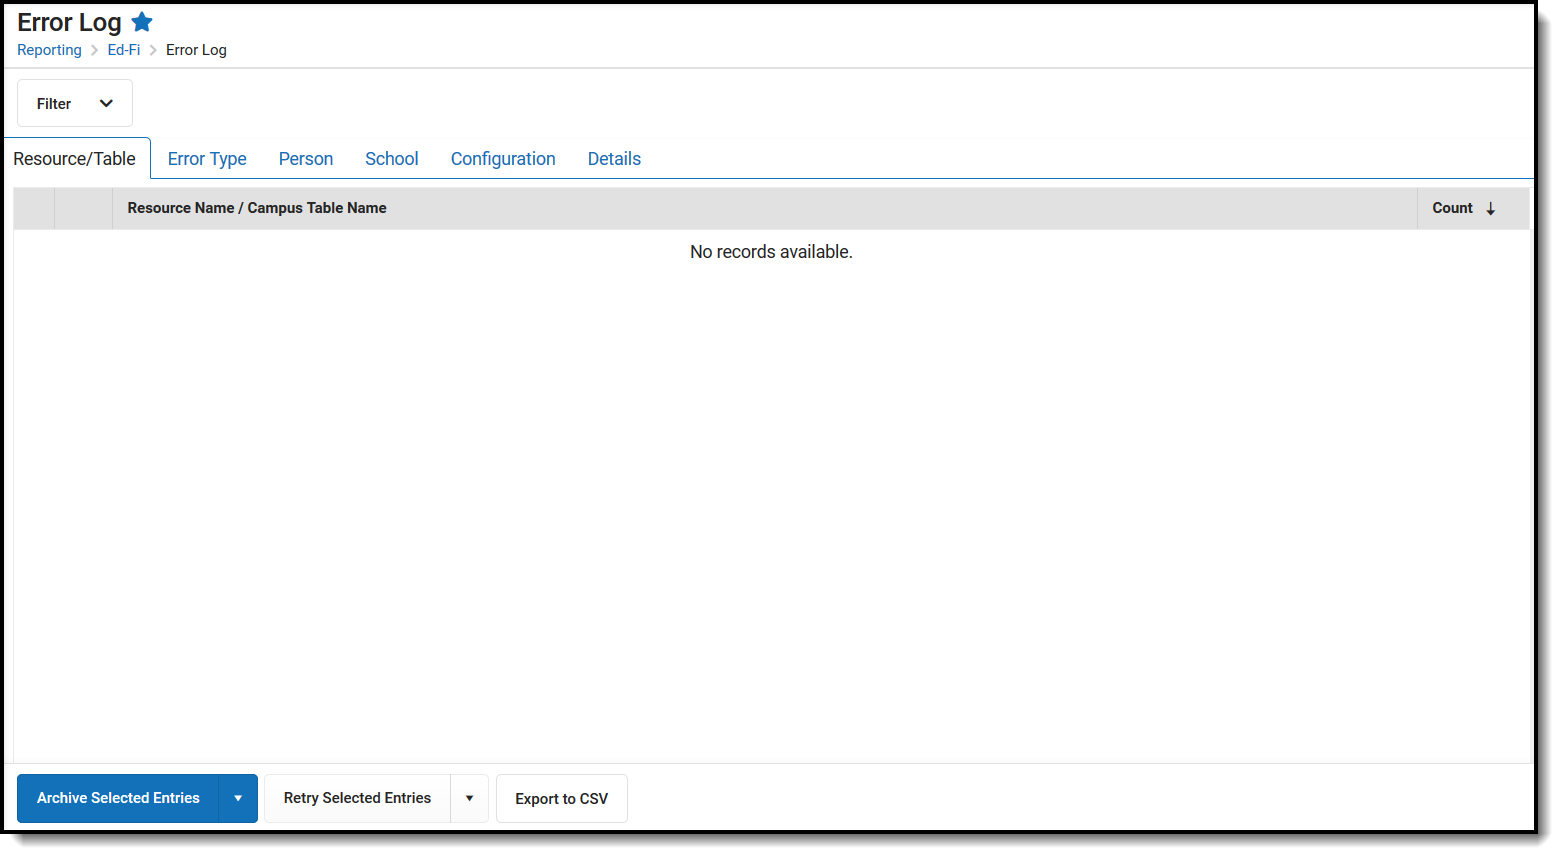
Navigate to the Error Log (System Administration > Ed-Fi > Ed-Fi Tools > Error Log). Review the Error Log and note any errors that exist. When you have addressed all of the underlying causes for the errors, click “Archive All Entries” on the Error Log tab (this will remove them from the list) and return to Step 9, (resyncing of data.
Step 13. Compare the Ed-Fi Information with the Data from the MARSS File
Submit your MARSS-B file and review the comparison report. Since Ed-Fi is continuously reporting and MARSS is a snapshot of data at a certain time, if you want to compare the MARRS file and Ed-Fi data, users can briefly turn off the Ed-Fi Resource Preferences to allow the MARRS file data to 'catch-up'. Districts should contact MDE directly for detailed information on the comparison report or refer to information posted on MDEs website here.
Step 14. Enable Data to Send Optional Demographics Information for Ed-Fi and MARSS
In order to consistently send optional demographics information for Ed-Fi and MARSS, the data must be enabled in the following areas:
A. MARRS B Extract Layout (MN State Reporting > MARSS B)
Mark the Report Legal Identities when Provided checkbox in order to report Demographics fields from Census > People > Identities > Active Identity > Protected Identity Information. Please refer to the MARRS B Extract Layout article for more information.
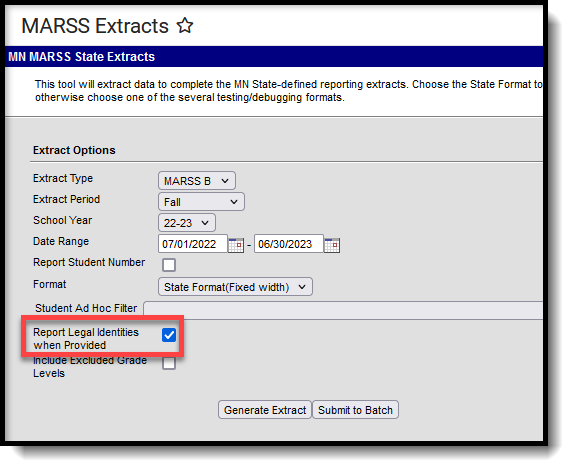 MARSS B Extract
B. In Ed-Fi (System Administration > Ed-Fi > Ed-Fi Configuration > Resource Preferences)
Mark the Report Legal Identities when provided checkbox on the Students and Student Education Organization Associations resource preferences. Please see the following articles for more information:
- Minnesota Ed-Fi Students Resource Preferences
- Minnesota Ed-Fi Students Resource
- Minnesota Ed-Fi Student Education Organization Associations Resource Preferences
- Minnesota Ed-Fi Student Education Organization Associations Resource
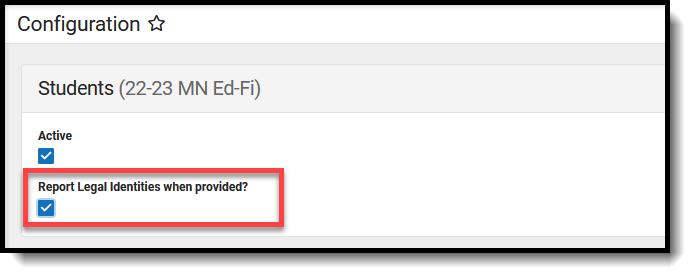 Students Resource Preferences
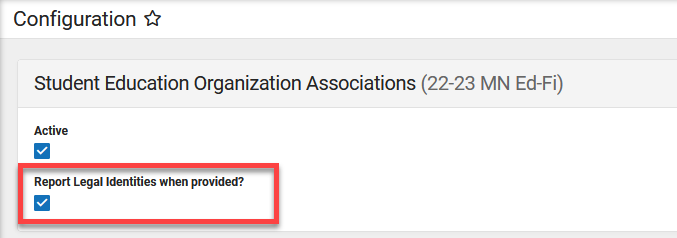 Students Education Organization Associations Resource Preferences
