If Campus Human Resources is enabled, Household information is maintained in the Personnel Master. See the following article for more information:
Classic View: Census > Households > Address
Search Terms: Addresses
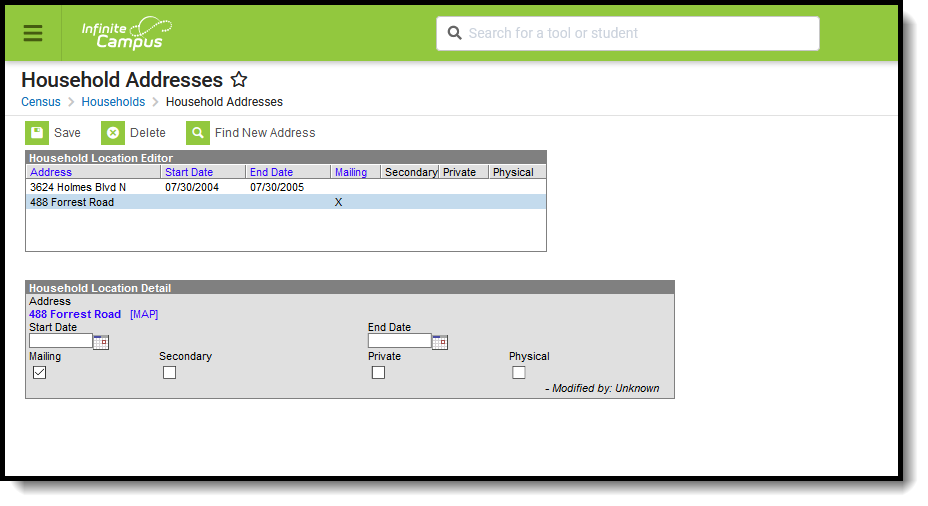
The Addresses tool within the household displays all addresses in which the family has resided. For legacy purposes, addresses should not be deleted, only ended, when a family moves. Like the household information to which it is tied, the addresses are used in generating reports that are sent home and in location extracts.
 Household Addresses
Tool Rights
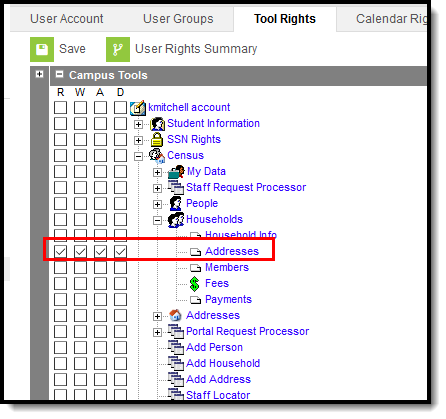
Users must be assigned the Census > Households > Addresses tool right.
- R = users can view household information
- W = users can edit existing household information
- A = users can add and save new household address information
- D = users can remove household address information
| Classic Navigation | New Navigation |
|---|---|
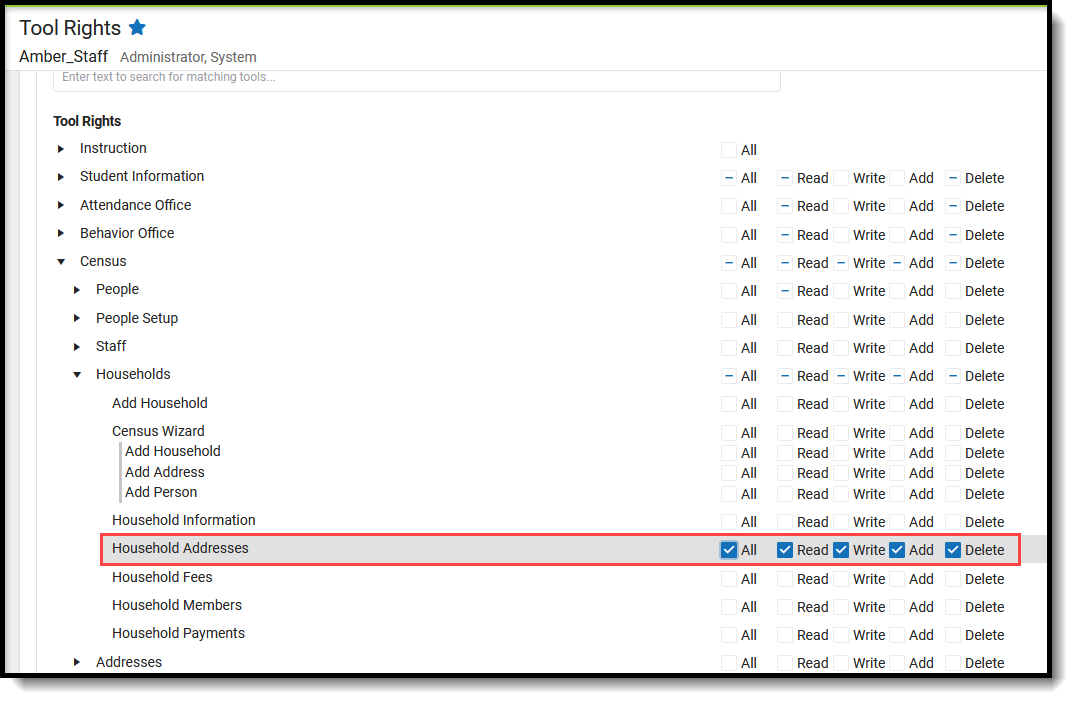 Household Address Tool Rights |
In order to add a new address that does not currently exist in Campus, users must also have RW rights to Census > Add Address. To add a new address that currently exists in Campus to an existing household, Census > Add Address tool rights are not necessary.
| Classic Navigation | New Navigation |
|---|---|
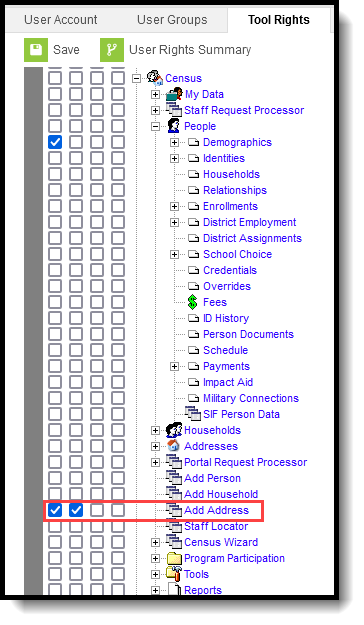 Add Address Tool Rights | 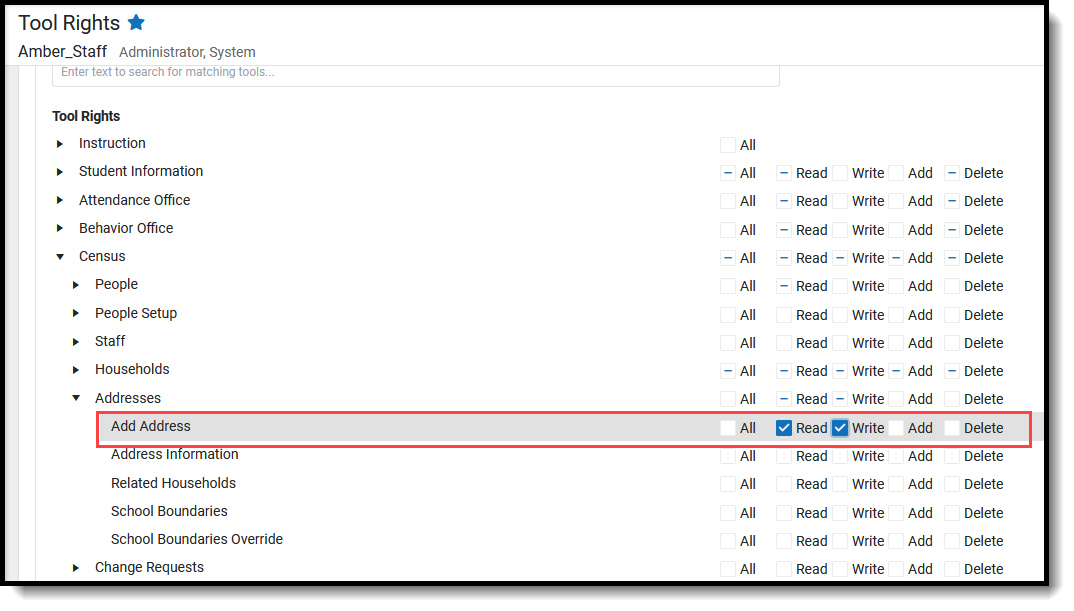 Add Address Tool Rights |
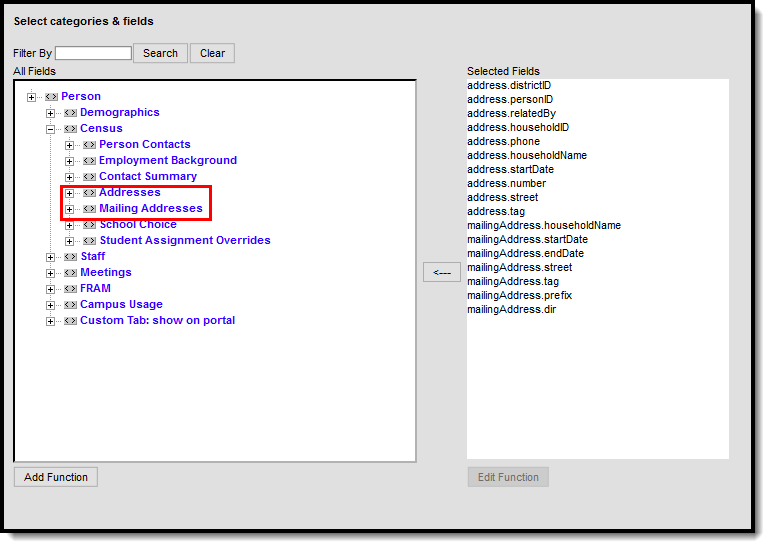
Address Information in Ad hoc Query Wizard
Transcript information is available in the Query Wizard for Census/Staff data types and Student data types.
- For Census/Staff data types, use the Addresses and Mailing Addresses folders in Person > Census.
- For Student data types, use the Addresses and Mailing Addresses folders in Student > Census.
Address Data Element Definitions
Data Elements | Definitions | Ad hoc Field Name |
|---|---|---|
Address | Lists the household address. This is a combination of all of the individual address fields that would be printed in the first line of a label - house number, street name, prefix, direction and apartment number. | address.addessLine 1 mailingAddress.addressLine1 |
Map | Opens a web browser that provides a visual representation of the address. | N/A |
Start Date | Date on which the household began residing at the address. Start dates are effective as of 12:00am on the entered date. | address.startDate mailingAddress.startDate |
End Date | Date on which the household stopped residing at the address. End dates are effective through 11:59pm on the entered date. | address.endDate mailingAddress.endDate |
Mailing | This is considered the Primary address and indicates the household receives mail at the designated address. Only one address for a household can be marked as Mailing. If the household has multiple addresses - a PO Box and a street address, the PO Box is marked as Mailing and the street address is marked as Secondary and as Physical. See the Addresses with PO Boxes section for more details. | N/A |
Secondary | Indicates it is a secondary address for the household. A household can only have one primary physical address at any given time. In the situation where a household has two physical addresses, one of them needs to be marked as secondary. | address.secondary malingAddress.secondary |
Private | Indicates the address information should remain at the school (not given to third party mailings). See the Private Checkbox Information article for more details. | address.privateAddress mailingAddress.privateAddress |
| Physical | Indicates the address is the household's physical location. | address.physicalAddress malingAddress.physicalAddress |
Manage Household Address Information
A household may have multiple addresses listed, and more than one address can be active, but only one is allowed to be marked as Mailing (the primary address) at any given time.
The mailing address can be a PO Box separate from the physical location, or the household has two addresses. Multiple Primary addresses are not allowed, which means one of the addresses needs to be marked as a secondary location and one needs to be marked as Mailing. When adding a second address to a household, if it is not marked as secondary, a warning message displays stating the addition of the new address ends the current address.
If a primary address is not defined, a message indicating such displays in the editor.
Note that when there is no primary address, reports that include addresses do not include information for that individual (like report cards, mailing addresses, attendance letters, etc.).
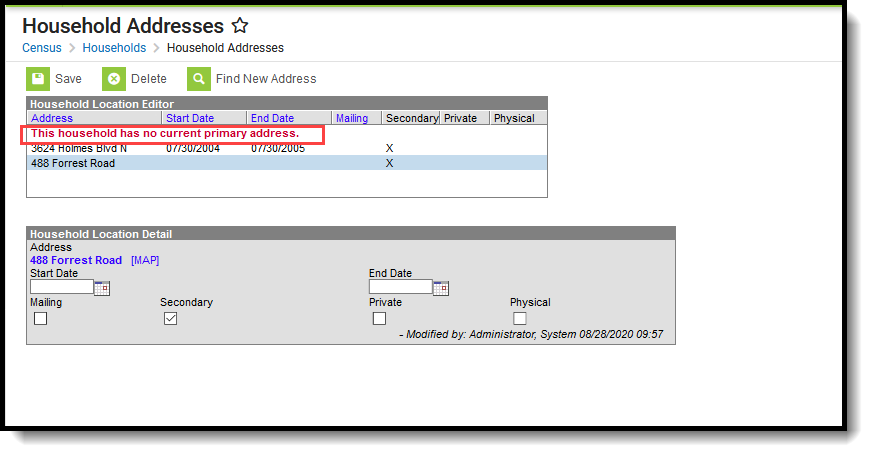 Household with no Primary Address
Manage Address Information
- Select the Address from the Household Location Editor. A Household Location Detail table displays below the editor view.
- Enter the Start Date of the family living in this home.
- If the family is moving away from this address, enter the End Date. If a moving date is known for the family, it can be entered at any time without adversely affecting the mailing properties of the address.
- Mark the address for Mailing if this is the address where mail for the household should be sent. When the mailing flag is marked on the household, all members of that household receive mailings to that address. See the Addresses with PO Boxes section for more details.
- Mark the Secondary box if this address is not the primary address for this household.
- Mark the Private box if this address should remain off of third party mailing lists. See the Private Checkbox Information article for more details.
- Mark the Physical checkbox if this address is the household's physical location.
- Click the Save icon when finished. The address is now listed with a start or end date in the Editor table.
To view a map of the address, click the Map link. This displays the Google Maps website.
Addresses with PO Boxes
A P.O Box checkbox exists on the Address Information editor. When marked, it is assumed that mail is sent to the P.O Box. When such an address is assigned to a household, two addresses should be assigned - the P.O. Box address, which would be marked as Mailing and is considered the Primary address, and the actual street address, which would be marked as Physical.
In the example below, the household has two street addresses assigned to it - one that is currently active and one that is no longer active. The active street address is marked as a Secondary address and can also be marked as Physical. The PO Box address is marked as Mailing and is used for any reports or letters that may be sent home.
 PO Box Mailing Address
The 488 address is marked as Physical. No reports or letters are sent to this location.
 Physical Location Address
Modification Alerts
Because a student's address is sensitive information, user tool rights should be closely monitored to this area. In addition to the tool rights, visual alerts display on the Address screen indicating a change was made to an address. A notification displays at the bottom of this editor that indicates which user modified the information and when. These display when hovering over the modified address in the Household Location Editor and on the Household Location Detail at the bottom.
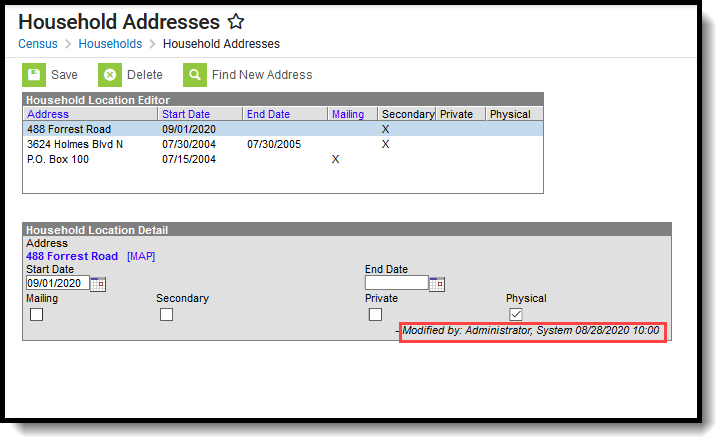 Address Modifications
Find a New Address
The process for adding an address to a household varies depending on the existence of the address in Campus.
When searching for households, note that addresses associated with a household that have been ended (end date is before today) or that begin in the future (start date is after today) display in red in the search results.
- Click the Find New Address icon in the action bar. An Add Address search screen displays.
- Enter appropriate search criteria for the new address. Matching results displays in the Address box to the right. If the selected address is already associated with the household, a warning message displays indicating such.
- When the Address Already Exists in Campus:
- Scroll through the results to find the correct option and select that address. The address is added to the Household Location Detail editor.
- Enter appropriate Start Dates for the new address.
- Mark the appropriate checkboxes for Mailing, Secondary, Private and Physical settings. See the Private Checkbox Information article for more details.
- Click the Save icon when finished. The new address displays in the Household Location editor. The old address is also still displayed in the editor.
- When the Address Does Not Exist in Campus:
- Click the New Address button. An Address Information editor displays.
- Enter appropriate details for the new address - number, street, etc.
- Enter the Start Date for the new address.
- Mark the appropriate checkboxes for Mailing, Secondary,Private, and Physical settings. See the Private Checkbox Information section for more details.
- Click the Save icon when finished. The new address displays in the Household Location editor. The old address is also still displayed in the editor.
Note that the New Address button requires tool rights to the Add Addresses tool.
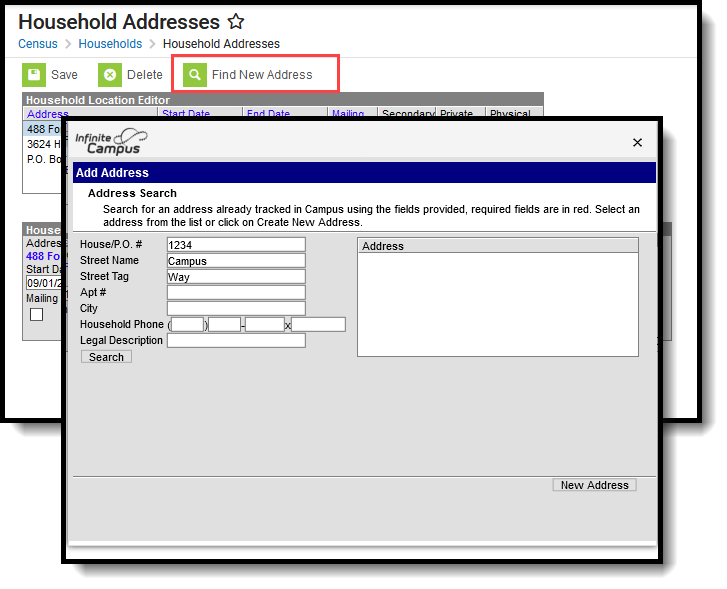 Find New Address
