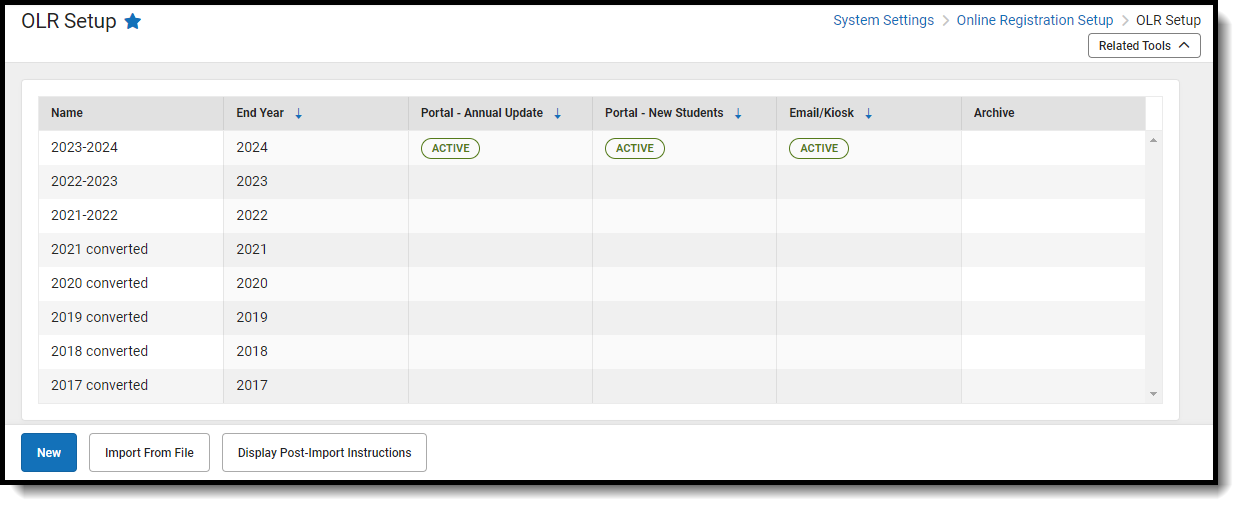
Tool Search: OLR Setup
The OLR Setup tool determines which configuration is available for application entry, which configuration displays in the Campus Portal, and which school year's applications can be submitted.
At least one Configuration Group needs to exist in the same year as the current active year in Campus for OLR to properly determine if a person is an active student. A warning displays in the OLR Information Center when a matching Configuration Group does not exist.
 OLR Setup
OLR Setup Detail Descriptions
| Field | Descriptions |
|---|---|
Name Required |
The name of the configuration as it displays in the OLR Setup tool. |
End Year Required | The end year of the school year. Indicates the school end year for registering students. If the district is allowing applications to be entered for the 2024-25 school year, the end year entered is 2025. For annual update applications, the student would require an enrollment in the end year, for the parent to register the student. |
| Required | When checked, this will indicate on the Campus Parent portal that an individual configuration is required to be completed. If the "Force all required OLR configurations in the current active school year to be completed before accessing the Parent Portal" setting is enabled in Online Registration Portal Settings, parents will be required to complete Online Registration for this configuration before being able to use the other features of the Parent Portal. |
| Copy config from Required | Copies the selected OLR configuration from a previous year to copy from. This copies all settings and customizations related to the selected configuration. |
Display Name Required |
The name of the configuration as it displays in the Portal. |
| Open Enrollment Configuration | Use the drop-list to select the open enrollment configuration that aligns with the Online Registration Configuration, if applicable. This field defaults to null. NOTE: Do NOT populate this field unless you are tying open enrollment with online registration. |
Archive |
When checked, archives the Configuration so it no longer appears in dropdown lists in Processing or OLR tools, excluding the OLR Setup. |
Portal - Annual Update Start Date Required |
Entered date indicates the start date that allows parents to access OLR who have a student that is enrolled in the OLR active school year indicated above. The process is used for existing parent/guardians to verify data for existing students or add new students. The application is pre-loaded with address, household parent/guardian, emergency contacts, other household members and existing students. Dates are entered in mmddyy format or can be chosen by selecting the calendar icon. |
Portal - Annual Update End Date Required |
Entered date indicates the end date that no longer allows parent/guardians to complete OLR for existing students. Dates are entered in mmddyy format or can be chosen by selecting the calendar icon. |
Portal - New Student Start Date Required |
Entered date indicates the start date that allows parents to access OLR who have a student who is enrolled in the OLR active school year indicated above. These dates allow existing parent/guardians to register new students to an existing family, such as a Kindergarten, adopted/foster child. The application automatically loads with household, parent and emergency contact information. The application does not include any existing student information. Dates are entered in mmddyy format or can be chosen by selecting the calendar icon. |
Portal - New Student End Date Required |
Entered date indicates the end date that will be used to no longer allow parent/guardians to complete OLR for existing family new students. Dates are entered in mmddyy format or can be chosen by selecting the calendar icon. |
Email/Kiosk Start Date Required |
Entered date indicates the start date that application status emails will be delivered for kiosk submitted applications. Dates are entered in mmddyy format or can be chosen by selecting the calendar icon. |
Email/Kiosk End Date Required |
Entered date indicates the end date that application status emails will be delivered for kiosk submitted applications. Dates are entered in mmddyy format or can be chosen by selecting the calendar icon. |
Enrollment Logic
The following enrollment logic is used for Online Registration (OLR):
- If the enrollment is in the future and lasts at least a day, the student is included in OLR.
- If the enrollment started in the past and ends in the future, the student is included in OLR.
- If the enrollment is in the future and ends on the same day it starts, the student is NOT included in OLR.
- If the enrollment started and ended in the past, the student is NOT included in OLR.
- If the enrollment is marked as No Show, the student is NOT included in OLR.
Enter OLR Setup Data
- Click the New button. The OLR Setup Detail screen displays.
- Enter the Name.
- Enter the Display Name.
- Enter the End Year.
- Enter the required date fields.
- Click the Save button when finished. The new year displays in the OLR Setup tool.
Importing Configuration Groups
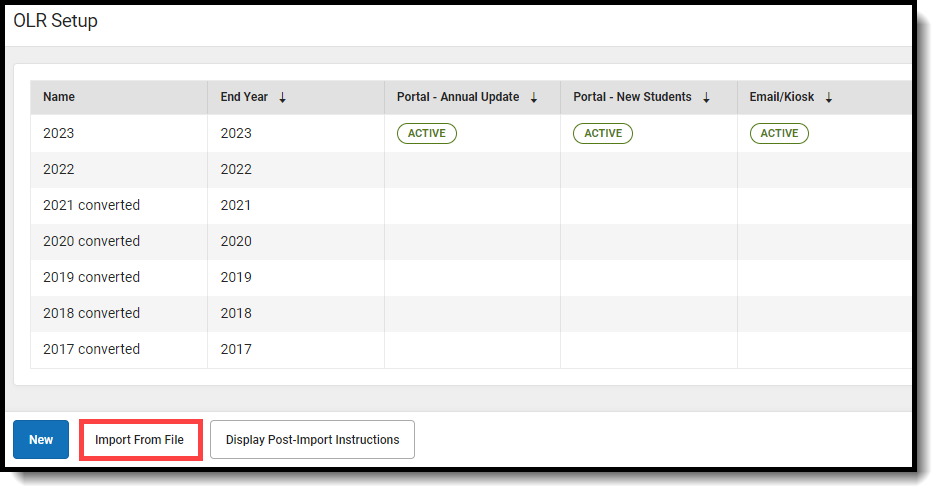
- Click the Import From File button.
- Click the Select Files button and select your file.
- Click the Import button. If the import is successful, the Import Complete message will appear.
- There is already an existing Configuration Group with the import name. To successfully import the configuration, the existing Configuration Group with that name will need to either be deleted or renamed.
- The OLR version of the import file is greater than the OLR version of the importing site or if the OLR version of the import file is less than the minimum OLR import version currently allowed.
About the Import
- The data for the main Configuration Group record will import exactly the same as it was exported, with the following exceptions:
- The name will be “Import-” and the name of the imported Configuration group (e.g., an import file for a Configuration Group named “2024” will create a Configuration Group named “Import-2024”).
- The dates will be changed to the day before the import date for all date fields, so the Configuration Group will not start out active.
- The OLR System Settings will import exactly the same as it was exported, except the “Allow Batch Posting of Students with Medications or Health Conditions” option is set to be disabled.
- Language Groups import:
- If there is a Language Group in the importing site that has the same Name or Code as a Language Group in the export file, then that existing Language Group’s ID will be used when applicable in the import.
- If there is not a Language Group in the importing site with a matching Name or Code as a Language Group in the export file, then a new Language Group will be created using the information in the export file, with the following exceptions:
- The Language Group will not be active.
- The Language Group’s Preferred Language value will not be set.
- The new Language Group’s Primary Language Code will not be set.
- OLR Literals and Lists Banks will be imported with exactly the same data as in the export file.
- OLR Builder Pleat and Field records will have the exact same data as in the export file. This includes the Post Object and Post Element values, even if there is no matching location in Campus on the importing site. Once the import is complete, see the OLR Information Center tab for a list of Builder fields set to post to locations that do not exist.
- OLR Status records will import exactly the same as they were exported, with the following exceptions:
- If the importing district is not the same as the exporting district, then the Default Message value will not be set.
- Letter templates are not included in the OLR import. Different districts will have specific information, such as phone numbers and addresses, that should not be included in messages from another district. In the case of the same district, the letters likely already exist on the importing site, or can be easily transferred manually.
- OLR Notification Editor will import exactly the same as they were exported, with the following exceptions:
- If the importing district is not the same as the exporting district, then the rule will be set to be not active.
- If the importing district is not the same as the exporting district, then the Only Send For School value will be changed to Any School.
- If the importing district is not the same as the exporting district, then the User Group To Receive Notification value will be set to be invalid so that it will need to be chosen manually when the rule is later activated.
- Document Upload Option records will import exactly the same as they were exported, with the following exceptions:
- If the importing district is not the same as the exporting district, then the Post Tab value will be changed to Person Documents.
Exporting a Configuration Group
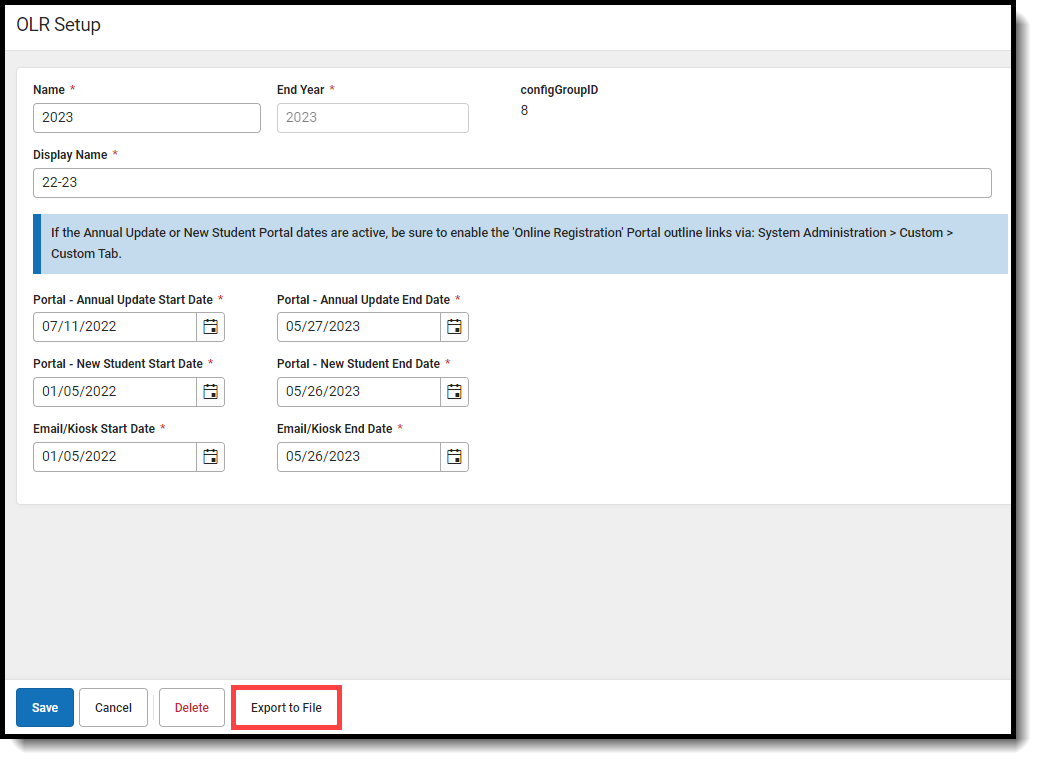
- Select one of the Configuration Groups available.
- Click the Export to File button. A confirmation message will appear.
