Tool Search: User Account Type Wizard
The Account Type Wizard allows you to convert existing Campus user accounts from local Campus login authentication to SAML SSO or LDAP authentication. You can search for and convert a specific user account(s) or a large group of accounts using an ad hoc filter.
You may also use this tool to convert Campus accounts from SAML SSO or LDAP authentication to local Campus authentication.
Prerequisites
- If Using SAML SSO: SAML SSO must be enabled and configured correctly via the SSO Service Provider Configuration tool.
- If Using LDAP Authentication: LDAP authentication must be enabled via the LDAP Authentication tool.
Only users assigned a Product Security Role of Student Information System (SIS) are allowed to use this tool.
Step 1. Search for User Accounts
The first step in configuring Campus accounts is to search for and identify which accounts will be converted. Accounts can be identified by generating a list based on an Ad hoc Filter or by searching for accounts using Username, Last Name, First Name, their homepage, or their account type information.
In the example below (Image 2), the user identified the user accounts by selecting an existing Adhoc Filter, selecting the User Account Type of LDAP, and clicking the Search Users & Add to Search Results button.
The identified accounts (Christopher, Kelly, etc) are then placed in the Search Results window where they can be individually selected and added to the list of people who will have their authentication converted.
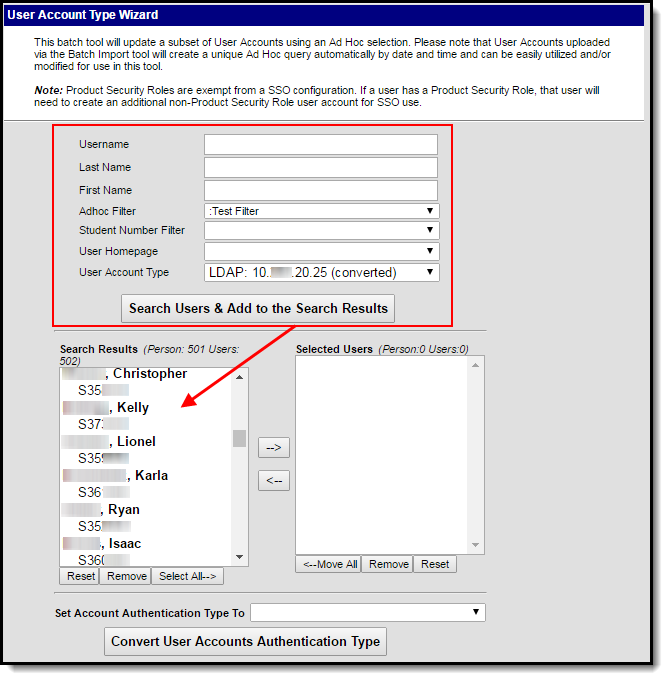
Image 2: Identifying Accounts via Adhoc Filter
Step 2. Determine Which Users to Convert
Once user account search results have been generated and user accounts are identified, you must add the appropriate accounts to the Selected Users window. These users will have their authentication converted to the value selected in the Set Account Authentication Type To field.
Select the user account from the Search Result window and click the right arrow button (—>). The user name and account will move from the Search Results window to the Selected Users window (see Image 3).
To remove a user account from the Selected User window, select the user account name and press the left arrow button (<—). The user name and account will move from the Selected Users window to the Search Results window.
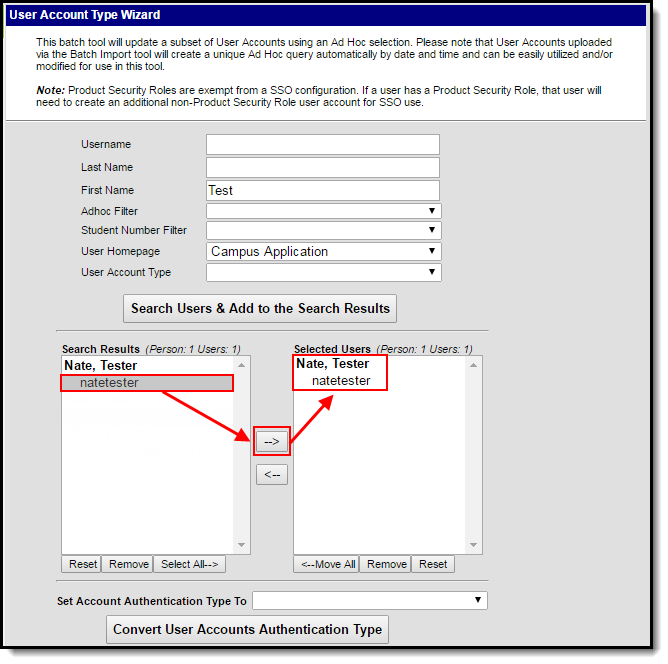
Image 3: Selecting Users for Conversion
Step 3. Determine the Authentication Method
Once all accounts have been identified and properly added to the Selected Users window, a Set Account Authentication Type To value (Image 4) must be selected. See the table below for more information about field values.
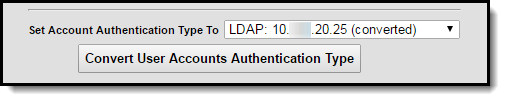
Image 4: Authentication Type Field
| Allow Only Local Campus Authentication | |
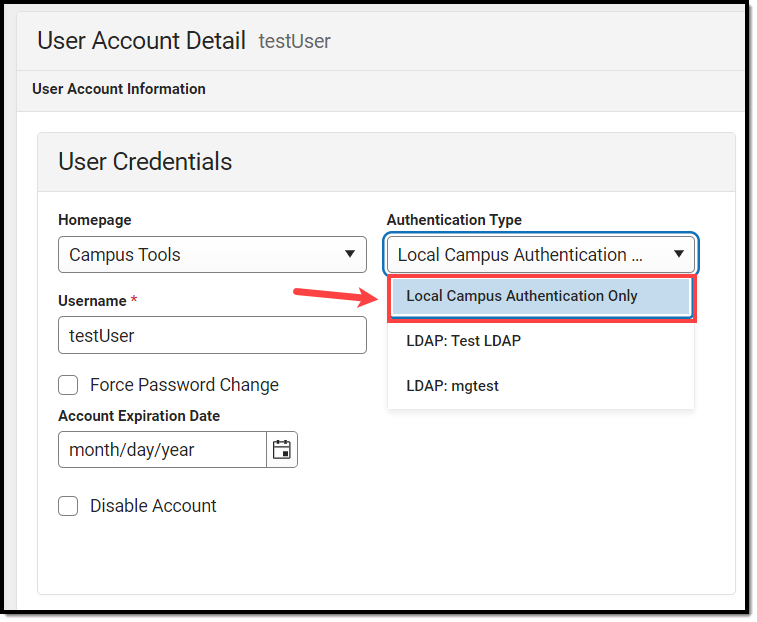
Selecting this option means all identified user accounts will use their local Campus District ID and password to log into Campus. The account password is also managed within Campus and can be reset via the Reset Password button in the User Account tab. | |
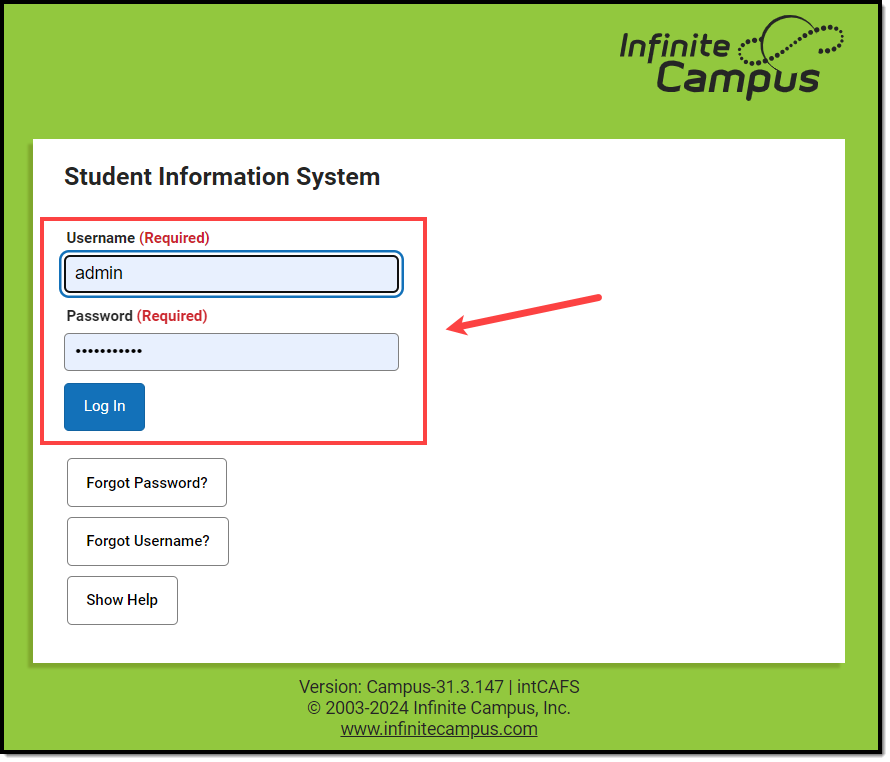
The User Account tab will allow Administrators with proper tool rights to initiate a password reset via the Reset Password button, and the Authentication Type field will show a value of 'Allow Only Local Campus Authentication' (see image below).
| Account users will log into Campus by entering their local Campus ID and password (select image below).
|
| Allow Only SAML Authentication | |
| Selecting this option means all identified user accounts will use their SSO username and password to log into Campus. This also means account passwords are managed outside of Infinite Campus, and your network administrator must make any modifications to credentials. Locked user accounts with a Local Authentication type are not converted to SAML during the conversion process but remain with a Local Campus Authentication type. | |
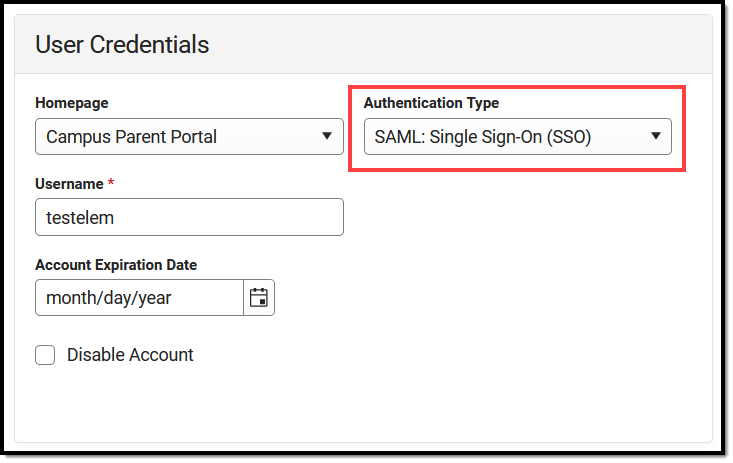
The User Account tool will not allow users to initiate a password reset (all password credentials are managed by the network administrator outside of Infinite Campus) and the Authentication Type field will show a value of 'SAML: Single Sign-On (SSO).
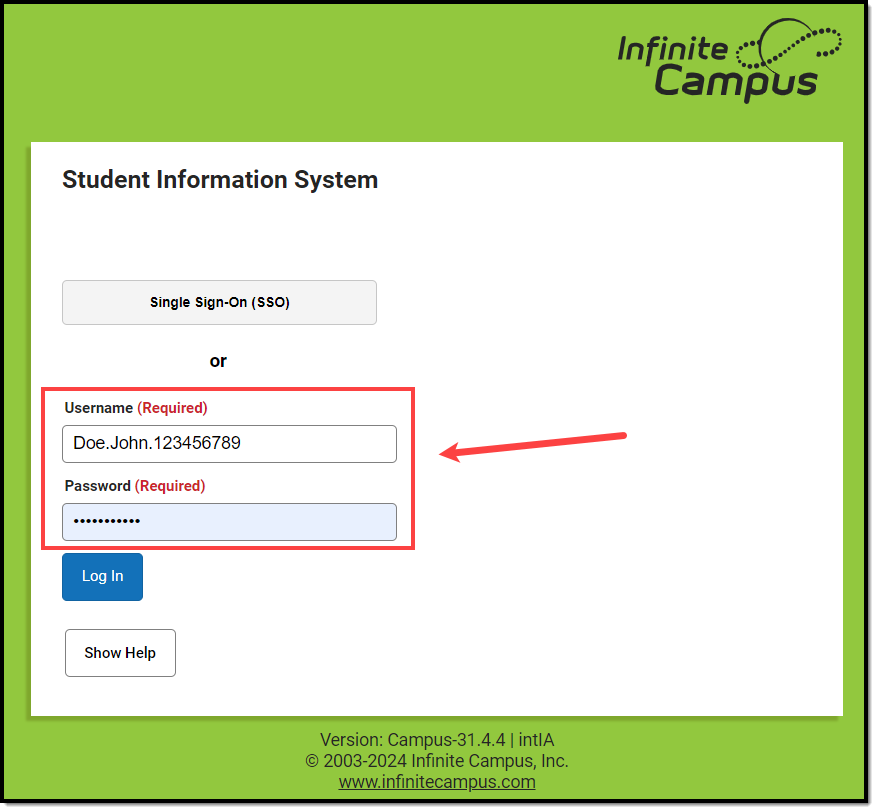
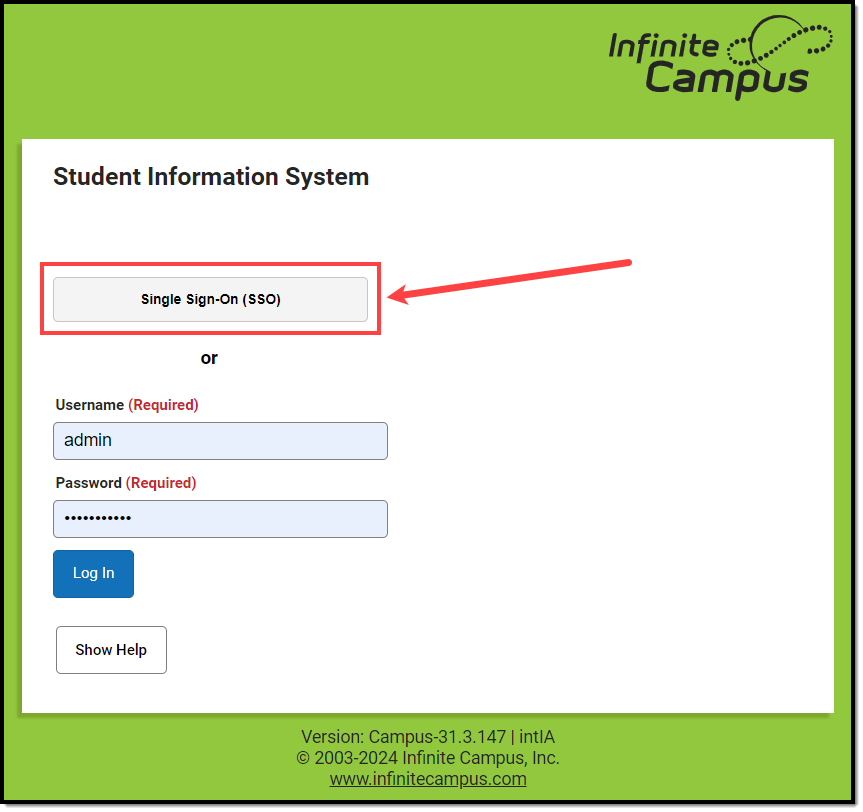
| Account users will log into Campus by clicking the Single Sign On button and entering their SSO username and password (select image below). The name of this button is entered and managed in the SSO Service Provider Configuration tool.
|
| Allow Only LDAP Authentication | |
| Selecting this option means all identified user accounts will use their LDAP username and password to log into Campus. This also means account passwords are managed outside of Infinite Campus and your network administrator must make any modifications that need to be made to credentials. Locked user accounts with a Local Authentication type are not converted to LDAP during the conversion process but remain with a Local Campus Authentication type. | |
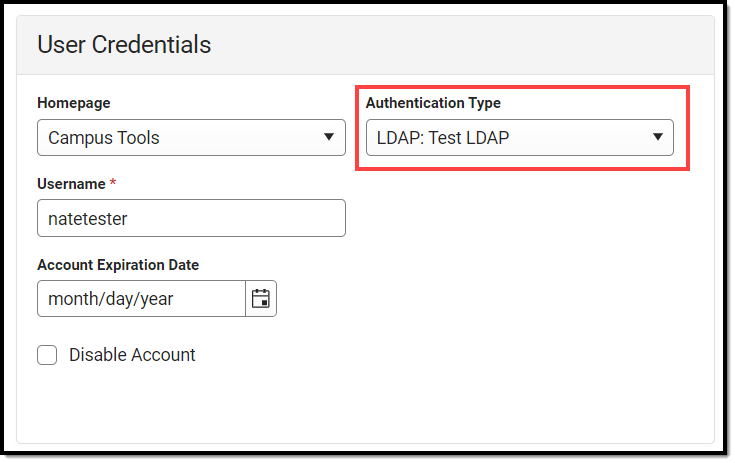
The User Account tool will not allow users to initiate a password reset (all password credentials are managed by the network administrator outside of Campus) and the Authentication Type field will show a value of 'LDAP Authentication' (or whatever your LDAP instance was named when setup).
If your environment has more than one LDAP instance configured, you will also need to select the LDAP Configuration. This is the LDAP server to which the user's account is tied. | Account users will log into Campus by entering their LDAP credentials into the local username and password fields. (select image below).
|
Step 4. Convert User Accounts
Once user accounts have been added to the Selected Users window and a Set Account Authentication Type To value has been set, convert the accounts by selecting the Convert User Accounts Authentication Type button (see Image 5).
A pop-up message will appear, indicating how many user accounts were successfully converted.
The User Account Type Wizard can convert up to 9000 accounts per time it is run. If you need to convert more than 9000 accounts, run the tool multiple times until all accounts are converted (assuming you allow for conversion to complete between each tool run).
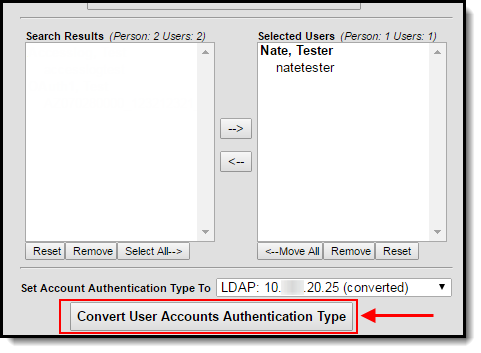
Image 5: Convert User Accounts
Converting User Accounts Back to Campus Authentication Accounts
Converting user accounts back to a Campus-authenticated account will require using the User Account Batch and Import Wizards to reset passwords to use local Campus account passwords. When local Campus accounts are converted to third-party authentication or uploaded as third-party authentication records, the password will either be forgotten or non-existent since user accounts can be uploaded without a password. Because of this, when a selection of SSO or LDAP user accounts are converted to Campus accounts, an Ad Hoc filter with the list of person IDs will be created by default so the User Account Batch Management workflow can be utilized to reset the passwords.
The workflows can be found here:
The Ad Hoc filter will have a naming convention of "UATW_PersonList_" plus the date and time of the creation of the ad hoc (YYYY-MM-DD-HH-MM-SS).
Generating a List of LDAP Enabled Students/Staff
Tool Search: Filter Designer
You can filter and report which students and staff members have LDAP enabled (or disabled) by using the Filter Designer and selecting the usage.ldapAccount field.
For detailed steps of this process, see the Generating a List of LDAP Enabled Students/Staff section of the LDAP Authentication article.
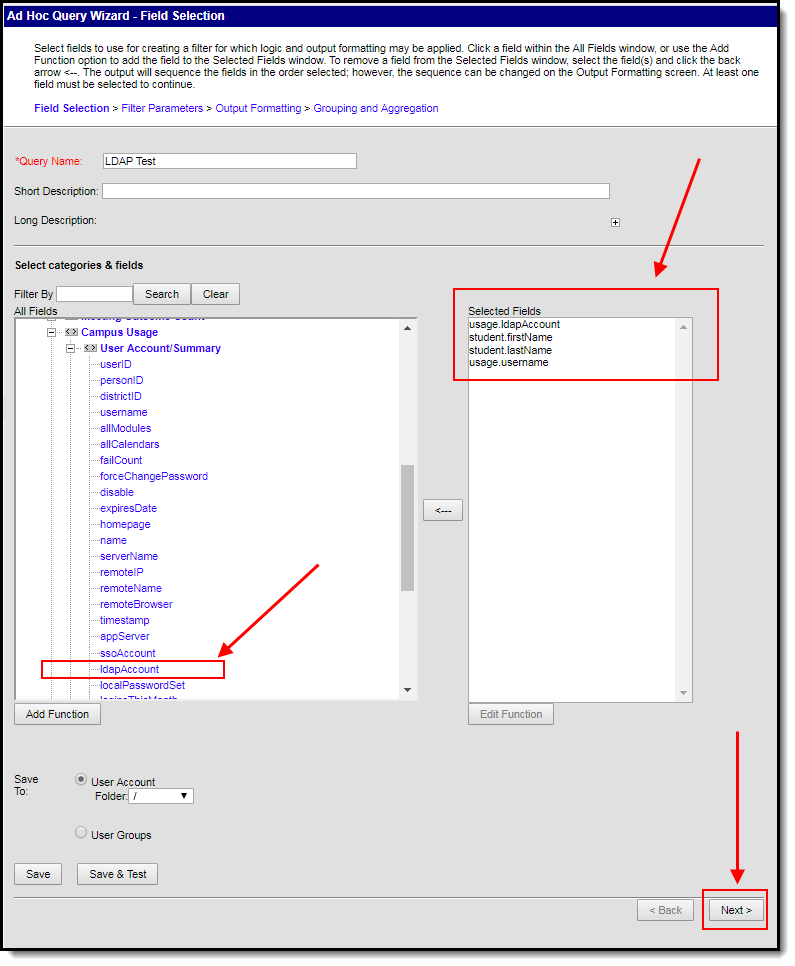
Image 6: LDAP Enabled Filter
Generating a List of Single Sign On (SSO) Enabled Students/Staff
Tool Search: Filter Designer
You can filter and report which students and staff members have SSO enabled (or disabled) by using the Filter Designer and selecting the usage.ssoAccount field.
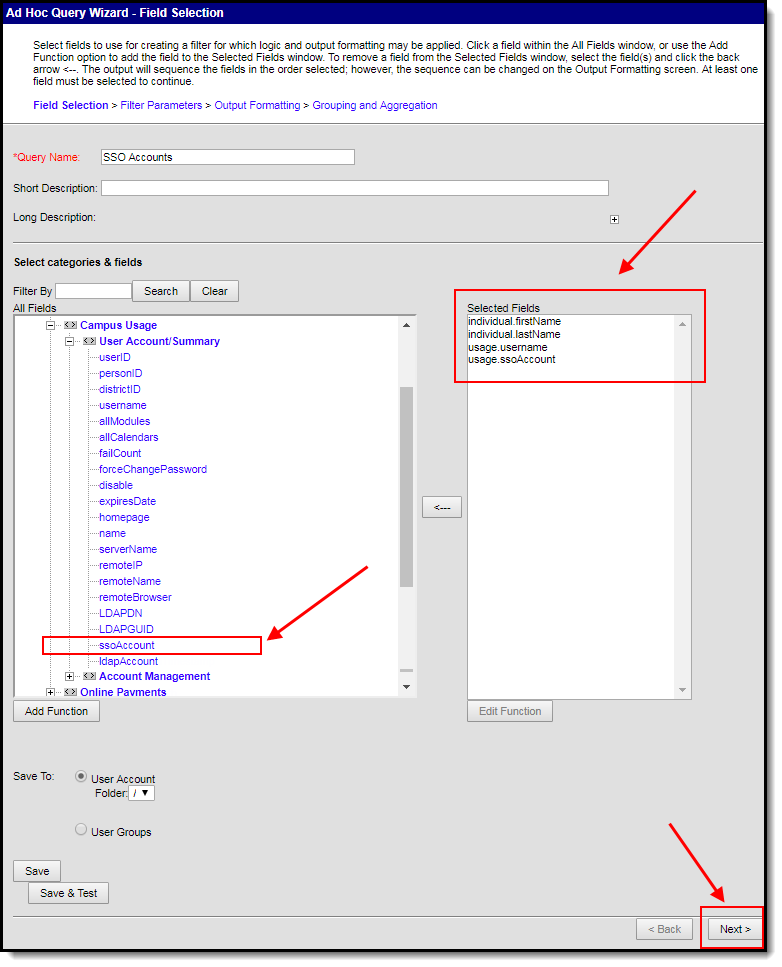
Image 7: Creating an SSO Account Filter
Once you have selected the usage.ssoAccount field, Campus recommends adding additional fields to the filter, preferably identifiers such as first name, last name, username, etc to help in identifying and differentiating between filter results. Below are a few examples:
- student.firstName
- student.lastName
- usage.username
Click the Next button. You be redirected to the Filter Parameters editor (Image 8). To generate a list of users with SSO accounts, give the usage.ssoAccount the following values:
- An Operator of =
- A Value of 1 (see image below).

Image 8: Entering Filter Parameters
Once you have entered in the proper filter parameters, select the Save & Test button. A report will be generated in a separate window, displaying users who are SSO authenticated (Image 9).
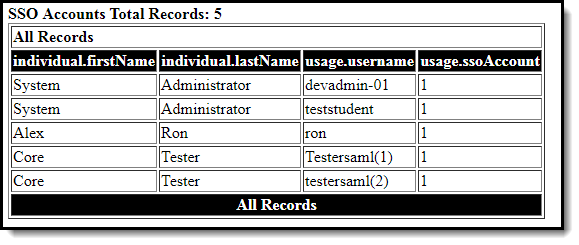
Image 9: Example of an SSO Account Report
