Classic Path: Student Information > Response to Intervention > Caseload
Search Terms: RTI Caseload
The Response to Intervention Caseload tool allows you to view and manage your RTI students. From here you can access the student's Summary, Team Member, Documents and Contact Log information as well as enter an intervention delivery record and finalize the student's RTI plan.
View Your Caseload
As a staff member designated Response to Intervention on your District Assignment, you are able to view a list of students in your school who you are considered a Team Member via the Caseload tool.
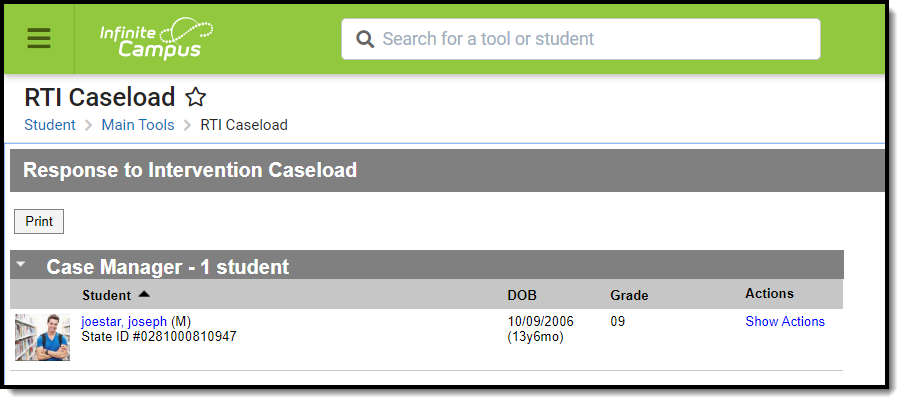
To view a list your RTI students, click Caseload in the Campus Index (see Image 1). A list of students will appear on the right in the Intervention Provider section.
Image 1: View Your Caseload
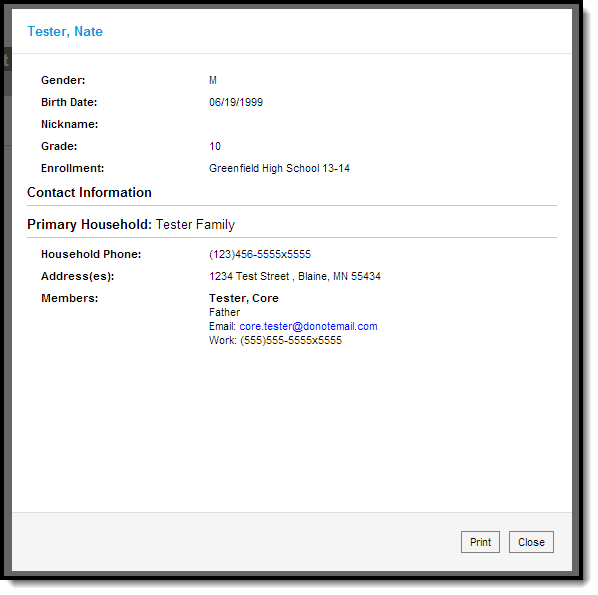
Selecting a student's name will generate a pop up detailing the student's demographic, contact and primary household information (Image 2).
Image 2: View RTI Student Information
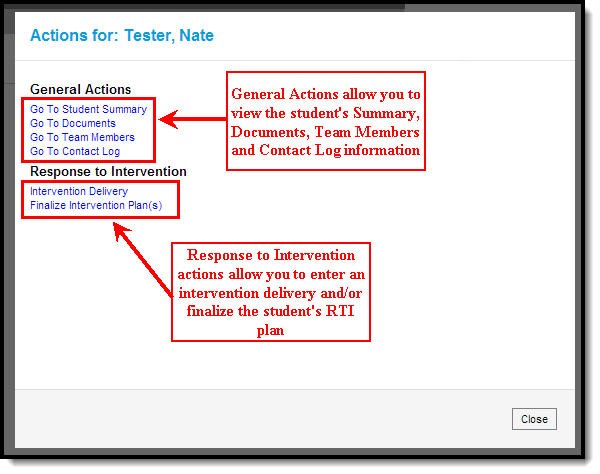
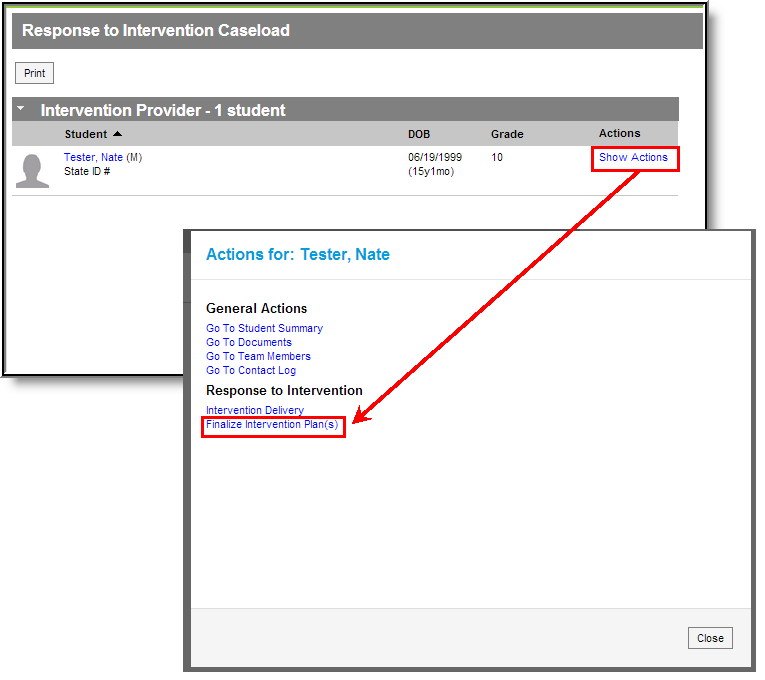
Selecting the Show Actions hyperlink for a student generates the Actions pop up where you can view the student's Documents, Team Members and Contact Log information as well as enter an Intervention Delivery and/or finalize the student's RTI plan (see Image 3).
Image 3: View RTI Actions
Record and Intervention Delivery Time
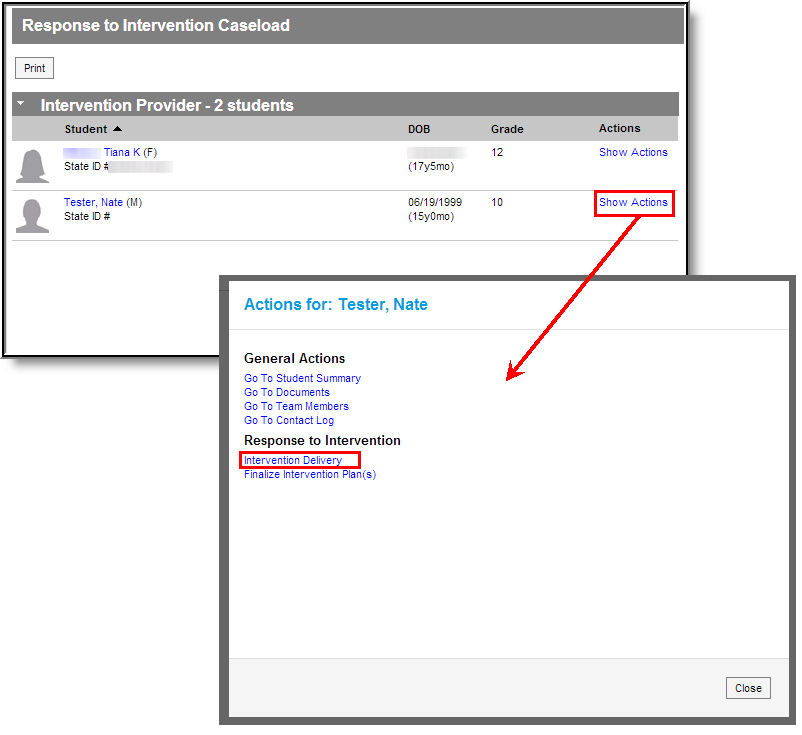
You can record an intervention delivery in your Caseload by selecting Show Actions for the designated student and clicking Intervention Delivery (Image 4).
The Intervention Delivery editor will only appear if the student has a locked RTI plan on their Documents tab.
Image 4: Record an Intervention Delivery Event
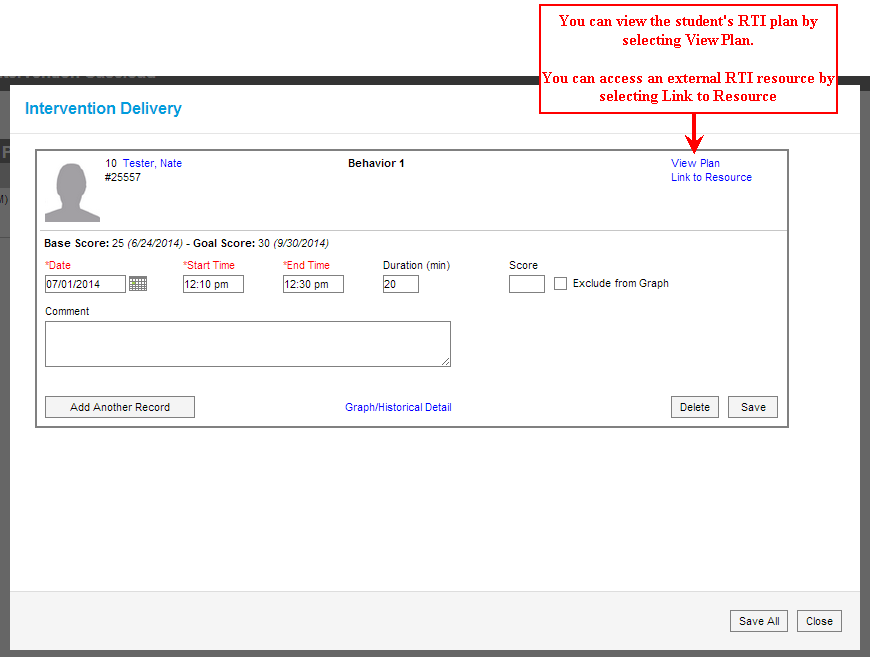
Once Intervention Delivery is selected, the Intervention Delivery editor will appear (Image 5).
Image 5: Enter an Intervention Delivery
To Enter a New Intervention Delivery:
If you are unfamiliar with the student's RTI plan, select the View Plan and/or Link to Resource hyperlinks in the upper right-hand corner to familiarize yourself with their plan prior to entering an intervention delivery (Image 5).
- Enter the Date in which the intervention occurred.
- Enter the Start Time of the intervention.
- Enter the End Time of the intervention.
- The Duration (min) will automatically calculate how long the intervention occurred based on the Start Time and End Time entered. You can modify this value if necessary.
- If the intervention includes scoring, enter the Score the student received for the intervention.
- If you would like the score to not appear on the student's RTI graph (accessed by click the Graph/Historical Detail hyperlink at the bottom of the editor), mark the Exclude from Graph checkbox.
- Enter any Comments about the intervention delivery.
Select the Save icon. The record is now saved for the student.
Edit or Delete an Intervention Delivery
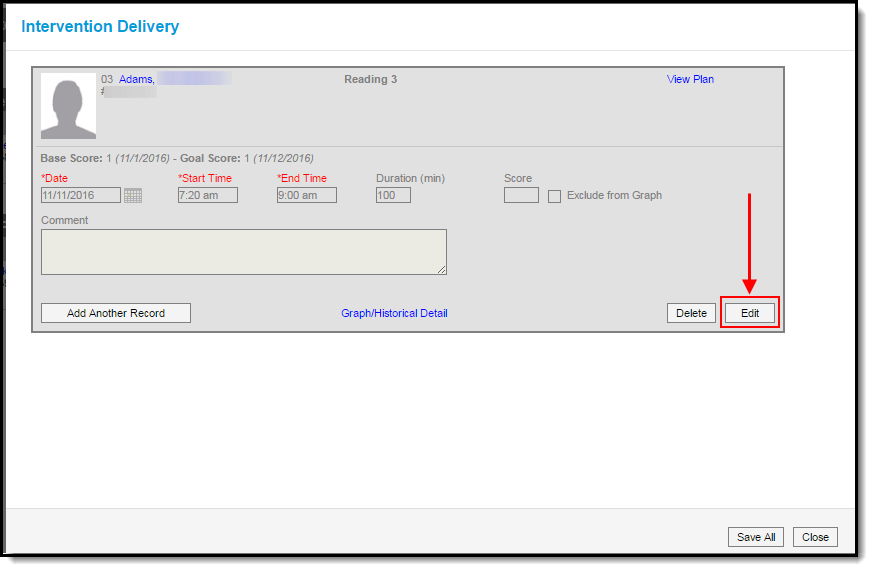
The user who created the intervention delivery record can edit and/or delete any records they've created, regardless of the time, as long as the RTI plan is still in effect.
To edit an intervention delivery, click the Edit button (Image 8), enter updated information within the available fields and click the Save icon. The record is now updated with newly entered information.
Once an RTI plan End Date has passed, no editing is allowed without unlocking the RTI plan, changing the End Date to the current day (or a future date) and re-locking the plan.
Image 6: Edit an Intervention Delivery
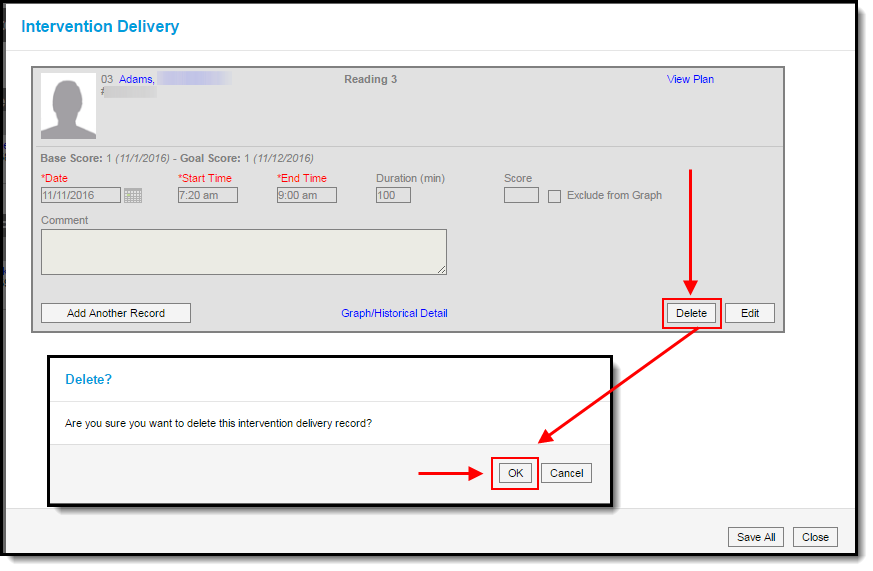
To delete an RTI intervention delivery, click the Delete button (Image 7). A message will appear, asking you to confirm deletion of the record. Click OK to permanently delete the record from Campus.
Deleted intervention delivery records will not appear on the Plan PDF or the graph.
Image 7: Delete an Intervention Delivery
Finalize Student Intervention Plan(s)
Once a student's RTI plan is complete, you may finalize and close the plan by selecting and the Show Actions hyperlink and clicking Finalize Intervention Plan(s) (see Image 8).
Image 8: Finalizing an Intervention Plan
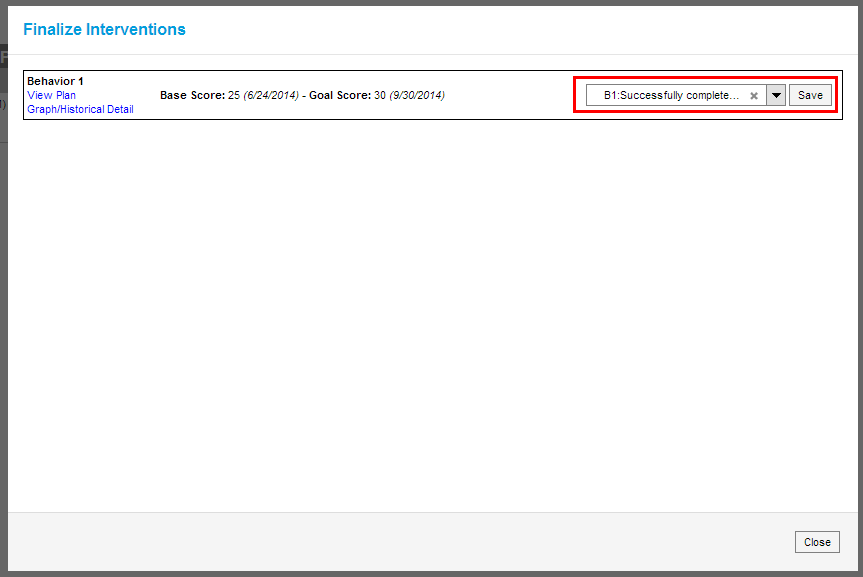
Select an Intervention Success Status value in the dropdown list found on the far right of the plan's details (see Image 9). Once a success value has been selected, select the Save icon.
Image 9: Select an Intervention Success Status
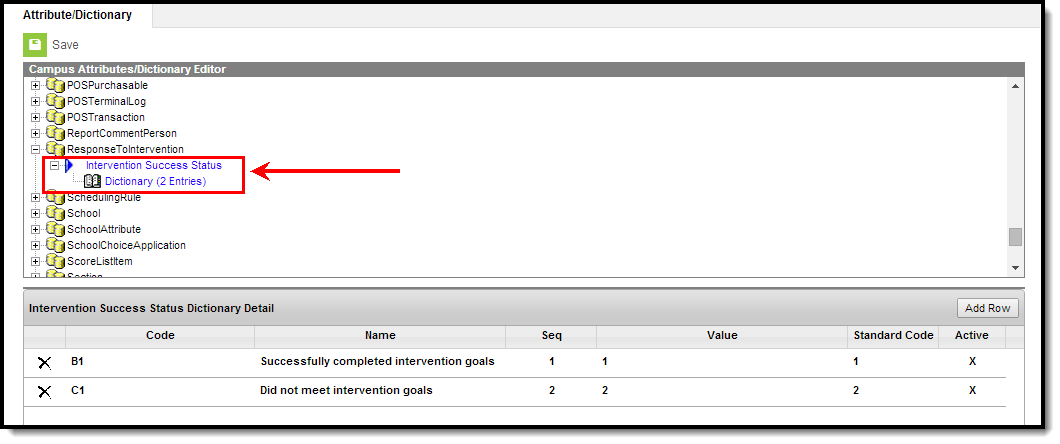
Intervention Success Status values are created in the Attribute/Dictionary. Values must be created here in order for users to have values to select in this dropdown list (see image below).
Once an Intervention Success Status value has been selected and saved, the RTI plan will appear grayed out (Image 10).
Image 10: Example of a Finalized Plan
