Tool Search: Add Resource Wizard
The Add Resource Wizard allows you to add non-employee resources like contractors who work within the district. The wizard walks you through entering contact information and Assignment information. non-employee resources may be assigned to more than one Assignment at a time.
Complete the following steps to add a new non-employee resource to Resource Management:
Step 1. Search for Non-Employee Resources
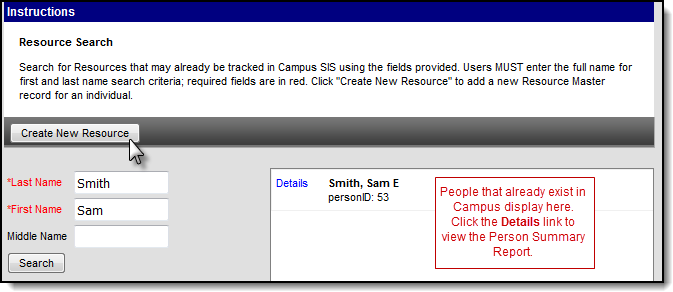
On the first screen of the wizard, search for non-employee resources that may already be tracked in Campus. When you search, people who already exist in Campus display in the search results.
| If... | Then... |
|---|---|
the person does not display in the search results | click the Create New Resource button and continue to Step 2. Enter Contact Information. |
the person already exists in Campus | click their name and continue to Step 2. Enter Contact Information. You cannot add students as ron-employee resources. |
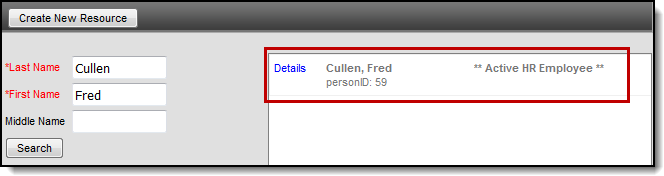
| the person has a Work Assignment | you cannot add or modify them using the Resource Wizard.
|
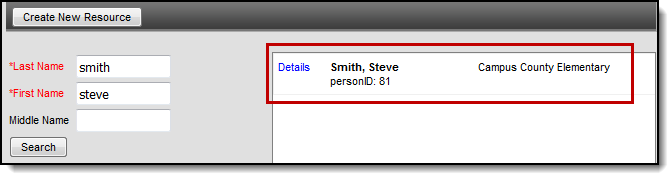
| the person is already a non-employee resource | you cannot add them using the Resource Wizard; however, you can click their name and make changes. The school to which they are actively assigned displays to the right of their name.
|
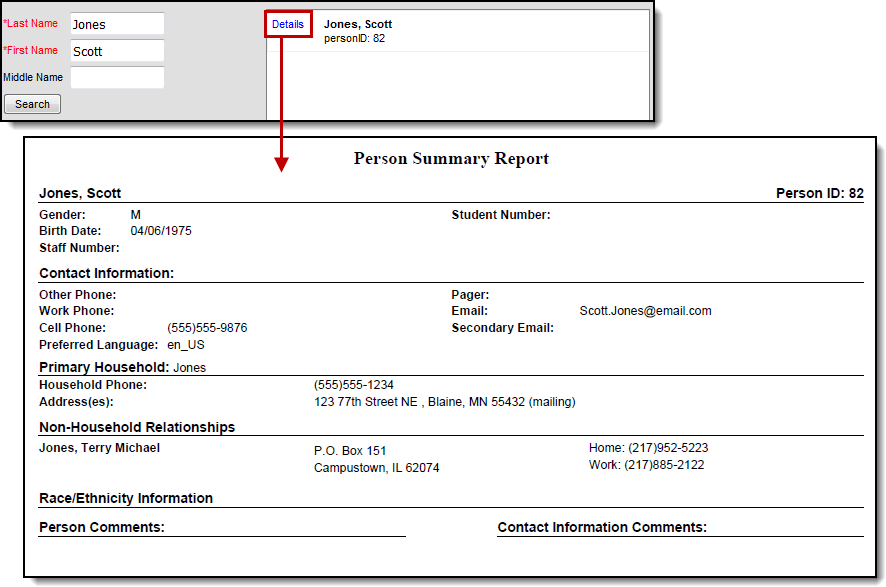
If the person already exists as an employee or non-employee resource, click the blue Details link to display the Person Summary Report. The Person Summary report provides contact and household information that can help you identify the person.
Step 2. Enter Contact Information
The Contact Information section allows you to enter general contact information like the person's name, phone number, and email address.
If the person already exists in Campus:
- the PersonID field will display their ID. Otherwise, that field displays Auto and Campus will assign an ID once you save the record.
- the Phone field will display the cell phone number from their Census record.
The Organization field is set up using the Resource Codes tool.
After you enter general contact information, continue to Step 3. Add New Assignment(s).
After you save a new non-employee resource, Campus automatically creates a record of the person in Census > People if a record did not already exist.

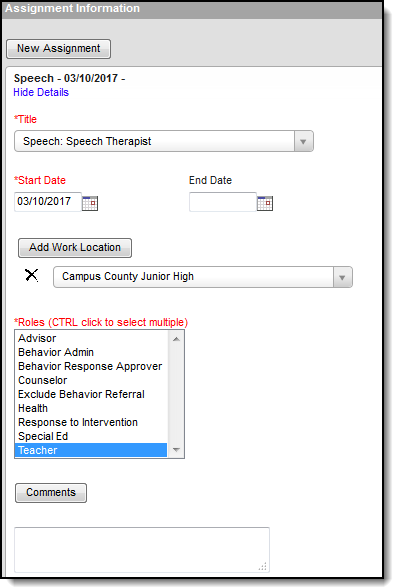
Step 3. Add New Assignment(s)
The Assignment describes the activity a person is doing for the district. Click the Add New Assignment button to add multiple Assignments. See the following field descriptions for information about each field. Click the Save and Continue button at the top of the screen when you are done adding Assignments. Campus saves your changes and you can manage the new non-employee resource using the Resource Master tool.
| Field | Description | ||||||||||||||||||||
|---|---|---|---|---|---|---|---|---|---|---|---|---|---|---|---|---|---|---|---|---|---|
| Title | The Title field is set up using the Resource Codes tool and identifies the activity to which the person is assigned. | ||||||||||||||||||||
| Start Date | The date on which the person started this Assignment. | ||||||||||||||||||||
| End Date | The date on which the person's Assignment ends. | ||||||||||||||||||||
| Add Work Location | All location(s) where this person will be working. You may select more than one location. | ||||||||||||||||||||
| Roles | The responsibilities associated with this Assignment. Roles control where the user displays in Campus.
| ||||||||||||||||||||
| Comments | This button hides and displays comments entered for the Assignment. |
