Case Search
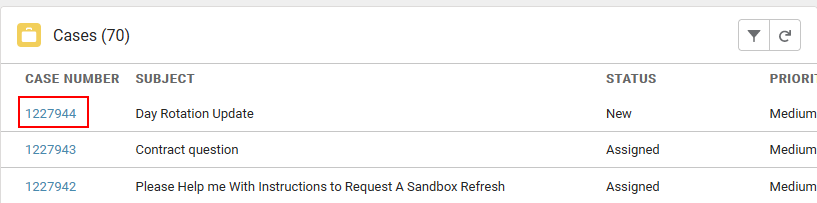
Technical and Authorized Support Contacts have access to view and post comments on all cases for their district. A list of all cases is presented by default when selecting Cases > View Cases from the top dropdown. Cases are sorted by last modified date and columns can be toggled to quickly sort by status, modified date, module, etc.

Displayed cases may be refined by clicking on the funnel icon to display filters. Using multiple filters will narrow the results, only returning entries that meet the requirements of each entered field. For example, searching for "Grade Book issues" (Subject) created by a selected contact will only return cases matching both of those instances, while only entering "Grade Book issues" in the Subject field will return issues entered by all users.
When available, use the dropdowns to further refine your search. For example, Subject may be filtered using Equals, Not equals, Starts with, Ends with, Contains, and Does not contain.
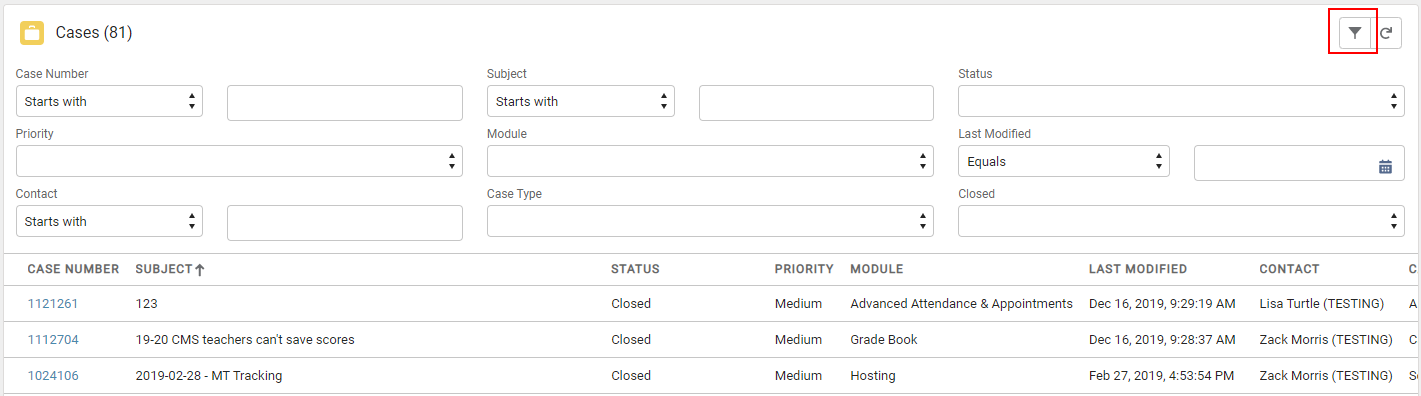
The following fields are available.
| Option | Description |
|---|---|
| Case Number Standard | Enter the number assigned to the case when it was created. |
| Subject Standard | Enter the title of the case or a keyword that can be used to locate the case. Entering a phrase like "grade book issues" might not return results, but "grade book" will. |
| Status Standard | Indicates the status assigned to the case. Options are:
|
| Priority | Indicates the level of urgency associated with the case. Options are:
|
| Module | Selected option relates to the area of Campus where the issue is occurring. |
| Case Type | Selected option indicates the type of case that was entered. Options are:
The category on a case is automatically populated based on the screen the case is completed from. |
| Contact | The Authorized Support or Technical Contact assigned to the case. |
| Last Modified | Date that the case was last updated or last communicated on. |
| Account | Name of the district that submitted the case. |
Search Results
The number of Results returned displays at the top of the Cases window. The number of cases returned per page is automatically set to 20. This number can be changed by updating the Page Size value that displays at the bottom of the cases list. When this value is changed, the number of pages also changes. Advance to a new page in the search results by choosing a new page number under the Page dropdown.

Viewing and Communicating on Cases
Clicking on a Case Number will open it to view, add attachments, communicate with Support, or close.
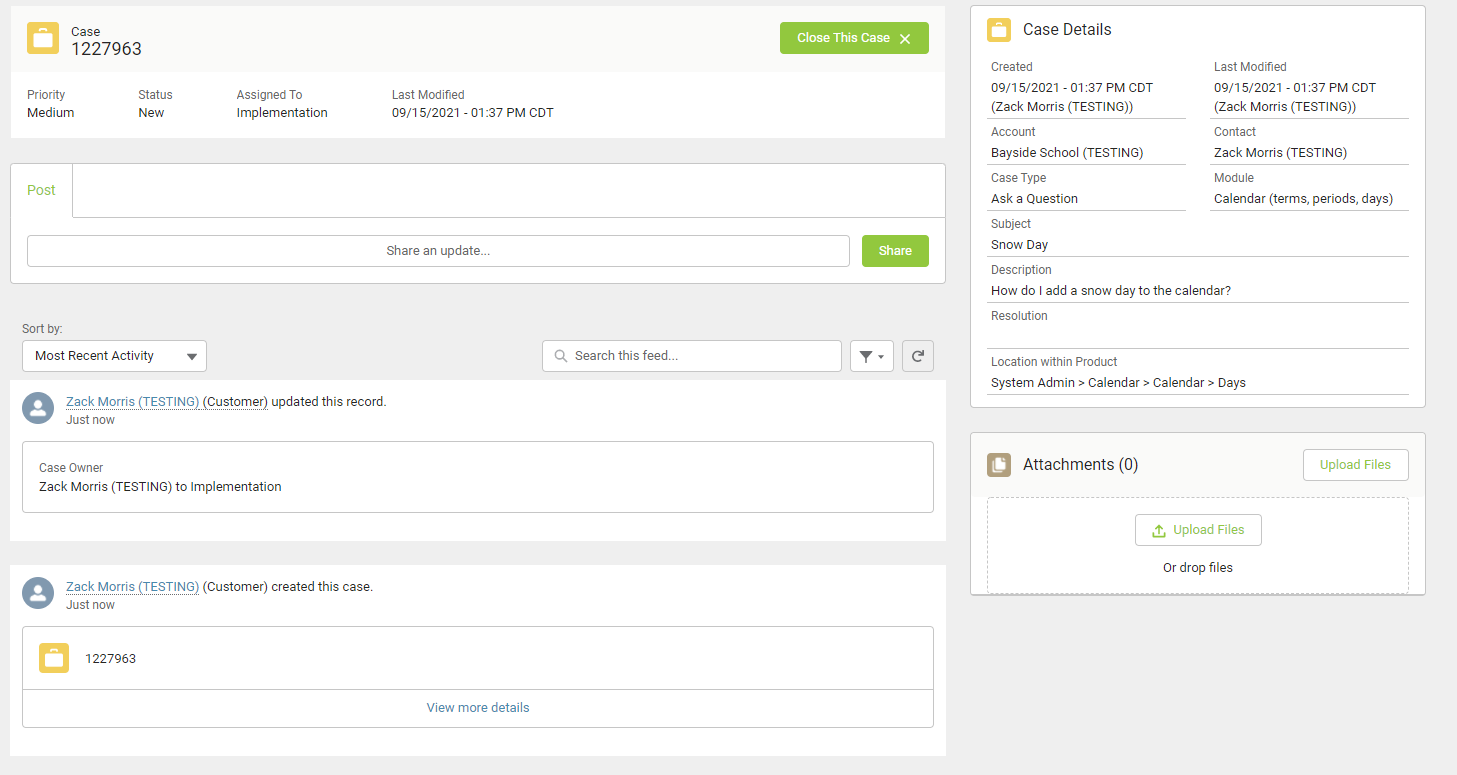
The top panel of a case displays important information including its Case Number, Priority, Status in its life cycle, who in Support the case is assigned to, and its last modified date. Cases may be closed (or re-opened) using the button at the top.

Case Details on the right side of the screen includes the information provided by the contact at the time of case creation, and/or case qualification information added by Support.
All attachments (added by the district or Campus) display in the Attachments area for easy access. Click on the text Attachments to expand the box and view additional details.

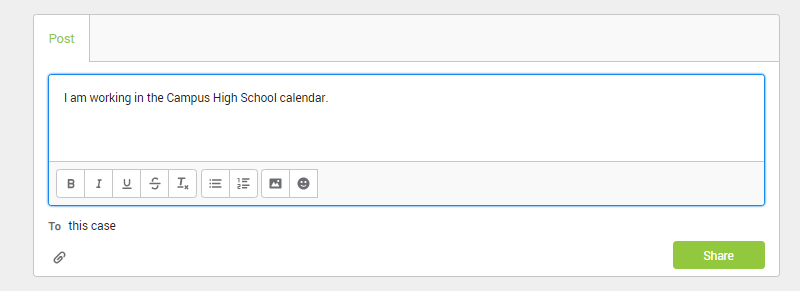
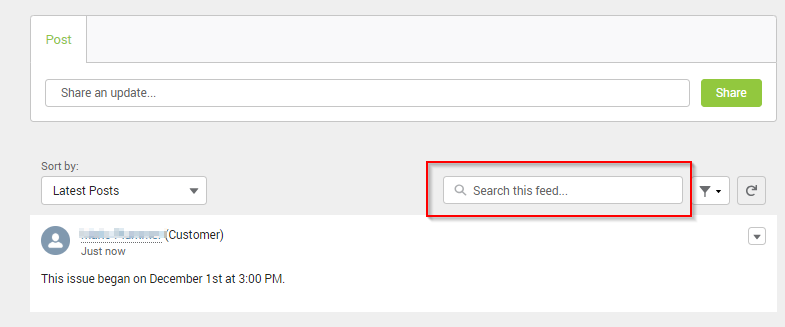
Written case communications between Authorized Support Contacts and Campus are called Posts. Posts display in the case's Feed with the most recent at the top. Posts may be searched using the "Search this feed" box.
To add a Post to a case, click into the Post box that says "Share an update". An editor box will appear. Type your message into the editor and hit Share to submit. Note that you may format your text, add bullets or numbers to your steps, or add saved images directly into your Post. The paperclip icon may also be used to attach files to your post. Up to 10 attachments can be added at the same time. Max file size is 15MB.