PATH: Campus Instruction > Reports > Blank Spreadsheet
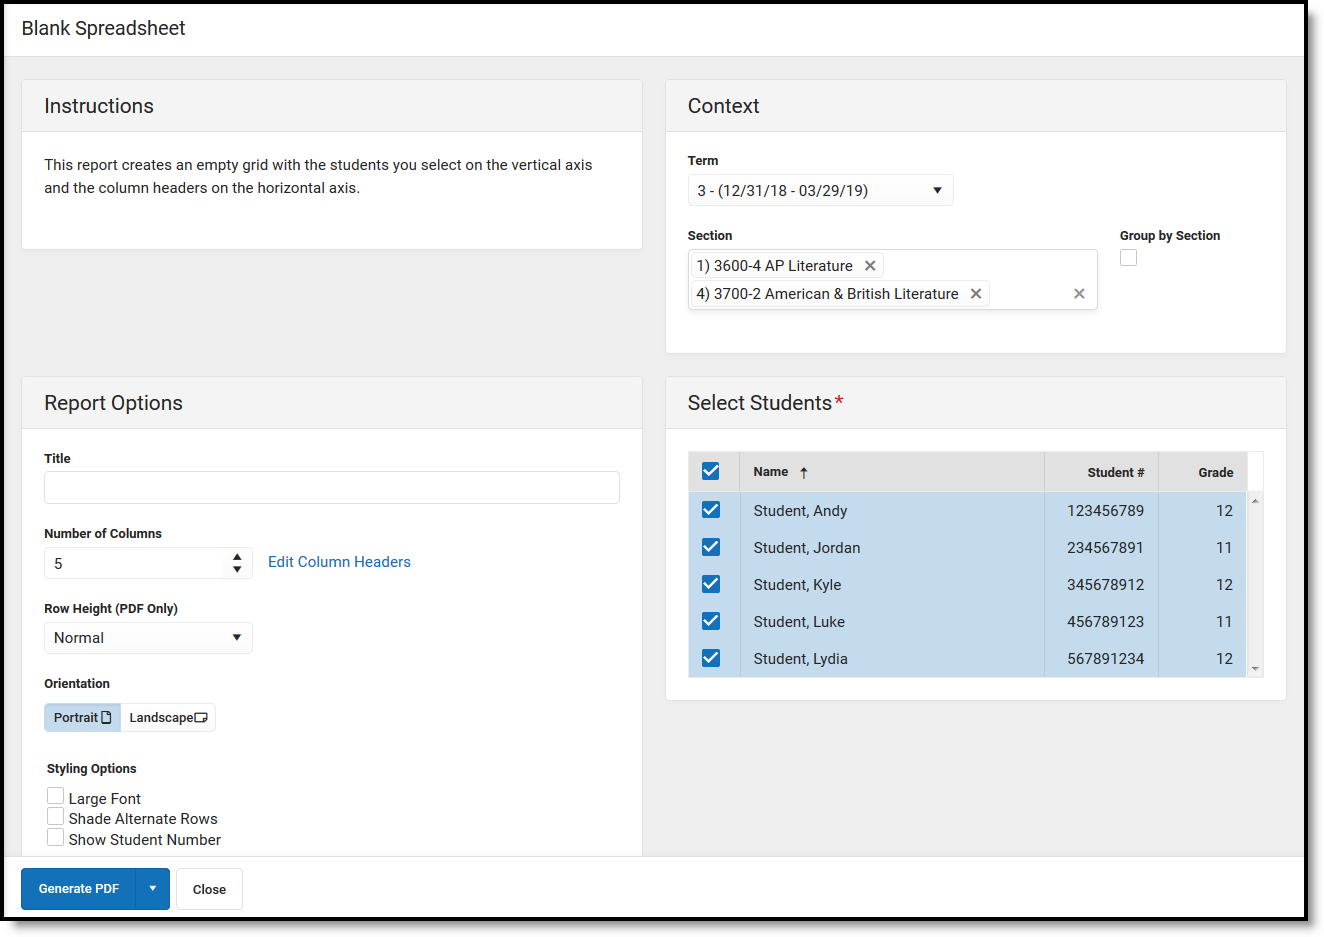
The Blank Spreadsheet report creates a blank spreadsheet with the students you select along the y-axis and blank column headers along the x-axis.
Creating a Blank Spreadsheet
- Select the Term and Section you'd like to generate the spreadsheet for. Select multiple sections if desired.
- If multiple sections are selected, indicated if the students should be Grouped by Section or sorted alphabetically across all selected sections.
- Enter a Title for the report, if you'd like one other than the default. This field is limited to 80 characters.
- Select the Number of Columns you'd like to include in the report.
- If desired, click Edit Column Headers to enter custom headers for the report. A side panel opens when headers can be named, added, or removed.
- Select whether the Row Height of the horizontal rows should be Normal, or 1/2, 1 or 2 inches.
- Select the Orientation of the spreadsheet, Portrait or Landscape.
- Mark the checkbox to display the spreadsheet in Large Font.
- If desired, mark Shade Alternate Rows.
- Mark the checkbox if you'd like the spreadsheet to Show Student Numbers.
- Determine which Students to list on the y-axis. The default setting is to include all active students in the section, unmark the checkboxes next to student's names to remove them from the report. Filter the student list by entering a Student Group if desired.
- Click Generate PDF to view the report in PDF format or click the arrow button next to Generate to select a different format.


