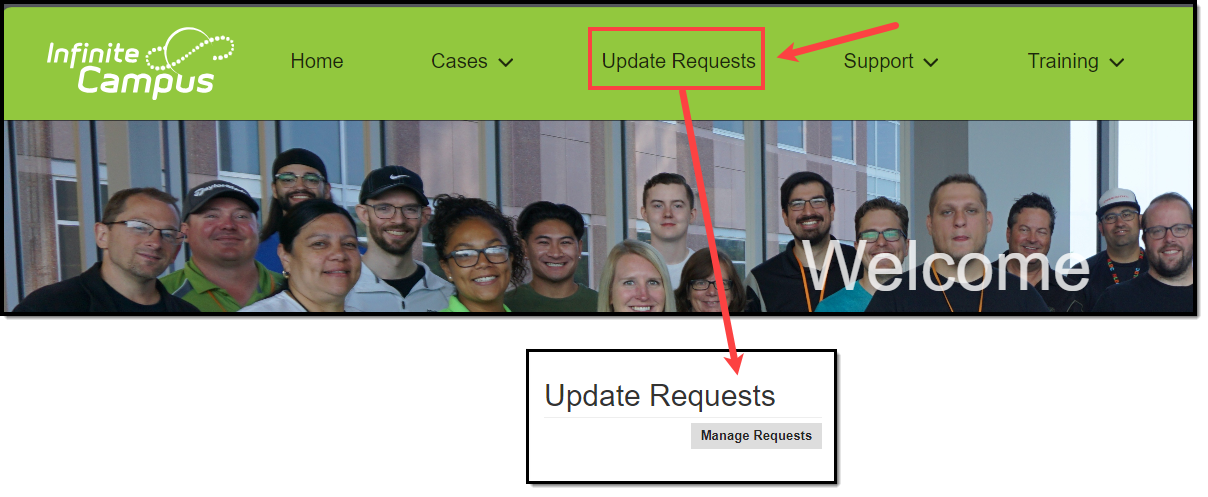
Technical Support Contacts at Campus Cloud Choice hosted districts can request Campus version updates using the Manage Updates tool via the Update Requests button within the Support Portal.
Please note that the Time Zone set for your CampusID will impact the time selected for this update. The default setting is Central Time. Click your name at the top of the Community toolbar and select Location to verify and/or change your time zone.
To make a Campus version update request:
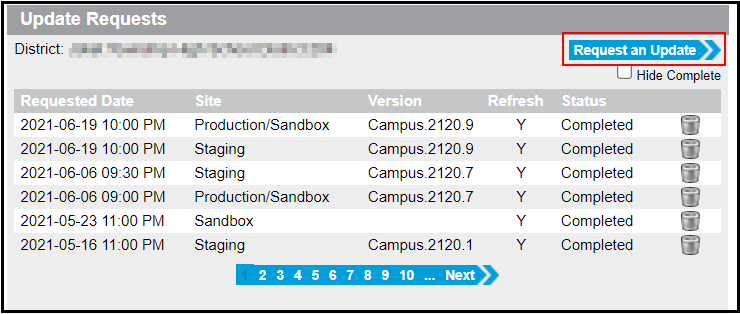
- Click on the Request an Update button.
- Those with a staging environment may choose if the update should apply to their Production/Sandbox or Staging sites. Those without a staging environment should ensure that Production/Sandbox is selected. Production and Sandbox environments are listed together because they must be on the same version.
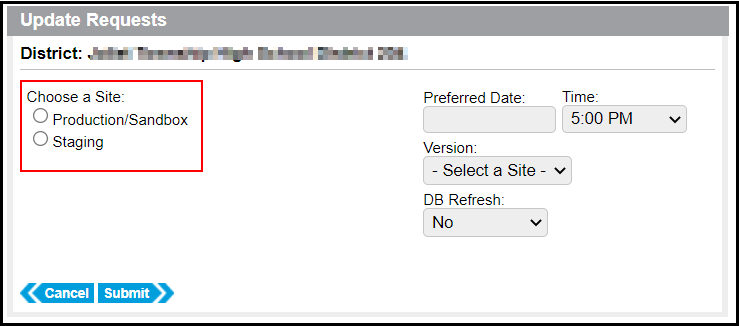
- Choose a Preferred Date. Please note that updates are scheduled on a first come/first serve basis. Campus Hosting reserves the right to change the date. Requests can be made 24 hours in advance.
- Select the Time of the update. Please note that this will be based on the Time Zone set in your CampusID profile. To view or change this field, click your name in the Community toolbar, and select Location.
- Choose the Version to update to.
- If desired, those with a Sandbox site may choose to also refresh their Sandbox at this time by selecting Yes under Database Refresh.
- Click Submit.


NOTE: If you have not updated in a while, you may not see the latest version as an option. This is likely due to an update in underlying technology (such as Tomcat) delivered in a version greater than your current version but less than the latest version offered by Infinite Campus. In this scenario, please update to the latest available version. Once installed, you can return to this tool and request an update to the newest Campus version.

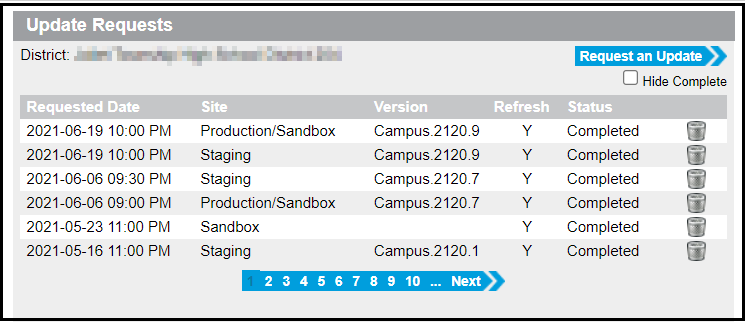
Once the request is submitted, it will display in the Update Requests list view. Campus Hosting will send an email notification at the beginning and end of the update or in the event of an error. The Status will update to show the current state of the request.