The Public Store is a place where anyone can shop for goods or services from your district. You might want to create a Public Store to sell spiritwear, tickets to events, or items for booster club fundraising.
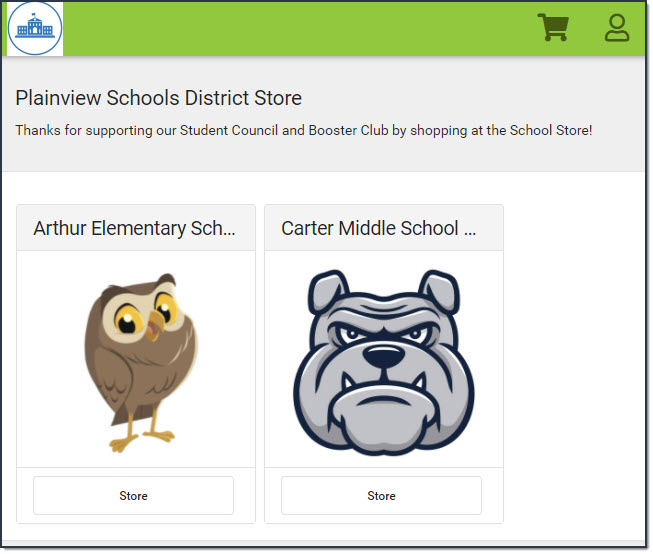 Example of the Public Store
Important Information About the Public Store
- Users need to be logged into their account to establish a bank account and use eCheck as a payment method in the Public Store.
- The Orders Report does NOT include Public Store purchases. However, the Pick List and Sales report do include Public Store purchases.
- Items that cost $0 cannot be purchased through the Public Store.
- Product and Item limits do not apply in the Public Store. To work around this limitation, set up separate product(s).
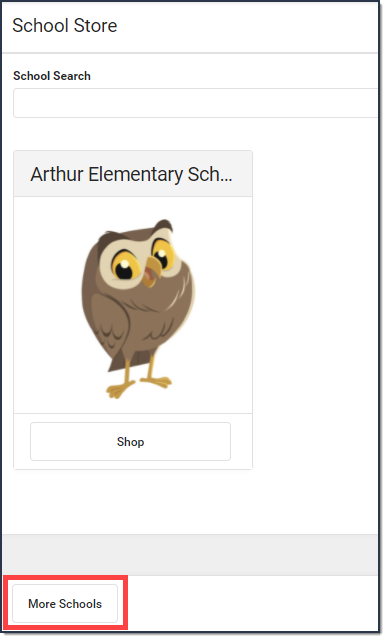
- Customers who log in with their Campus Parent or Campus Student credentials cannot shop in the Public Store. The School Store in Campus Parent or Campus Student displays for them instead. However, they can shop for Public Store products in other School Stores by clicking the More Schools button at the bottom of the School Store.
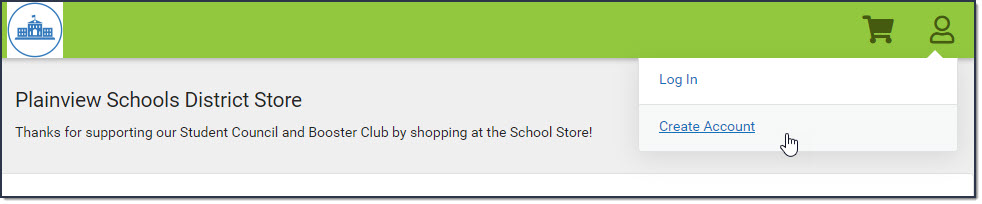
- Public Store customers can create a user account before they make purchases on the Public Store. If you select the Require User Account option on the Settings tool, customers are required to create a user account before making a purchase. When an account has been created, a confirmation email will be sent to the user's email.
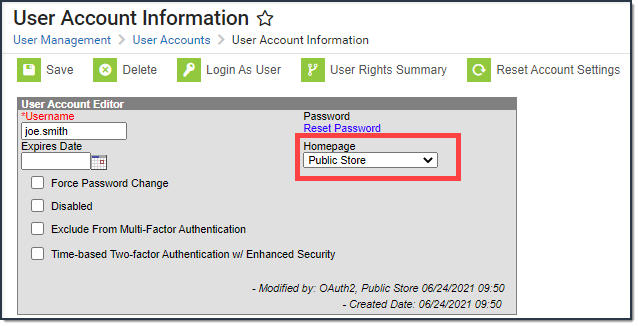
When someone creates an account, their name and email address are saved in Campus in the Demographics tool and Campus assigns the Public Store Homepage to their user account. Public Store customers can review their payment methods and purchase history after they log in. - If an email address is not confirmed or the customer is not logged in, they will be required to pass a CAPTCHA.


Setting Up Public Store
-
Mark the Public Store checkbox on the products you want to display on the Public Store.
Path: School Store > Product Inventory > General Product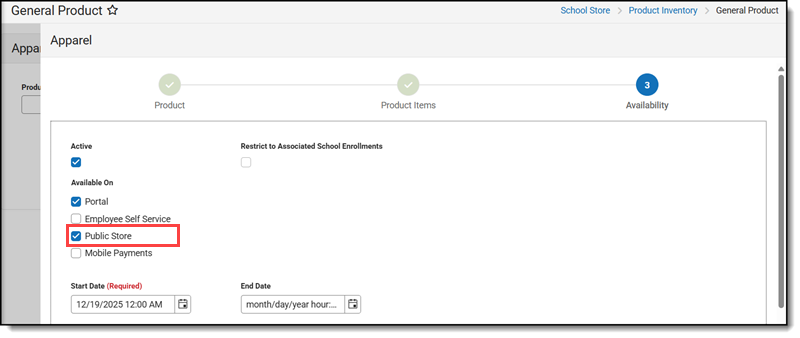
-
Mark the Public Store checkbox on the Categories you want to display on the Public Store.
Path: School Store > Administration > Categories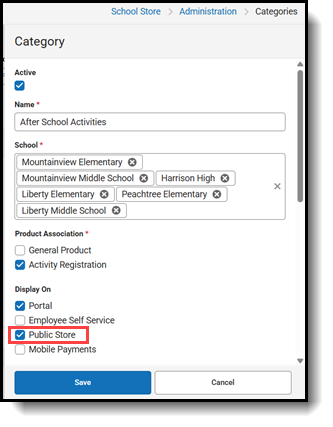
-
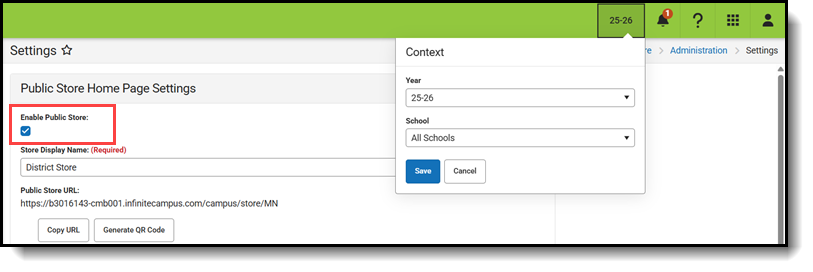
Select the School you want available on Public Store and mark the Public Store checkbox in the Settings tool.
Path: School Store > Administration > Settings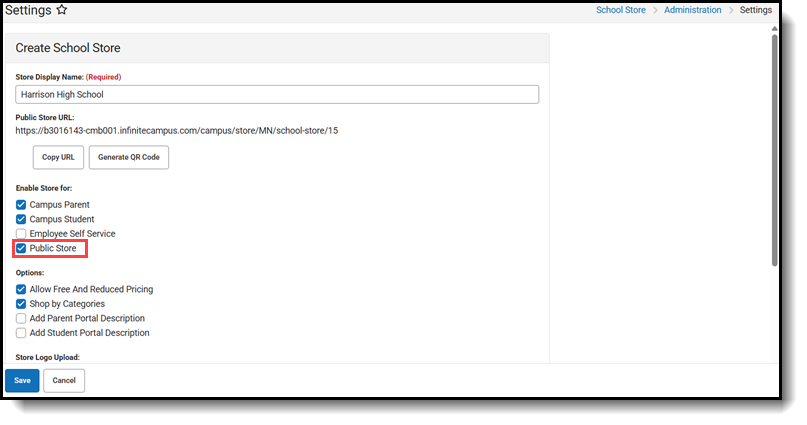
-
Create the Public Store home page in the Settings tool.
Path: School Store > Administration > Settings- Select All Schools in the school dropdown list.
- Fill in the Public Store Home Page section before the Public Store toggle can be switched to ON.
- Once the toggle is ON, people can use the Public Store Link to shop.