Classic View: User Communication > Announcements
Search Term: Announcements
Announcements provide a way to announce upcoming events, the daily school bulletin, district happenings, etc. Any user that logs into the Campus application will see the Announcements. Portal users can also view Announcements if the district so chooses. These communications can be created as District Announcements or as School Announcements.
Announcements can also be created by State Edition users. See the Announcements for State Edition Users documentation for more information.

Announcements
Announcement Editor
A list of existing Announcements displays in the Announcements List. This list includes the date the communication was available (Start Date), when it was no longer visible to either Campus users or Campus Portal users (End Date), and where the communication displayed - Campus only, Portal only or both.
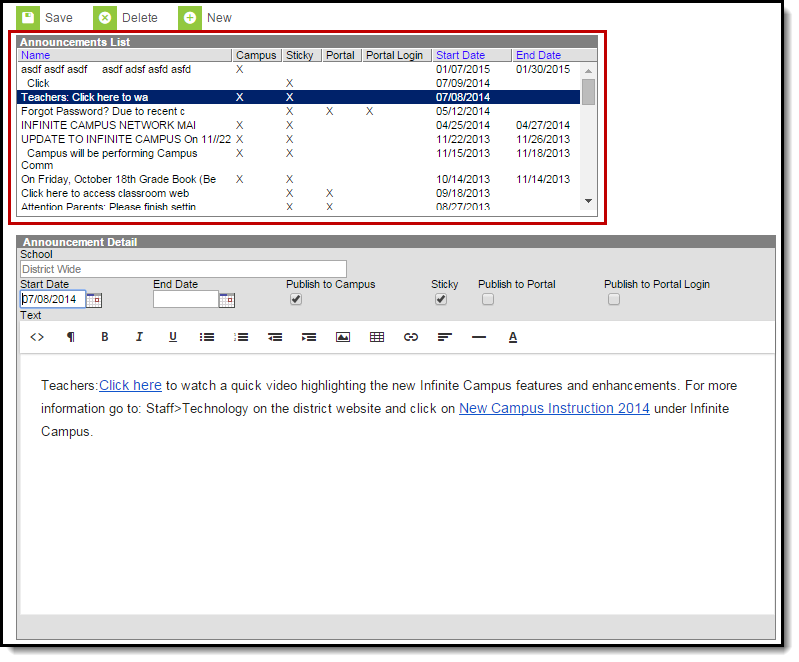
Announcements List
When a message is selected from the Announcements List, an Announcement Detail editor displays, where the items displayed in the Announcement list are chosen.
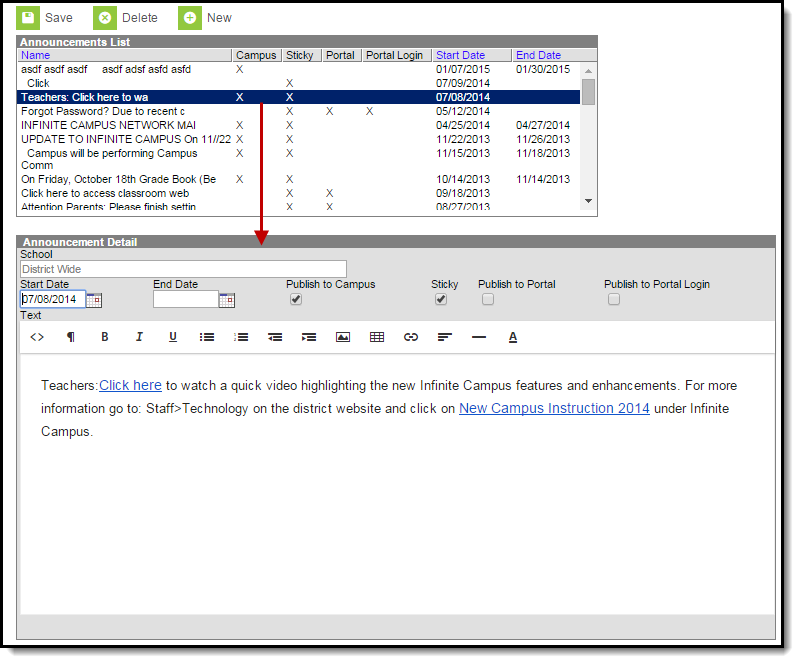
Announcement Detail
The following options are available for selection:
Field |
Description |
|---|---|
School |
Indicates the school in which the message will display.When All Schools is selected in the Campus toolbar (see the Message Recipients section), this will read District Wide; when a specific school is chosen in the Campus toolbar, this field reads the name of the school, and only displays for users in that selected school. |
Start Date |
Entered date determines when the message will first display. Dates are entered in mmddyy format or can be selected by using the calendar icon. This date displays in the Start Date column in the Announcement List view. |
End Date |
Entered date determines when the message will stop being displayed. Dates are entered in mmddyy format or can be selected by using the calendar icon. This date displays in the End Date column in the Announcement List view. |
Publish to Campus |
When marked, the message is viewable on the first page the user sees upon logging in to Campus, viewable when selecting the user's name from the top of the Index. This selection displays in the Campus column in the Announcement List view. |
| Sticky | Announcements marked as sticky always appear at the top of the list of announcements. This option only applies to messages viewable in Campus Instruction Message Center. At least one of the other checkboxes must be marked in order for the message to display. |
Publish to Portal |
When marked, the message will be viewable in the Messages section of the Campus Portal for both parent and student users. This selection displays in the Portal column in the Announcement List view. |
Publish to Portal Login |
When marked, the message will be viewable on the login page of the Campus Portal. This selection displays in the Portal Login column of the Announcement List View (for District Messages only). |
Message Text |
The body of the message is entered in this text box. Simple formatting options are available in the WYSIWYG editor. The first part of the first message (up to 35 characters) displays as the Name in the Announcement List. |
Any of these options can be marked, or no option can be marked. If no option is marked, the message will not be viewable to other Campus users or Campus Portal users.
Message Recipients
Announcements can be written and viewable to all users in a district or users in a selected school. The option selected in the School field of the Campus toolbar determines where the announcement will display.
When the School dropdown in the Campus toolbar is set to All Schools, the announcement is available to all users in the district.

District Wide Announcements
When the School dropdown is set to a specific school, the message is only viewable for users in the selected school.

School Announcements
Create District Wide Announcements
- Set the School dropdown in the Campus toolbar to All Schools.
- Click the New icon. An Announcement Detail editor displays.
- Enter the Start Date of the message.
- Enter the End Date of the message.
- Mark the appropriate checkboxes for where the message should be viewable.
- Enter the text of the message.
- Click the Save icon when finished. The message will display in the selected locations beginning on the date entered in the Start Date field.
Create School Wide Announcements
- Set the School dropdown in the Campus toolbar to the school where the announcement should be viewable.
- Click the New icon. An Announcement Detail editor displays.
- Enter the Start Date of the message.
- Enter the End Date of the message.
- Mark the appropriate checkboxes for where the message should be viewable.
- Enter the text of the message.
- Click the Save icon when finished. The message will display for the selected school in the selected locations beginning on the date entered in the Start Date field.
