School Store needs to be enabled in Digital Repository Preferences so pictures can be added within the Activity Registration module. See Step 1 of the article below to enable School Store.
The Infinite Campus School Store gives members of your school easy online access for purchasing goods and services. Each school in your district can have their own store. The stores display in Campus Parent and Campus Student.
This article walks you through the setup process step-by-step.
- Step 1. Enable School Store in the Digital Repository
- Step 2. Set Up Portal Self Service Options
- Step 3. Set up Product Types
- Step 4. Set up Fund Accounts
- Step 5. Create a Store for Each School
- Step 6. Set up Categories
- Step 7. Set up Products
Check with your System Administrator and make sure you have tool rights to System Administration > School Store.
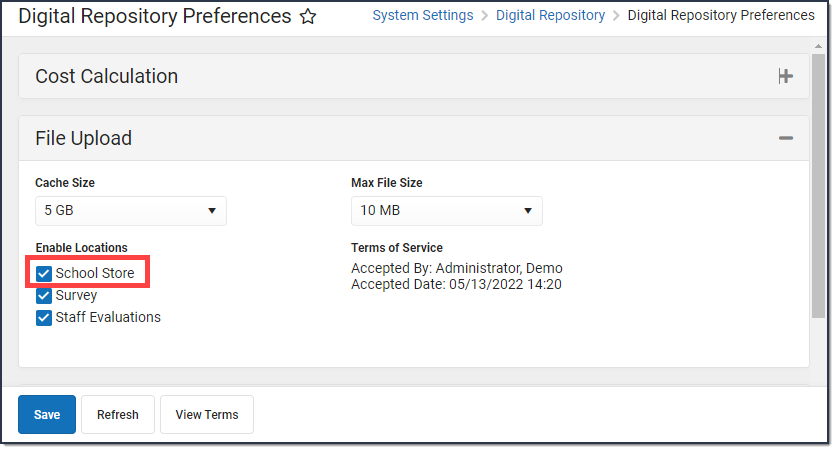
Step 1. Enable School Store in the Digital Repository
Classic View: System Administration > Digital Repository
Search Terms: Digital Repository Preferences
Before you can set up the School Store, you must enable the School Store in the Digital Repository tool by marking the School Store checkbox at the bottom of the screen then clicking Save. For more information about the Digital Repository see the Digital Repository article on the Campus Community.
Step 2. Set Up Portal Self Service Options
Classic View: System Administration > Portal > Preferences > Self Services
For a parent to purchase an item in the School Store, the Activate Family Information Portal Self Service option must be selected as well as Display Household Member Contact Information OR Display Household Member Relationships.

Step 3. Set up Product Types
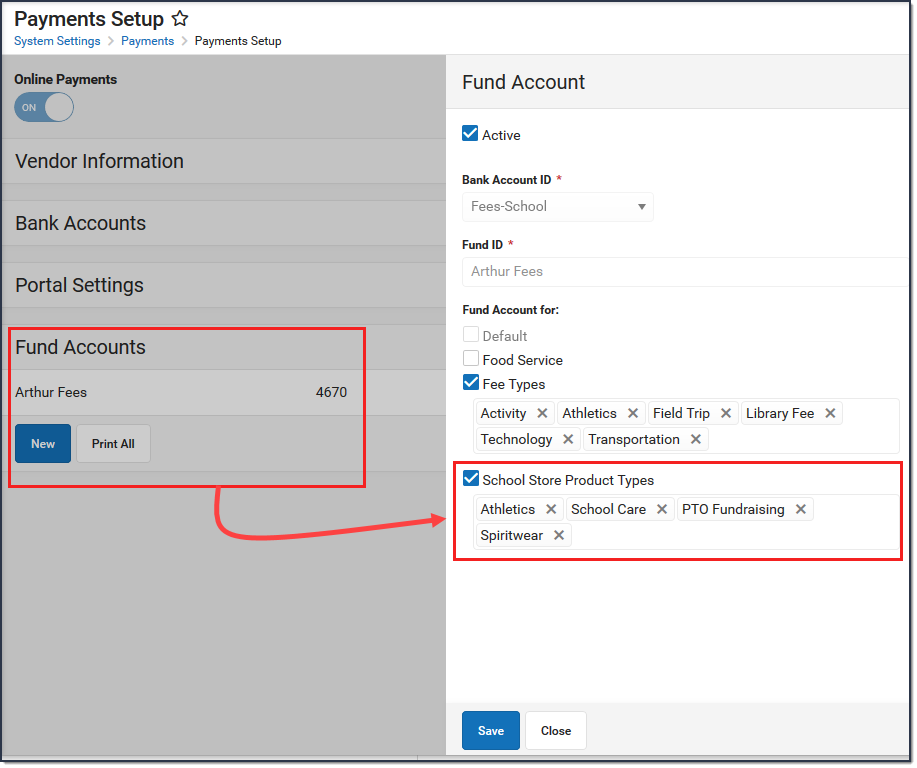
Step 4. Set up Fund Accounts
Classic View: System Administration > Payments > Payments Setup > Fund Accounts
Search Terms: Payments Setup
Fund Accounts identify which bank accounts are used for items purchased in the School Store. You can manage Fund Account in the Payments Setup tool.
You can assign each Product Type to a unique Fund Account or group Product Types together on the same Fund Account.
Step 5. Create a Store for Each School
Tool Search: Settings
The Settings tool allows you to choose where you want the School Store to display and set up different options for every store. From here you can also set up Public Store options. The Public Store is a website where anyone can shop for goods or services from your district.
Create a School Store
Create a store for each school by selecting the school in the Campus toolbar. Use the field descriptions provided here to complete the screen then click Save. Repeat this procedure for each school that is going to have a school store.

Field Descriptions (School Store)
| Field | Description |
|---|---|
| Store Display Name | The name of the store. |
| Public Store URL | The URL that is used to visit the Public Store. The URL is cannot be modified.
|
| Enable Store for | You can display the store in Campus Parent, Campus Student, Employee Self Service, or the Public Store. If you do not want the store to display, do NOT mark the checkbox. |
| Allow Free and Reduced Pricing | When this checkbox is marked, students that have an active eligibility record (FRAM > Eligibility) can be given a reduced price for items in the store. The reduced price is set up on the product. If you do not set up a reduced price, the student is charged the regular selling price. |
| Shop By Categories | This option allows you to set up the School Store for users to shop by category or by products.
|
| Add Parent Portal Description | Adds the text to the top of the Parent Portal School Store. |
| Add Student Portal Description | Adds the text to the top of the Student Portal School Store. |
| Store Logo Upload | A picture that represents the school store in Campus Student and Campus Parent. The image must use one of the following extensions: .jpg, .jpeg, .png, or .gif. |
Create a Public Store
Create a Public Store by selecting All Schools in the Campus toolbar. Use the field descriptions provided here to complete the screen then click Save.
Tip: See the Public Store Overview for more information about setting up a Public Store. There are multiple steps that you must complete before products can be purchased on the Public Store.
 Example Public Store Settings
Field Descriptions (Public Store)
| Field | Description |
|---|---|
| Enable Public Store | Once the Enable Public Store box is checked, people can use the Public Store URL found on this Settings page to shop at your Public Store. |
| Store Display Name | The name of the store as it appears in Campus Student and Campus Parent. |
| Public Store URL | The URL that is used to visit the Public Store. The URL is cannot be modified.
|
| Require User Account To Purchase | Public Store customers can create a user account before they make purchases on the Public Store. If you mark this checkbox, customers will be required to create a user account before making a purchase. When someone creates an account, their name and email address are saved in Campus in the Demographics tool and Campus assigns the Public Store Homepage to their user account. Public Store customers can review their payment methods and purchase history after they log in. 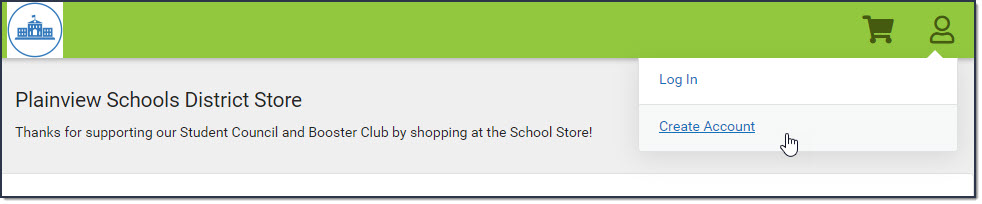 
|
| Description | The text you enter in this field displays below the Title on the Public Store.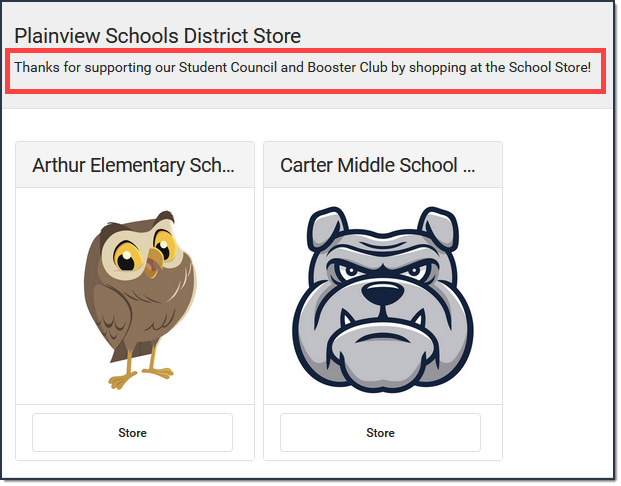 |
| Store Logo Upload | A picture that represents the Public Store. This image displays at top of the page. The image must use one of the following extensions: .jpg, .jpeg, .png, or .gif.  |
Step 6. Set up Categories
Step 7. Set up Products
Ad Hoc Filter Examples
Classic View: Ad Hoc Reporting > Filter Designer > Query Wizard > Student
You can create an Ad Hoc filter to limit purchasing to specific people. Only people who are included in the Ad Hoc filter and have an active enrollment in the active calendar year can be selected as a Recipient when a purchase is made.
The Ad Hoc filter must always include the Person ID: Student > Demographics > Person ID (student.personID)
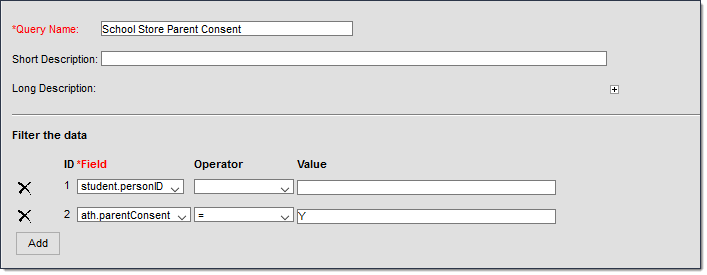
Filter for Students with a Parent Consent of Yes
This filter restricts purchasing to students who have a parent consent of yes on their Athletics record.
- Student > Demographics > Person ID: student.personID
- Student > Activities > Athlete Eligibility > parentConsent: ath.parentConsent
| Field | Operator | Value |
|---|---|---|
| ath.parentConsent | = | Y |
Ad Hoc Query Example
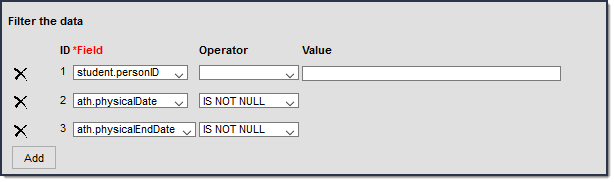
Filter for Students with an Active Physical Form
This filter restricts purchasing to students who have an active physical on record.
- Student > Demographics > Person ID: student.personID
- Student > Activities > Athlete Eligibility > physicalDate: ath.physicaldate
- Student > Activities > Athlete Eligibility > physicalEndDate: ath.physicalenddate
| Field | Operator | Value |
|---|---|---|
The values provided here are applicable for the 2019/2020 school year. Modify these dates as necessary or use the IS NOT NULL Operator. | ||
| ath.physicaldate | > | 09/01/2019 |
| ath.physicalenddate | < | 09/01/2021 |
 Ad Hoc Query Example
Refunds
- Use the Payments Reporter to issue refunds for products purchased in the School Store.
- If the Inventory Tracking checkbox is marked on the product, Campus automatically updates the Inventory on Hand to include the refunded item.
- You cannot perform a Partial Refund for products purchased in the School Store.
If schools are going to use the Activity Registration module, each school needs to establish a School Store.
Tool Search: Settings
The Settings tool allows you to choose where you want the School Store to display and set up different options for every store. From here you can also set up Public Store options. The Public Store is a website where anyone can shop for goods or services from your district.
Create a School Store
Create a store for each school by selecting the school in the Campus toolbar. Use the field descriptions provided here to complete the screen then click Save. Repeat this procedure for each school that is going to have a school store.
Field Descriptions (School Store)
| Field | Description |
|---|---|
| Store Display Name | The name of the store. |
| Public Store URL | The URL that is used to visit the Public Store. The URL is cannot be modified.
|
| Enable Store for | You can display the store in Campus Parent, Campus Student, Employee Self Service, or the Public Store. If you do not want the store to display, do NOT mark the checkbox. |
| Allow Free and Reduced Pricing | When this checkbox is marked, students that have an active eligibility record (FRAM > Eligibility) can be given a reduced price for items in the store. The reduced price is set up on the product. If you do not set up a reduced price, the student is charged the regular selling price. |
| Shop By Categories | This option allows you to set up the School Store for users to shop by category or by products.
|
| Add Parent Portal Description | Adds the text to the top of the Parent Portal School Store. |
| Add Student Portal Description | Adds the text to the top of the Student Portal School Store. |
| Store Logo Upload | A picture that represents the school store in Campus Student and Campus Parent. The image must use one of the following extensions: .jpg, .jpeg, .png, or .gif. |
Create a Public Store
Create a Public Store by selecting All Schools in the Campus toolbar. Use the field descriptions provided here to complete the screen then click Save.
Tip: See the Public Store Overview for more information about setting up a Public Store. There are multiple steps that you must complete before products can be purchased on the Public Store.
Example Public Store Settings
Field Descriptions (Public Store)
| Field | Description |
|---|---|
| Enable Public Store | Once the Enable Public Store box is checked, people can use the Public Store URL found on this Settings page to shop at your Public Store. |
| Store Display Name | The name of the store as it appears in Campus Student and Campus Parent. |
| Public Store URL | The URL that is used to visit the Public Store. The URL is cannot be modified.
|
| Require User Account To Purchase | Public Store customers can create a user account before they make purchases on the Public Store. If you mark this checkbox, customers will be required to create a user account before making a purchase. When someone creates an account, their name and email address are saved in Campus in the Demographics tool and Campus assigns the Public Store Homepage to their user account. Public Store customers can review their payment methods and purchase history after they log in.
|
| Description | The text you enter in this field displays below the Title on the Public Store. |
| Store Logo Upload | A picture that represents the Public Store. This image displays at top of the page. The image must use one of the following extensions: .jpg, .jpeg, .png, or .gif. |
Settings for each school store and the public store are managed in School Store Settings.
