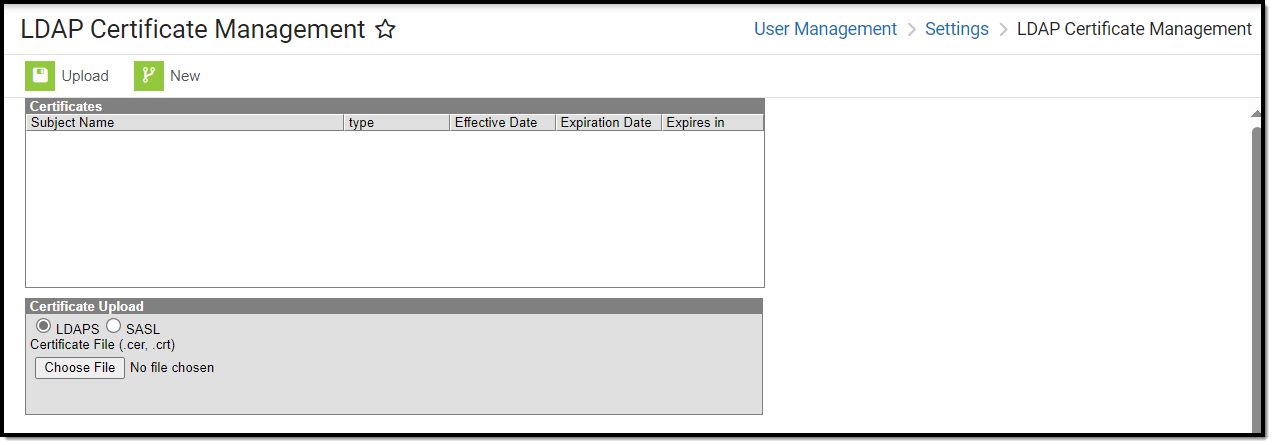
Tool Search: LDAP Certificate Management
The LDAP Certificate Management tool provides district administrators the ability to store and replace their public key certificates used by LDAP for authentication. By storing certificates in this tool, districts can mitigate the issue of having users locked out of Campus when certificates expire.
Existing certificates that were added by Campus are not impacted by this tool however, once your existing certificate expires, you will need to use this tool to upload a new certificate.
Uploading certificates into Campus is only required if your LDAP configuration is set to Use SSL.
Only users assigned a Product Security Role of Student Information System (SIS) are allowed to use this tool.
Upload a Certificate (LDAPS)
To upload an LDAP certificate:
- Click the New icon. The Certificate Upload editor will appear.
- Select LDAPS. If you need to upload SASL certificates, see the Upload a Certificate (SASL) section.
Click Choose File. You will be prompted to locate the certificate on your local hard drive or network.
You must upload a Cert File (.CER) in Base64 encoded x.509 or DER encoded library x.509 format.
- Select the certificate and click Open.
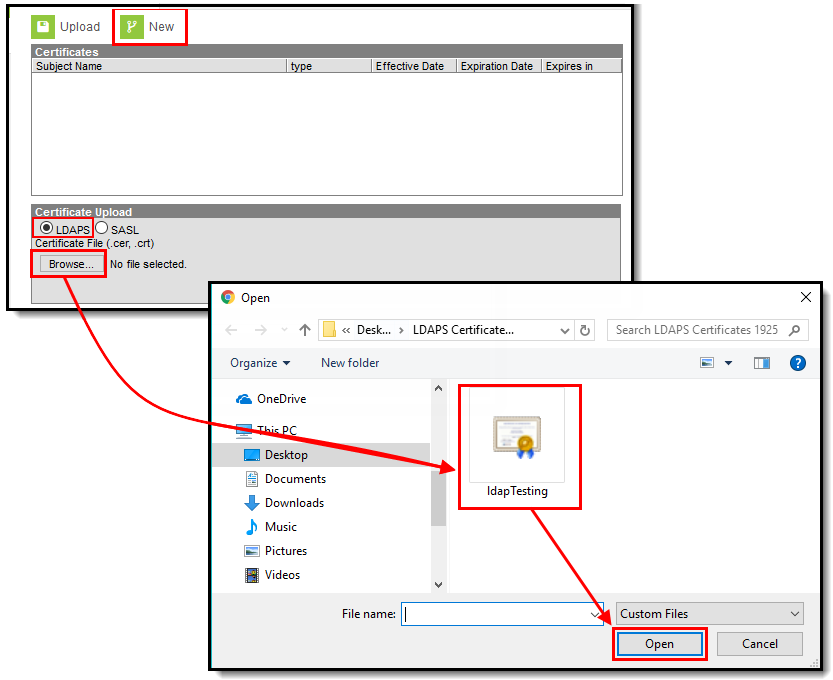
Image 3: Adding the LDAP Certificate
Once the certificate has been selected, it will appear in the Certificate Upload editor next to the Choose file button (Image 4). Click the Upload button to upload the certificate to Campus.
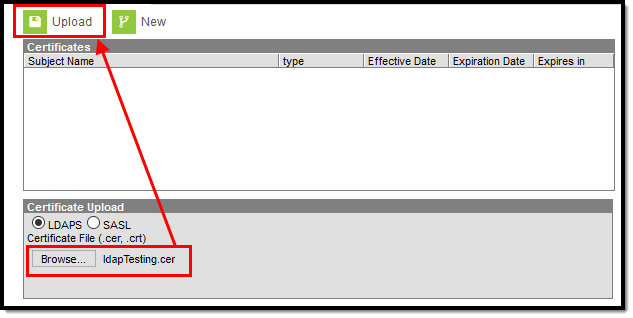
Image 4: Uploading the Certificate
Once the certificate is uploaded into Campus, the certificate's Effective Date, Expiration Date, and number of days until expiration will appear in the Certificates window (Image 5).
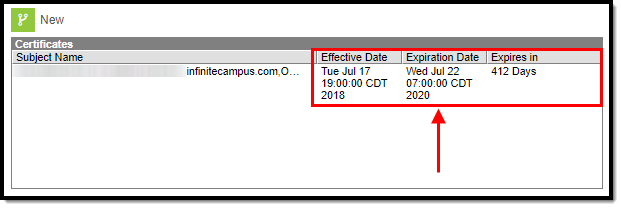
Image 5: Certificate Information
The final step in this process is to navigate to the LDAP Authentication tool, ensure LDAP is configured properly, and test your LDAP connection by entering a Test Username and selecting Test Configuration.
If your LDAP configuration and certificate(s) is valid, a message will appear stating 'Test Configuration Success!'. LDAP is now successfully configured in Campus.

Image 6: Testing Your LDAP Configuration and Certificate
Upload a Certificate (SASL)
In order to complete this process, you must first have your SASL client configured for Campus and Certificate and Key Files generated by the client. For a step-by-step process on how to configure Google Suite to work with Campus LDAP, see the LDAP Authentication article.
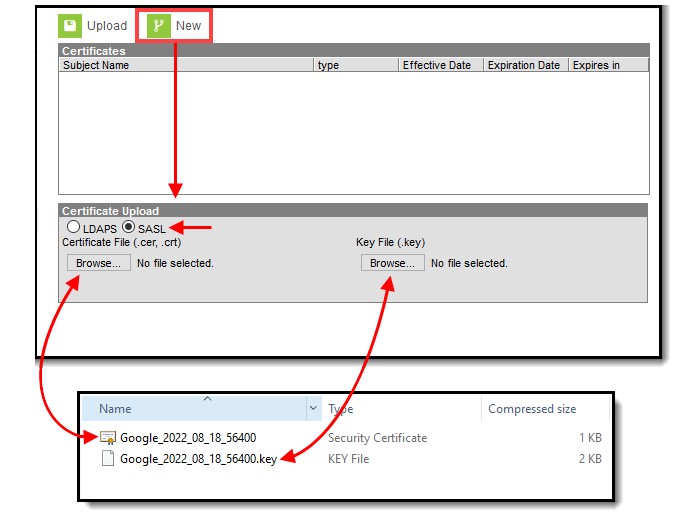
- Click the New icon. The Certificate Upload editor will appear.
- Select SASL.
- Under Certificate File click Browse. You will be prompted to locate the certificate on your locale hard drive or network. This file is provided to you by your SASL client.
- Under Key File click Browse. Locate the key file (likely to be in the same location as the Cert file in Step 3). This file is provided to you by your SASL client.
- The Certificate File and Key File will now appear as selected in the Certificate Upload editor. Click Upload.
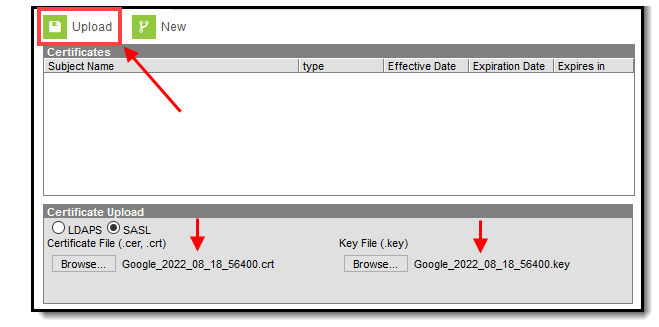
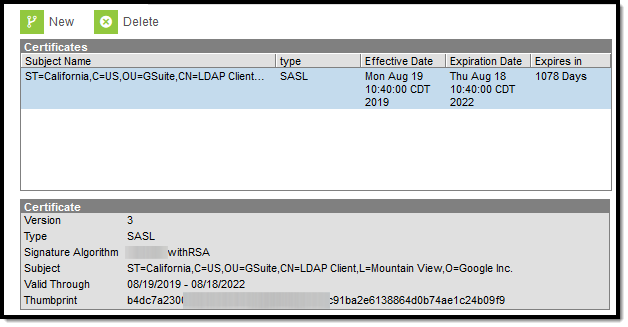
- The files are now uploaded into Campus and appear in the Certificates window.
The final step in this process is to navigate to the LDAP Authentication tool, ensure LDAP is configured properly, and test your LDAP connection by entering a Test Username and selecting Test Configuration.
If your LDAP configuration and certificate(s) is valid, a message will appear stating 'Test Configuration Success!'. LDAP is now successfully configured in Campus.


Replace a Certificate
If a certificate is close to expiring or simply needs to be replaced, you should do so by selecting the certificate, clicking the Delete button, and uploading a new certificate using the steps listed in the Upload a Certificate section above.
You can upload a new certificate without removing the expiring or expired certificate and Campus will know to use the new valid certificate. However, until you remove the expired certificate from this tool, you will continue to receive in-app and email notifications about the expired certificate.
To prevent a potential lockout of users, it is important to replace certificates prior to their expiration. You will receive warning emails when a certificate is getting close to expiring.
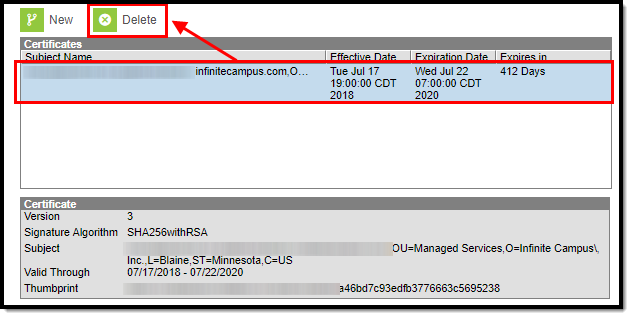
Image 7: Replace an Expired Certificate
Certificate Expiration Warnings
Email and in-app notification functionality is built into this tool. Users who have access to this tool will receive an email and in-app notification every 3 days when a certificate will expire in less than 30 days.
When a certificate will expire in 10 or less days, this notification will increase to every day until the certificate is replaced. Users will continue to receive daily notifications until the expired certificate is replaced or removed.
You must have proper Messenger Email Settings established in order to receive email notifications.
You can upload a new certificate without removing the expiring or expired certificate and Campus will know to use the new valid certificate. However, until you remove the expired certificate from this tool, you will continue to receive in-app and email notifications about the expired certificate.
