Classic View: Grading and Standards > Grading Window > Exceptions
Search Terms: Grading Window
Grading Window Exceptions provide a means for administrators to schedule a grading window for a particular reason without opening the window for all teachers in the school - a teacher missed the original deadline for posting grades, a student is moving out of the district and needs their latest scores posted, or the last day of school for the senior class is one week before students in other grade levels.
Exceptions can be created for the following:
- Specific Course and Section
- Specific Student
- Specific Grade Level
- Specific Student and Section
- Specific Grade Level and Section
Use the information in this article to schedule a Grading Window for a specific student, a specific grade level, or specific teachers, courses and sections. To schedule Grading Windows for schools to post student grades/scores at the end of terms, follow the information in the Grading Window article.
Grading Window Exceptions Editor
A progress tracker displays on each screen so users can quickly tell where they are in the process. If there is an issue with one of the selections, an exclamation point displays (i.e, when there are no dates selected or when there are no grading tasks selected). These are indications to revisit that step in the process (click the exclamation point) to verify the entered information is correct.
This section explains each step in the process. See the Schedule Grading Windows Exceptions section for instructions related to each section of the process.
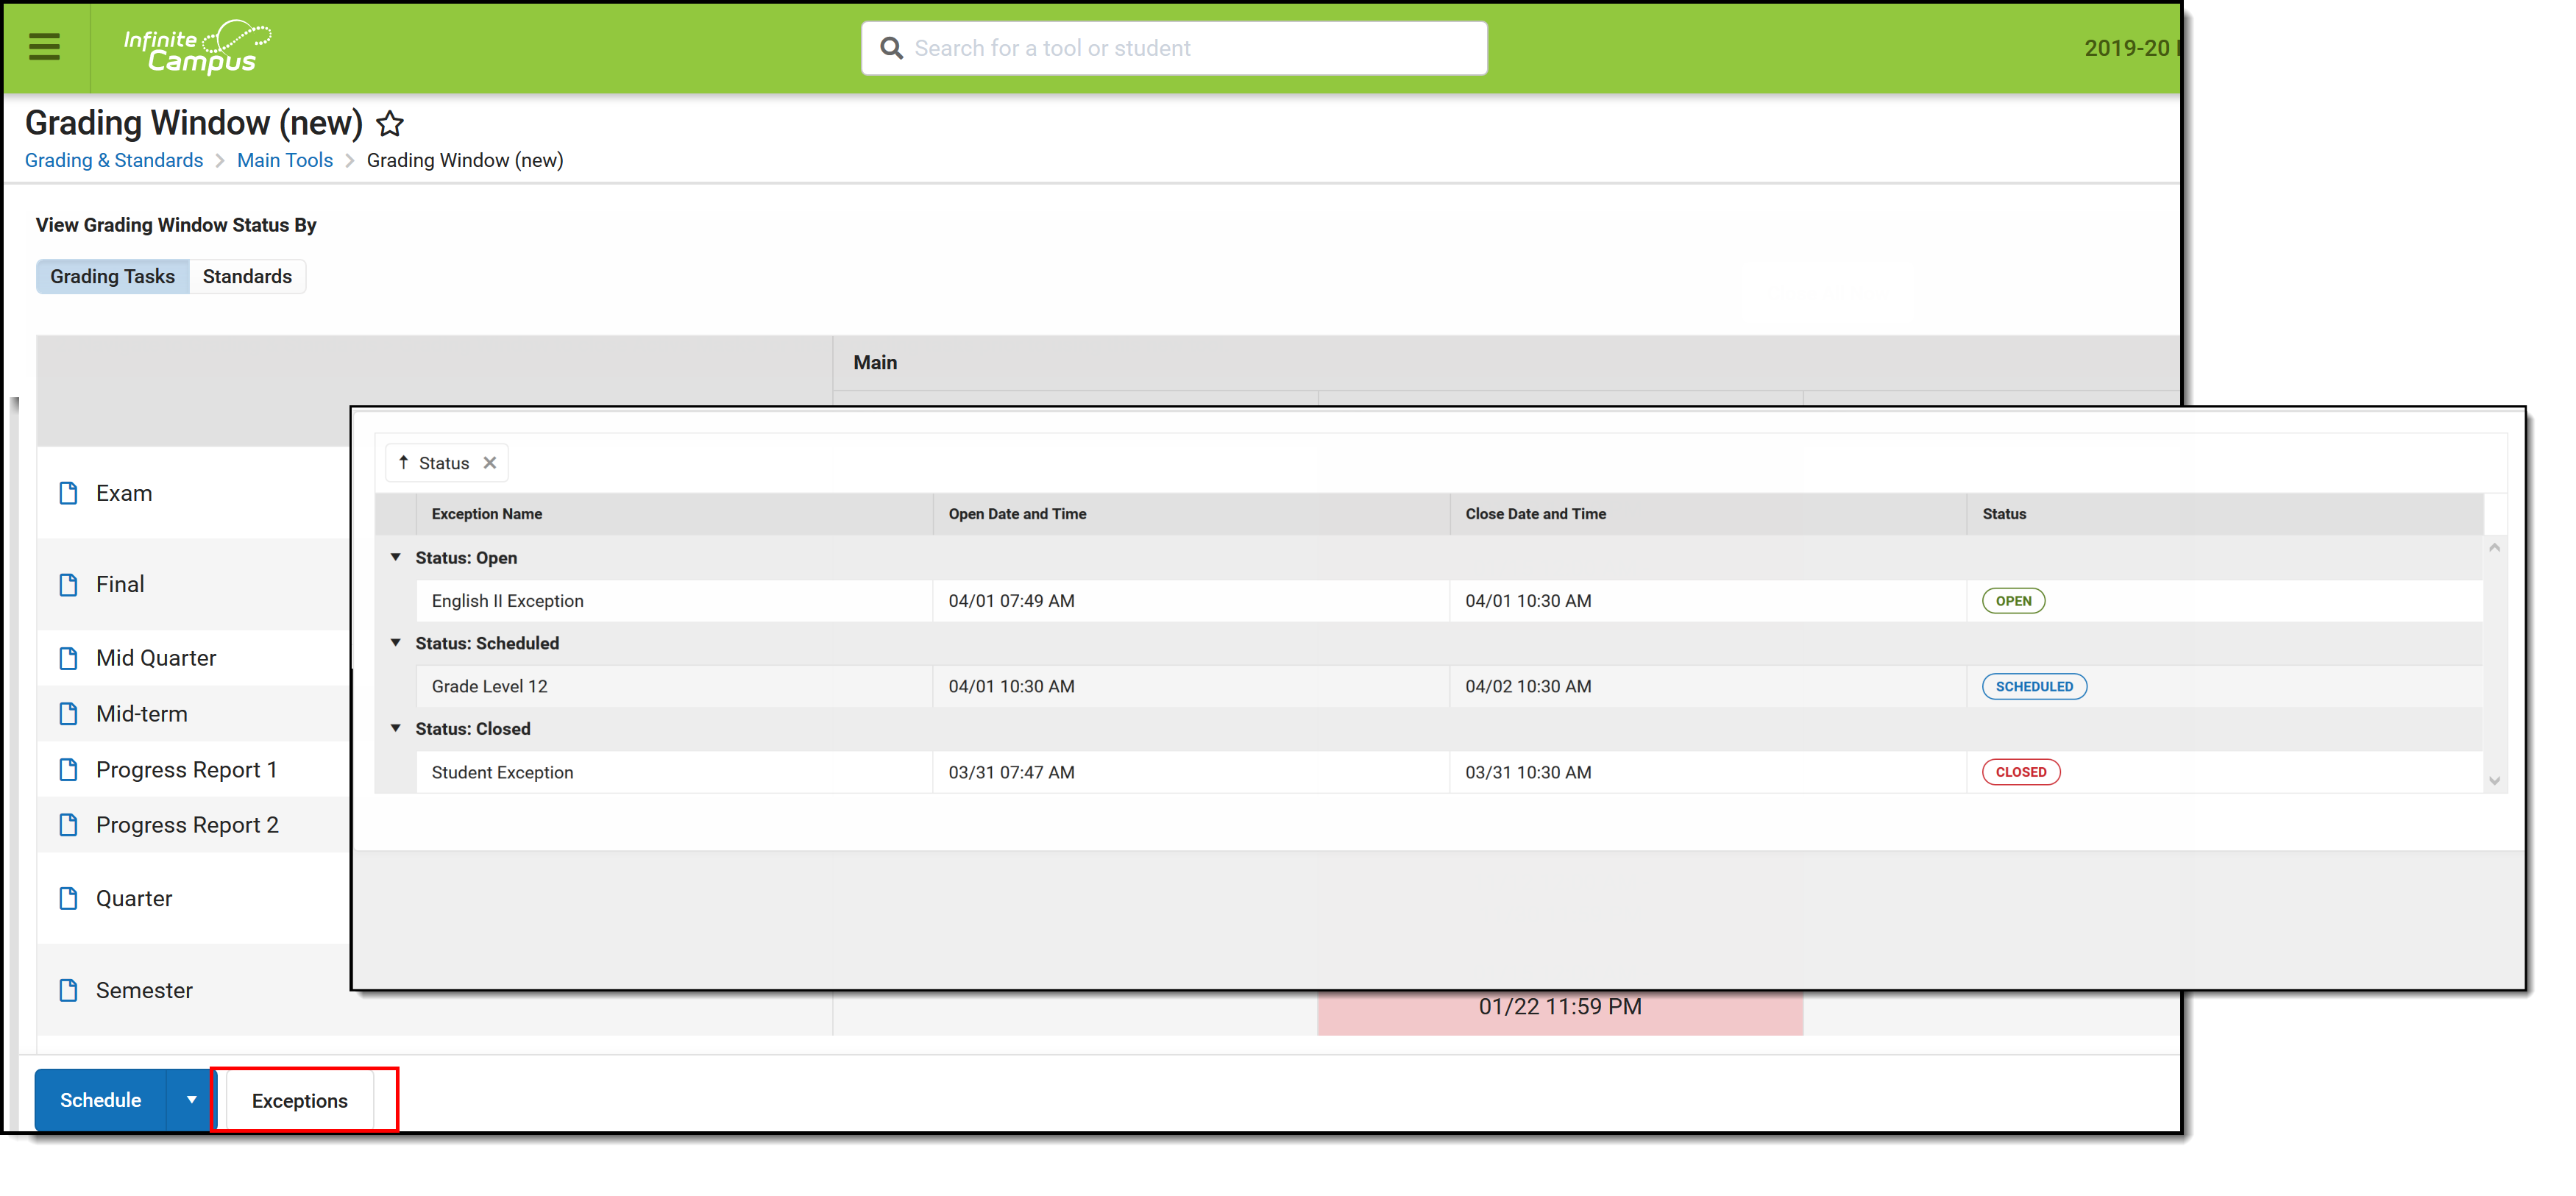
When exceptions have been added for a calendar (a school and calendar must be selected in the Campus toolbar), a summary of exceptions displays, listing the name, the times the exception is open and the current status of the exception - Open (currently able to post grades), Scheduled (grades can be posted in the future), or Closed (grades can no longer be posted). This list can be expanded or collapsed, and sorted by any of the column by dragging the column header to the top of the editor.
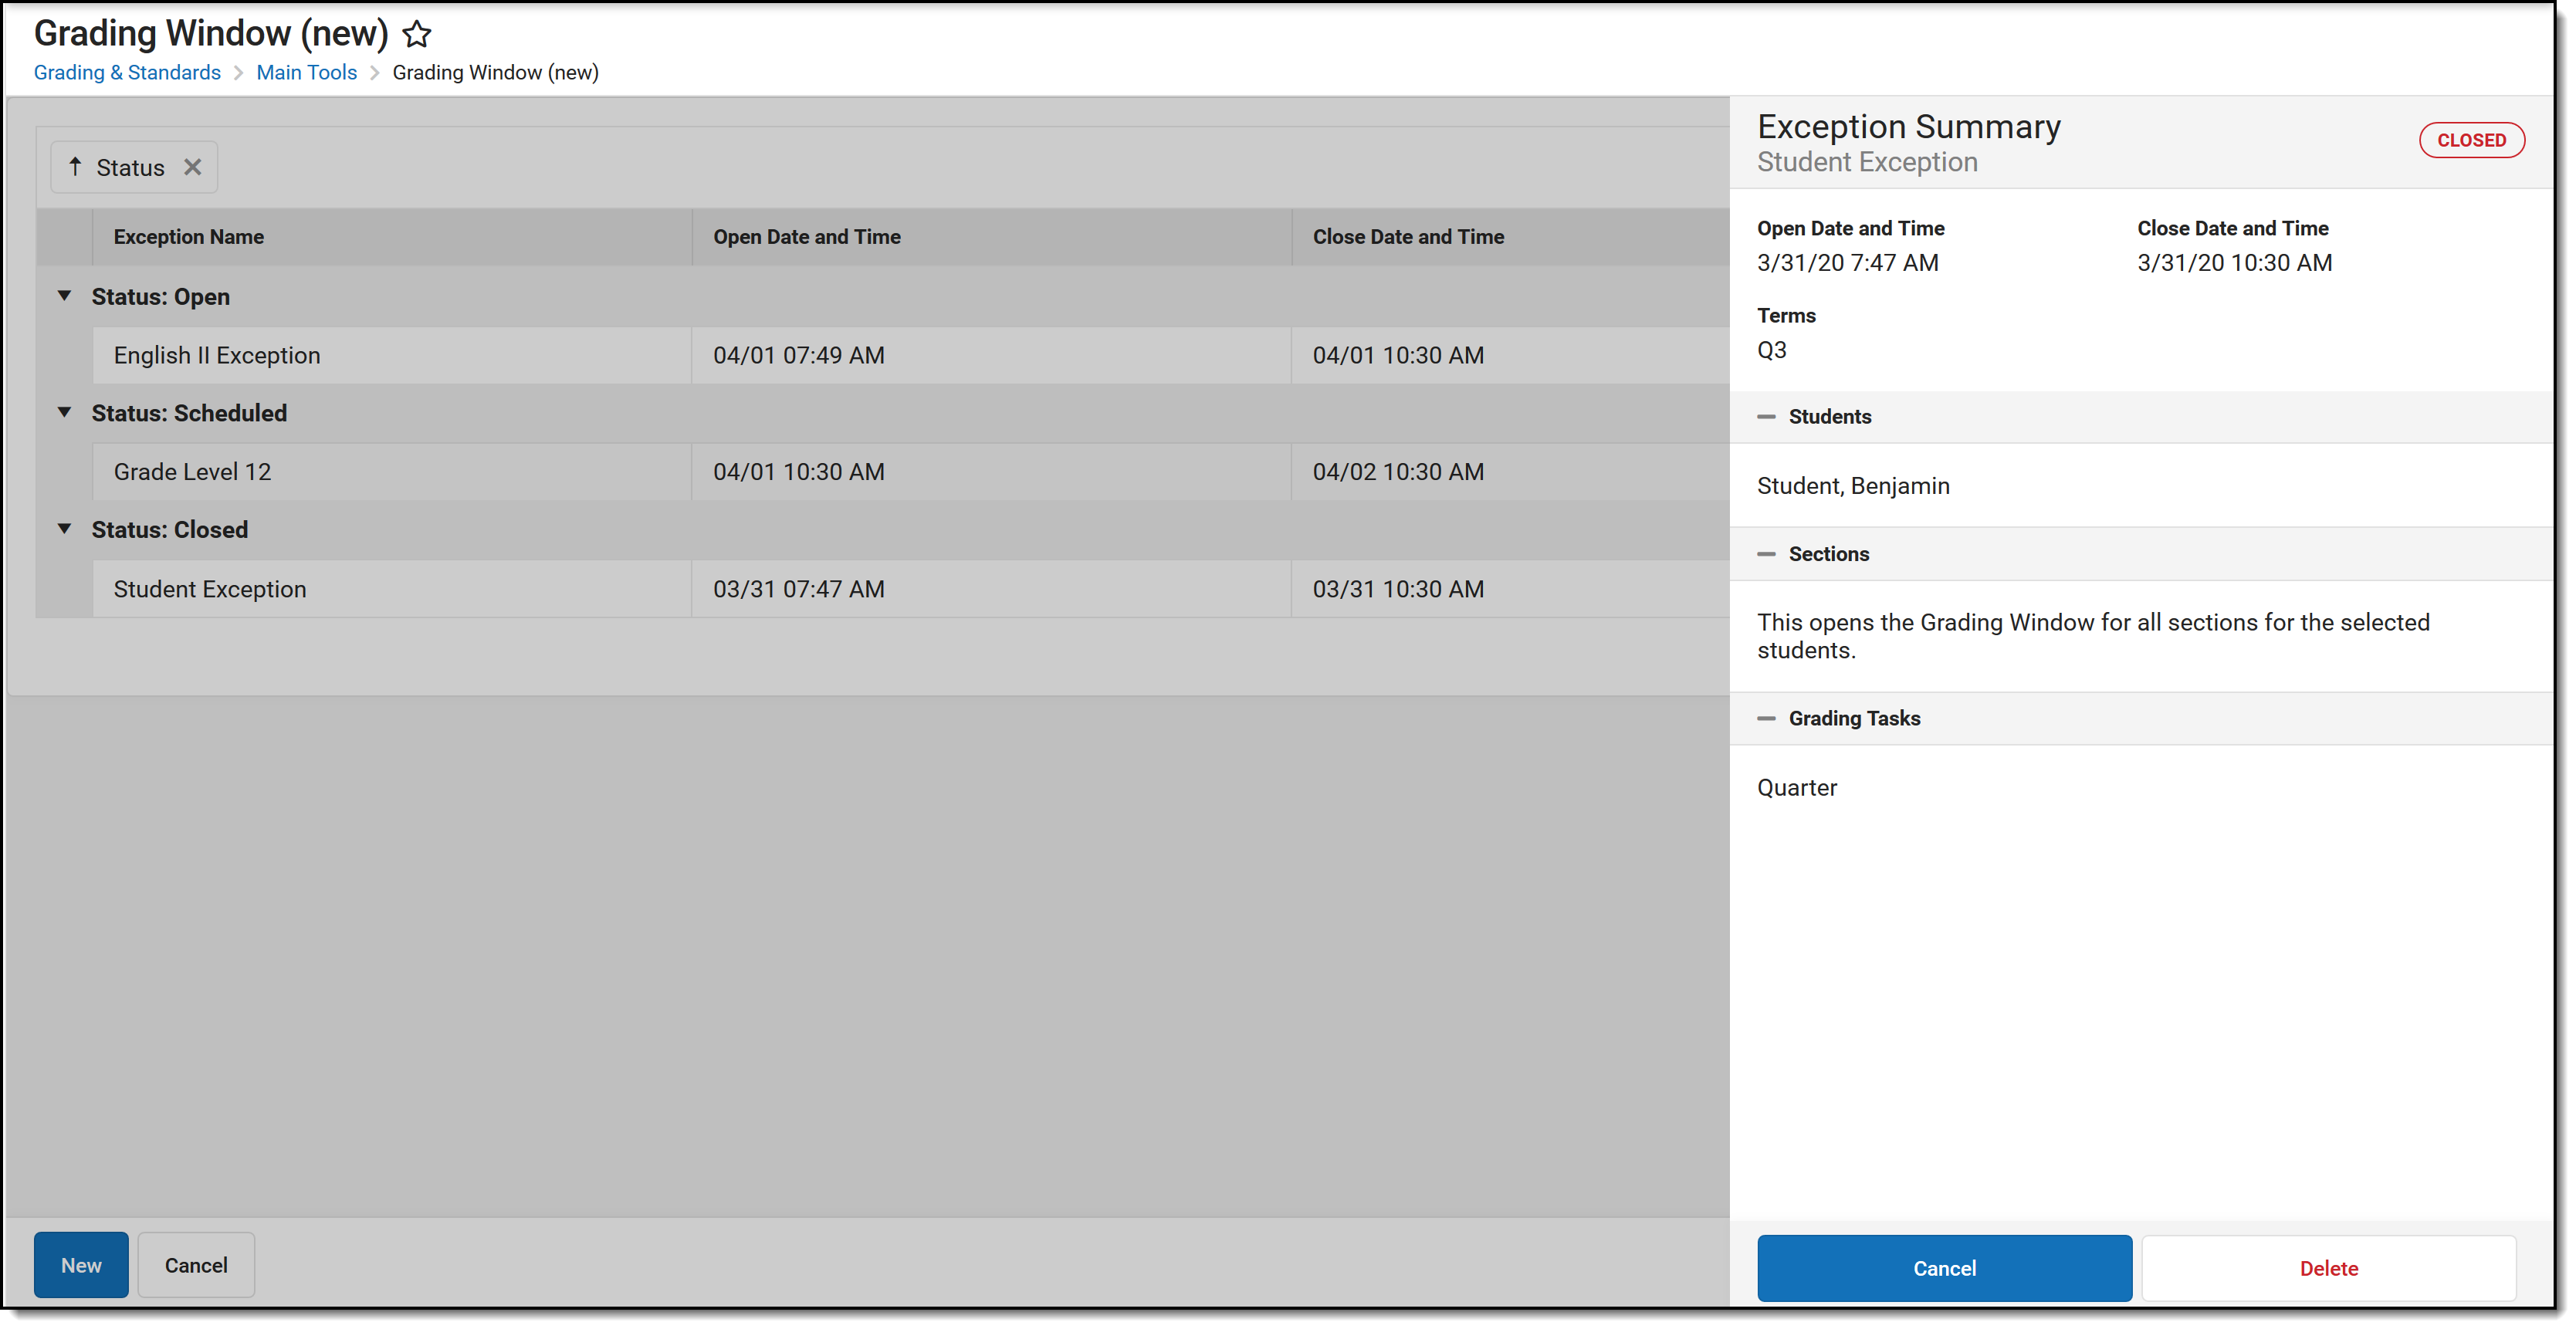
An Exception Summary displays to the right after selecting an existing exception, listing the date and times, the terms, students, sections and terms included in that exception. Click Cancel to close the summary or Delete to completely remove the exception. If the selected exception is currently open, an option to Close Now is also available.
Select Criteria
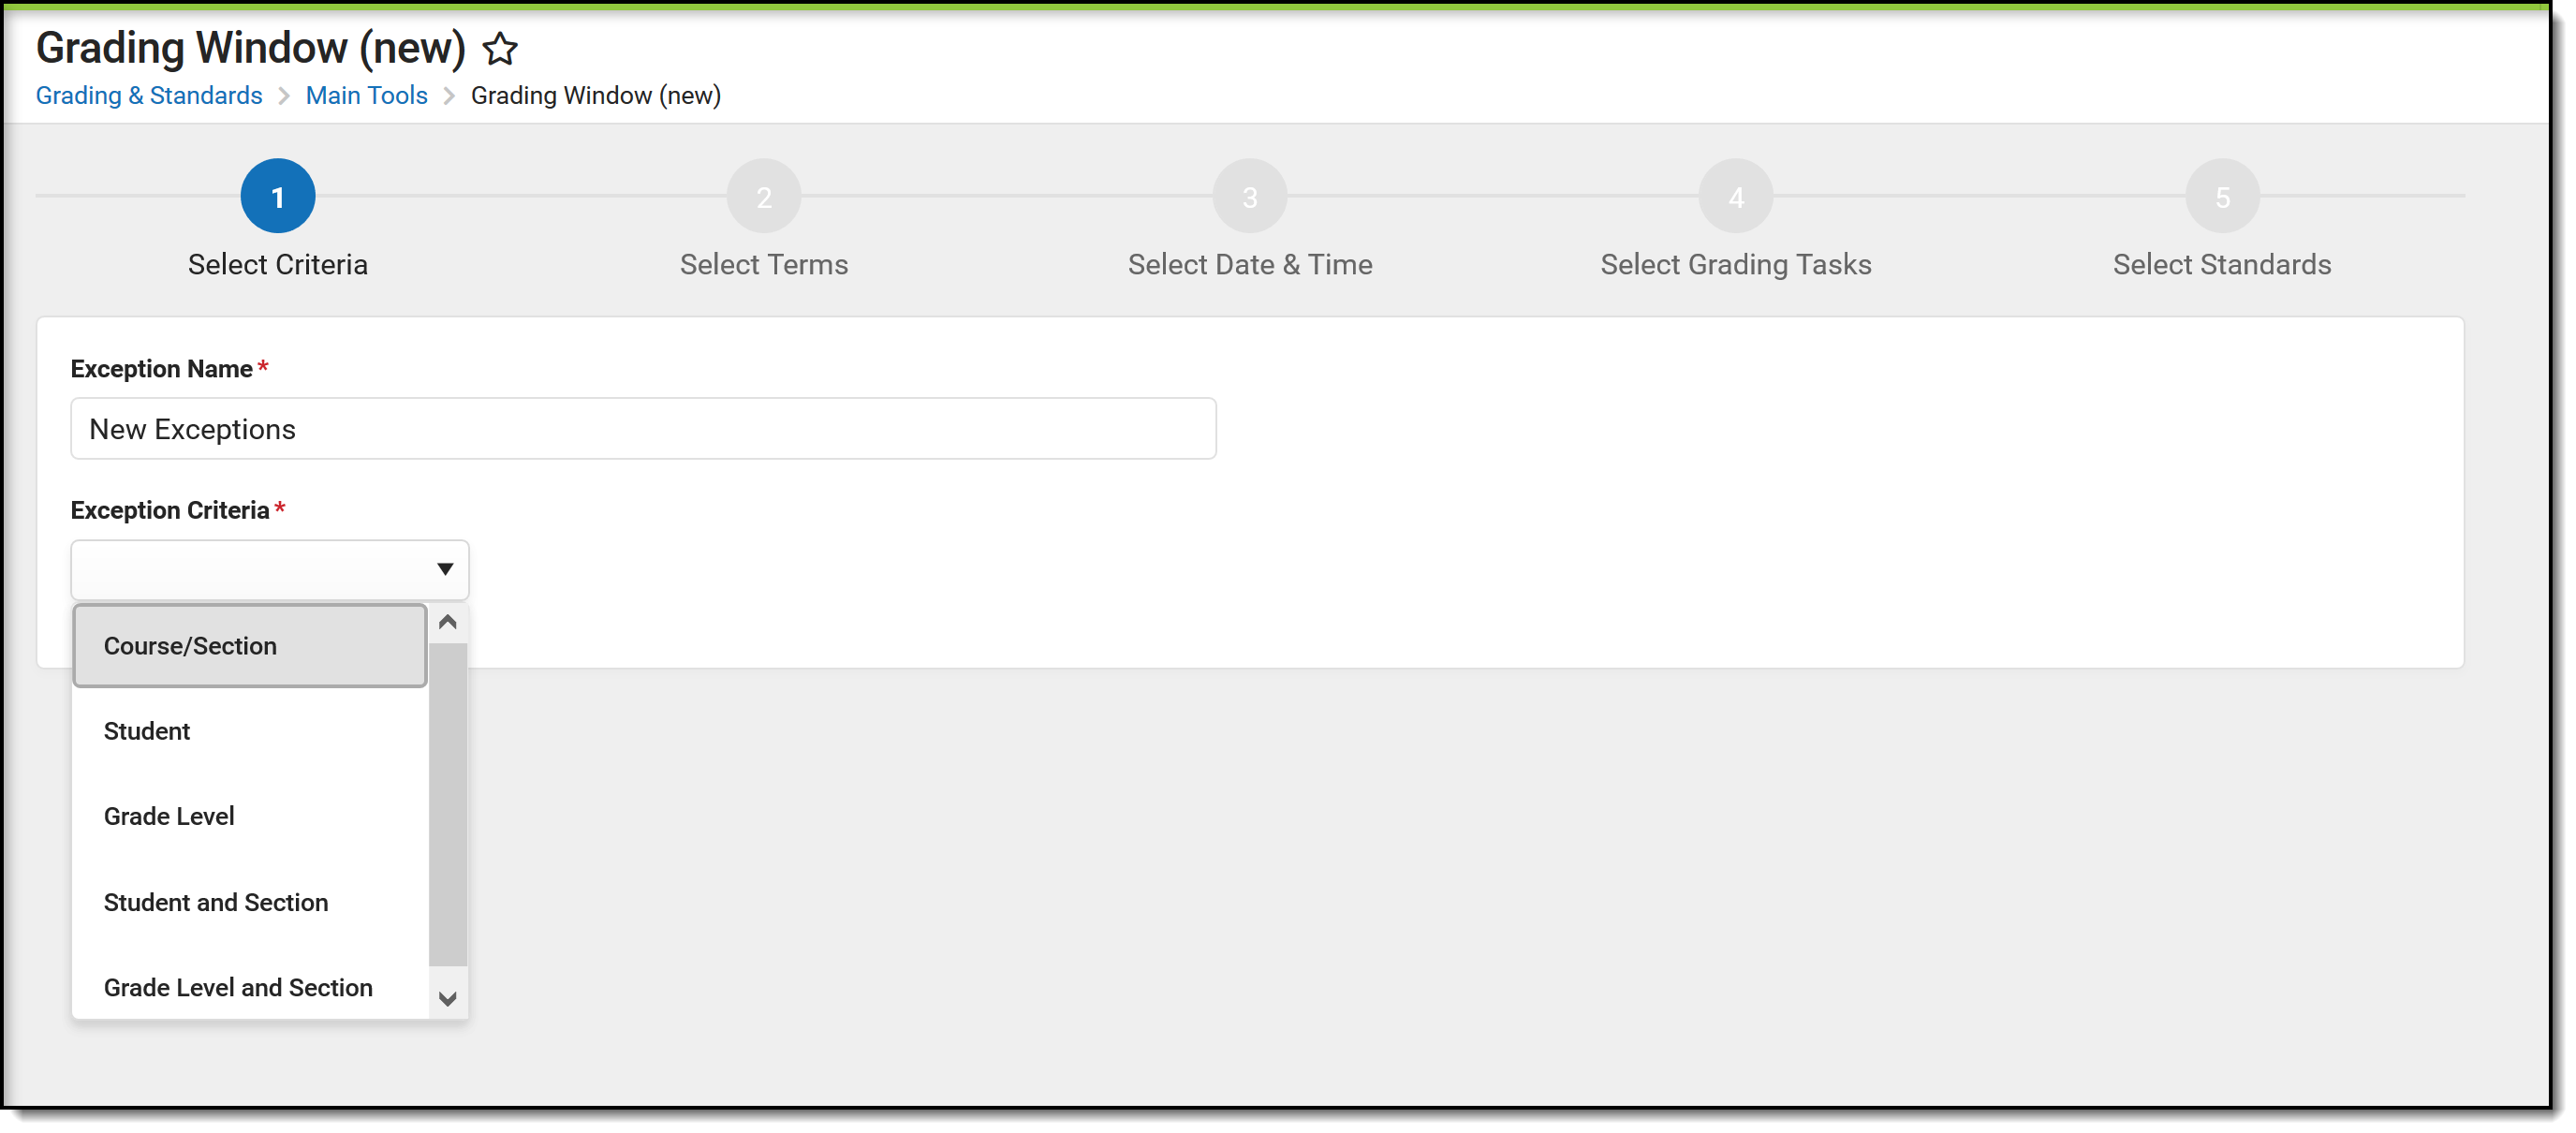
The first step in the Exceptions workflow is to name the exception and select the criteria. The name can be any text that identifies why the exception was created - Teacher Smith Courses, Senior Class EOY, etc. The criteria determines the granularity of who or what can have grades posted: students, courses, sections, etc.
After the Criteria is selected, additional options display that vary depending on the selected criteria. Review the table below for explanations of each.
Only one Exception Criteria can be selected at one time. Once finished with selecting the criteria from the additional options that appear, click Next.
| Exception Criteria | Description | Additional Options | Example |
|---|---|---|---|
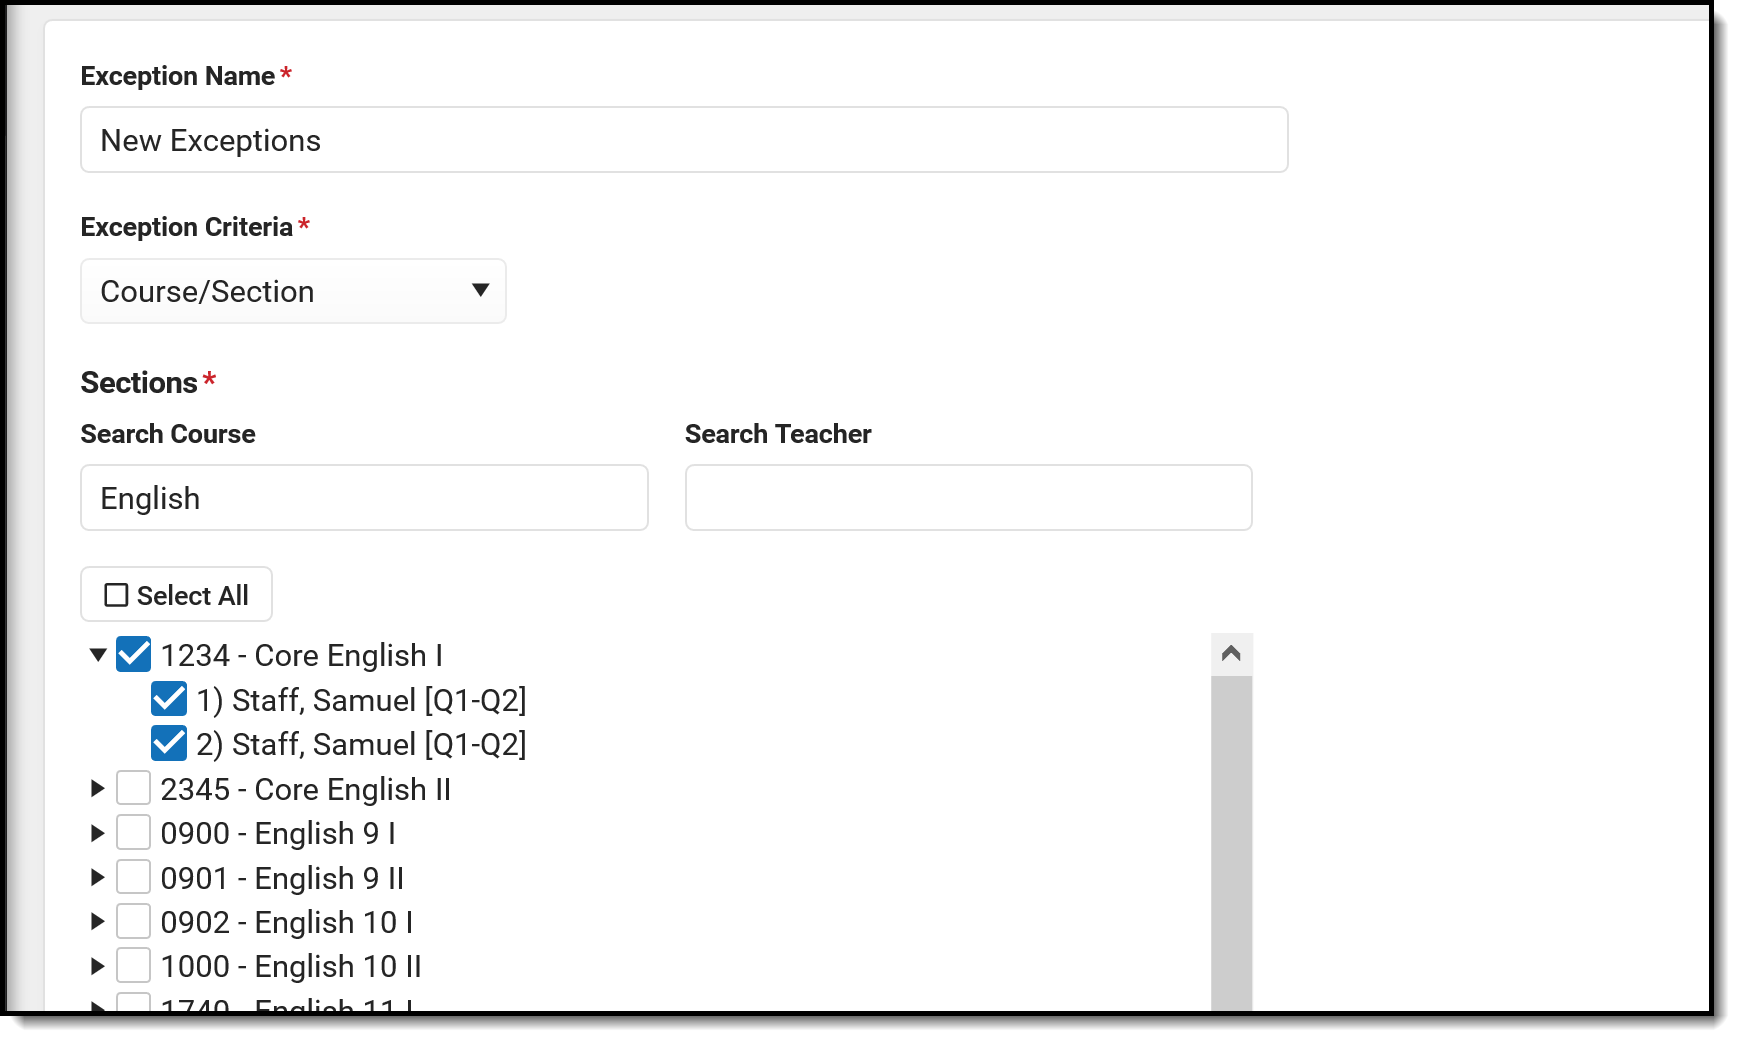
| Course/Section | This schedules a grading window for all selected courses and sections. All sections of a course can be selected, or specific sections of a course can be selected. This allows for ANY teacher of a course section to post grades. It is not limited to primary teachers, meaning primary teachers, teachers and section staff are allowed to post grades. Search results are listed first by the Course Number and Course Name. Expanding a course number/name displays the sections of the course with the teacher's name and in what terms that section meets. If there is no teacher assigned, the terms in which that section meets display. Use this option to allow all English teachers to post scores or to let the teacher of one English section post scores. |
To narrow the list of Course/Section, enter the Course Name and/or the Teacher Name in the Search Course or Search Teacher fields. This narrows the results of the available courses and teachers. Or scroll through the list of courses. Searching for a teacher shows all of the courses the teacher is assigned to teach in that school. Mark the checkbox next to the desired Course and Section. Marking the checkbox next to a Course Name selects all of that course's sections. |
|
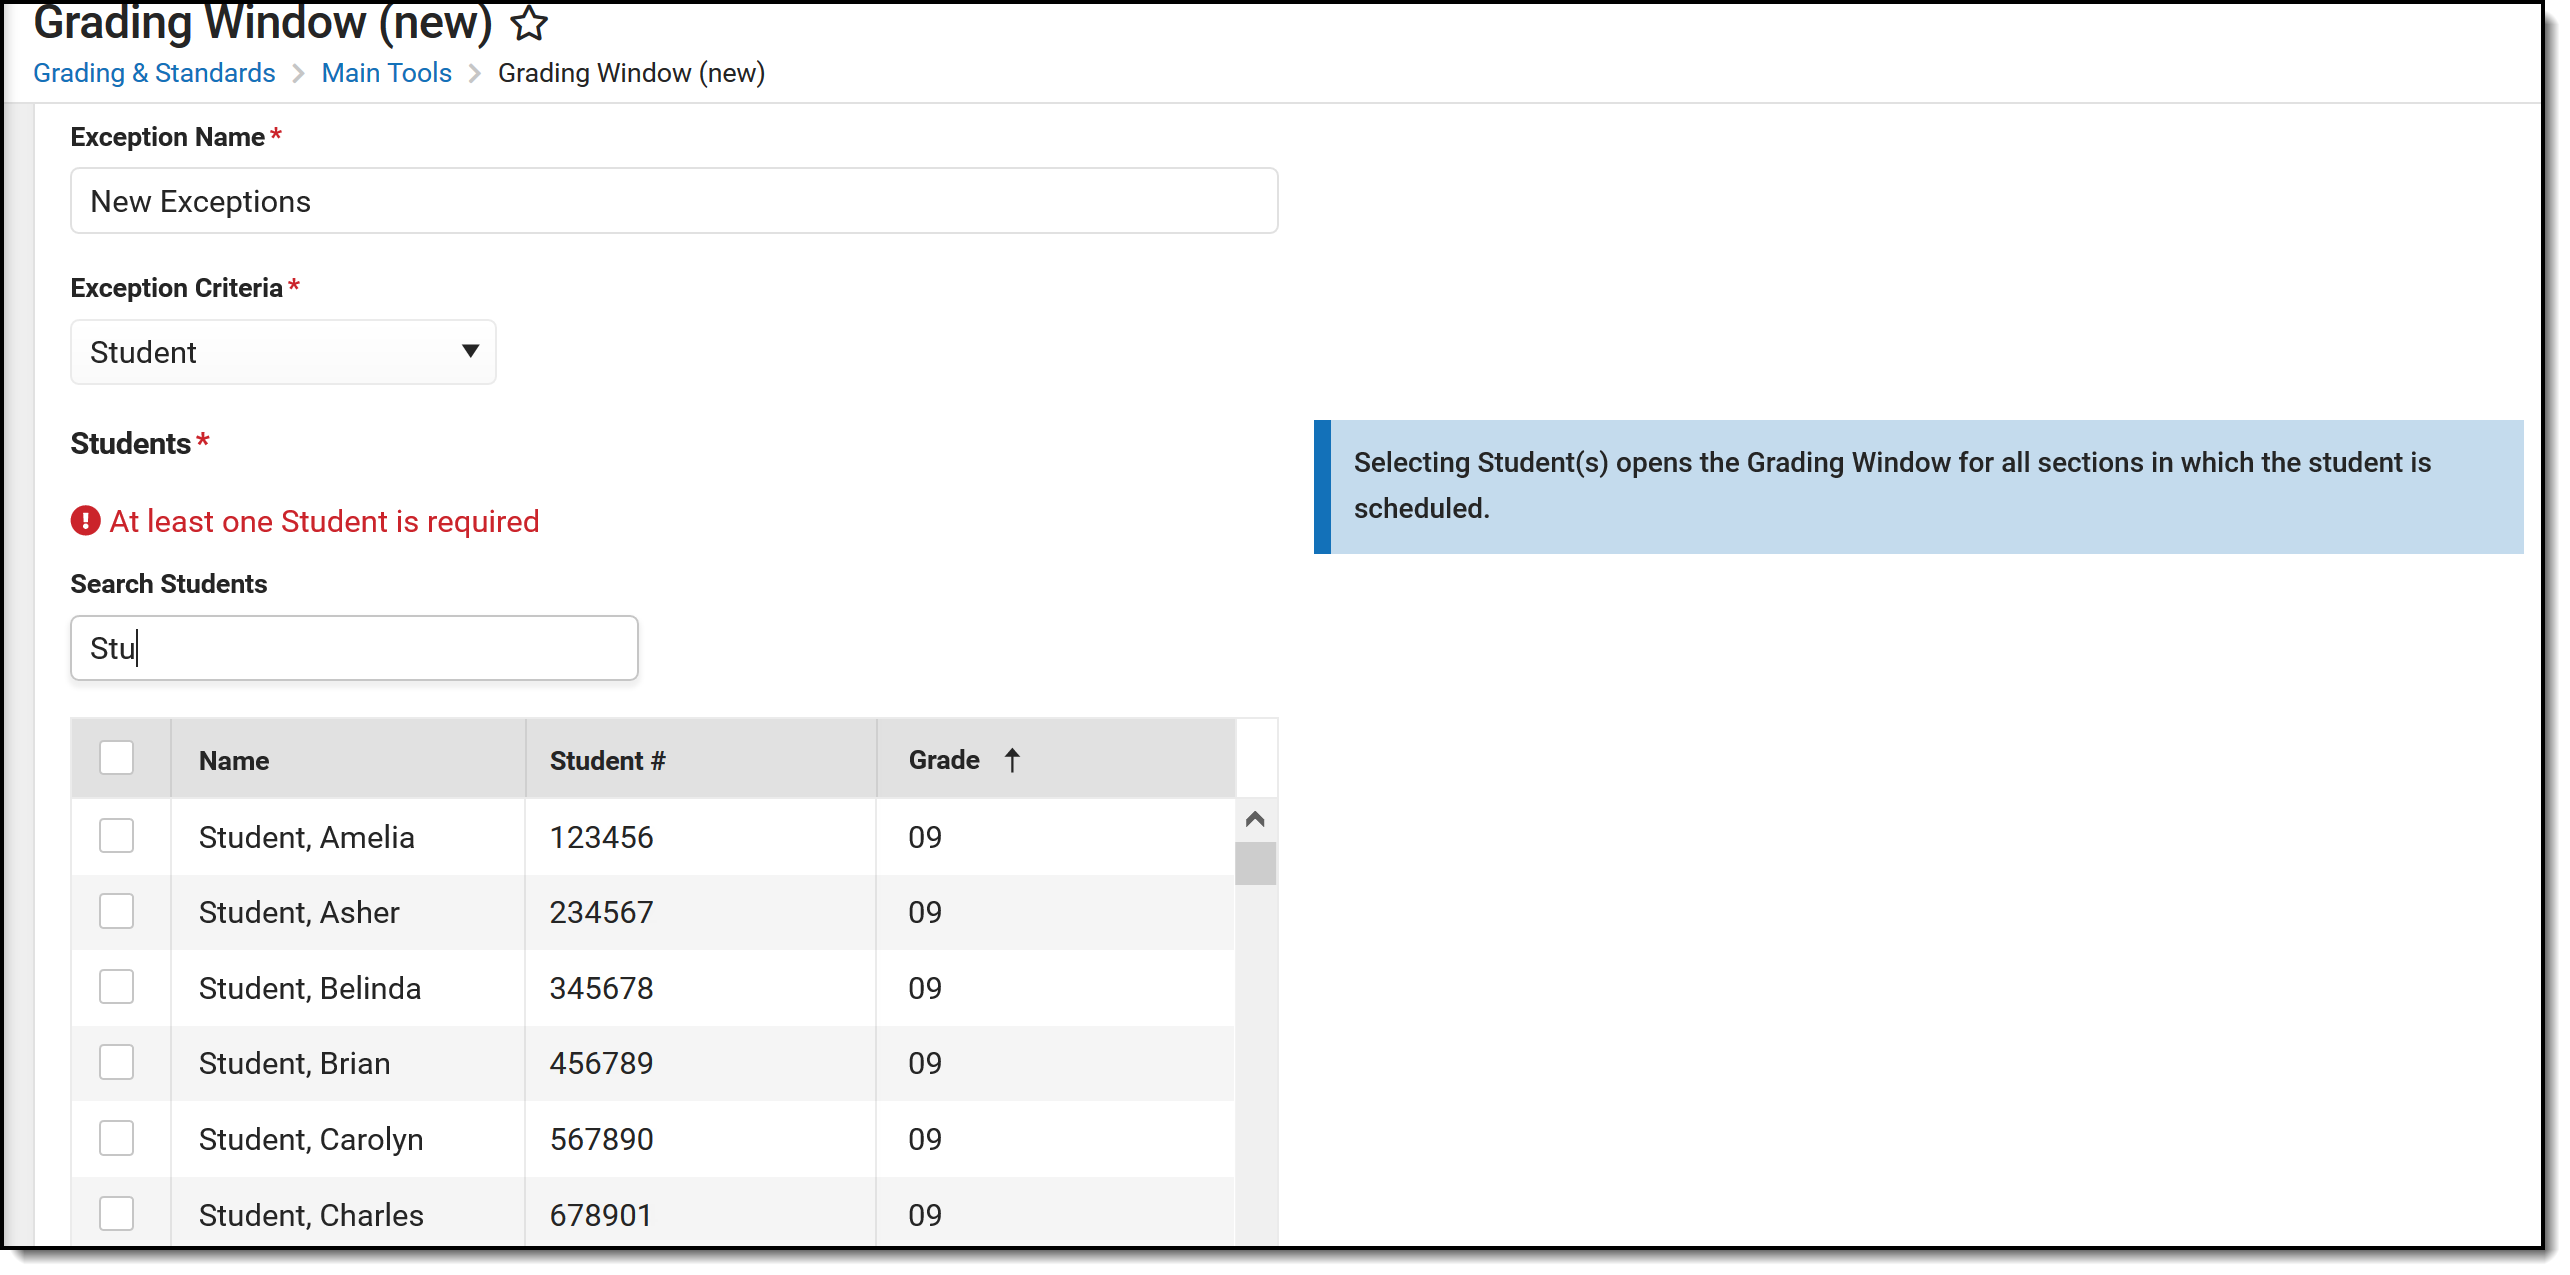
| Student | This schedules a grading window for all sections in which the selected students are scheduled. More than one student can be selected. Use this option to open a grading window for students who may be transferring before the end of a term or students who need to send current transcript information to colleges. Students are listed multiple times if they have more than one enrollment in the calendar. On selection of a student, both enrollments are selected. If an exception needs to be opened for just one of the enrollments, use the Student and Section criteria to select the sections associated with the correct enrollment. All students enrolled in the calendar are included here. Tool rights for Allow Unfiltered Search are ignored. |
Search for the students by entering criteria into the Search Students field. This could be the student's last name, first name, student number or grade level. Or, scroll through the list of students to select them. Mark the checkbox next to the desired student's name to include that student in the Exception. |
|
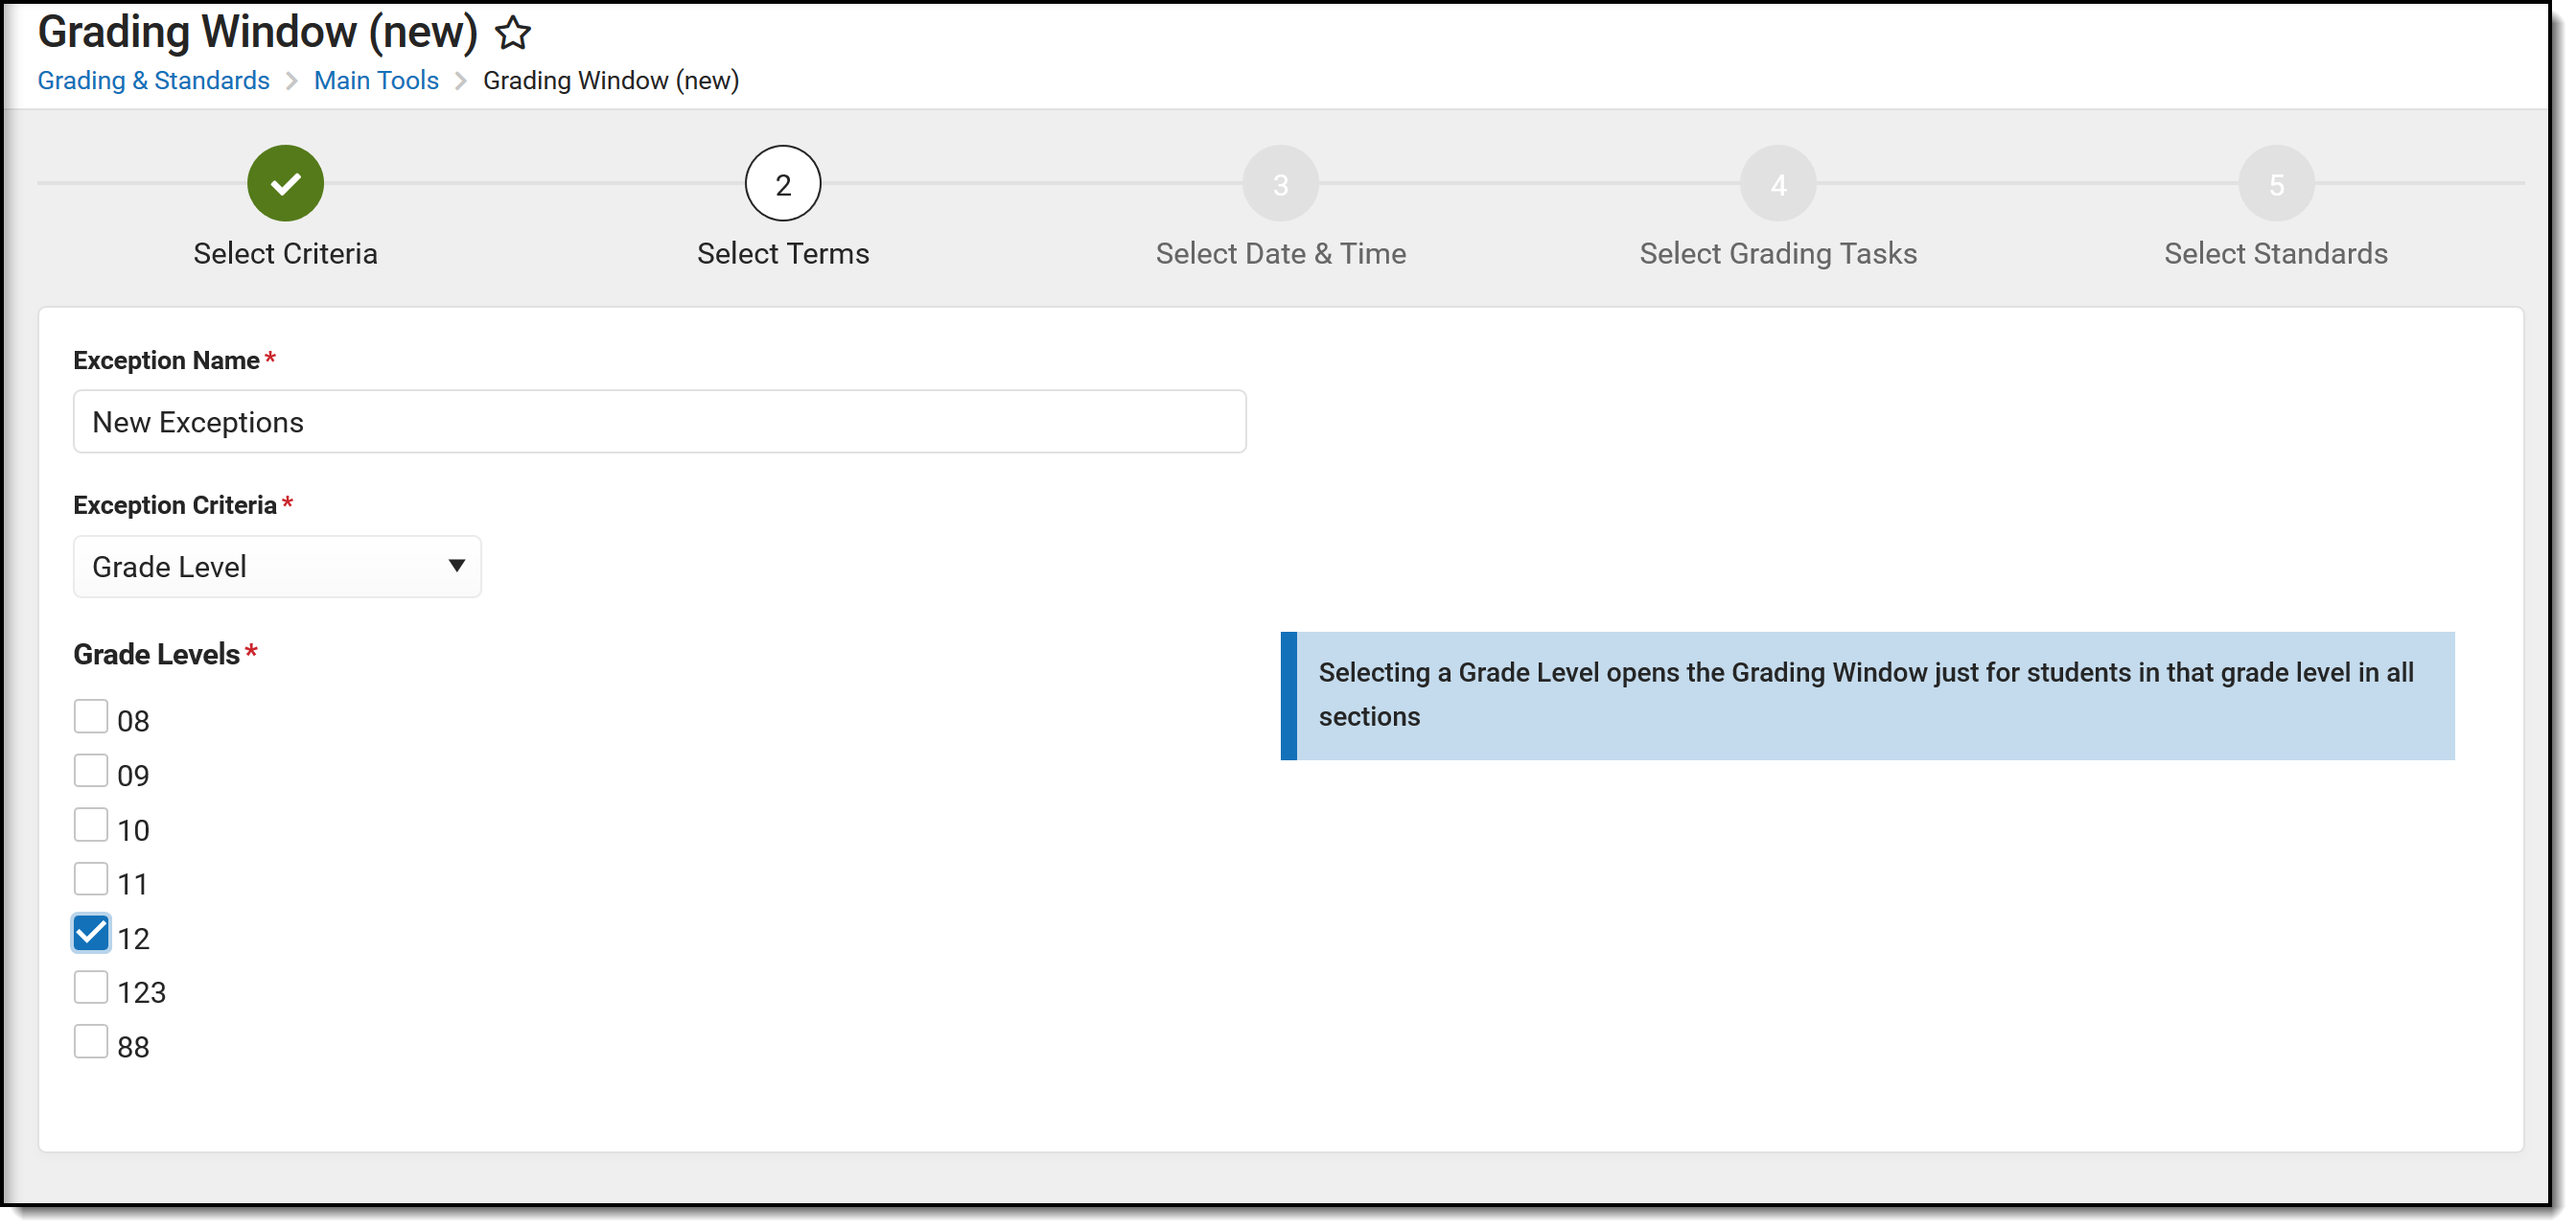
| Grade Level | This schedules a grading window for all students enrolled in the selected grade level. Use this option to post grades for all seniors at one time who are finished with classes before other students. |
Mark the checkbox next to the desired grade level to include students enrolled in that grade level in the Exception. All grade levels in the selected calendar are available. |
|
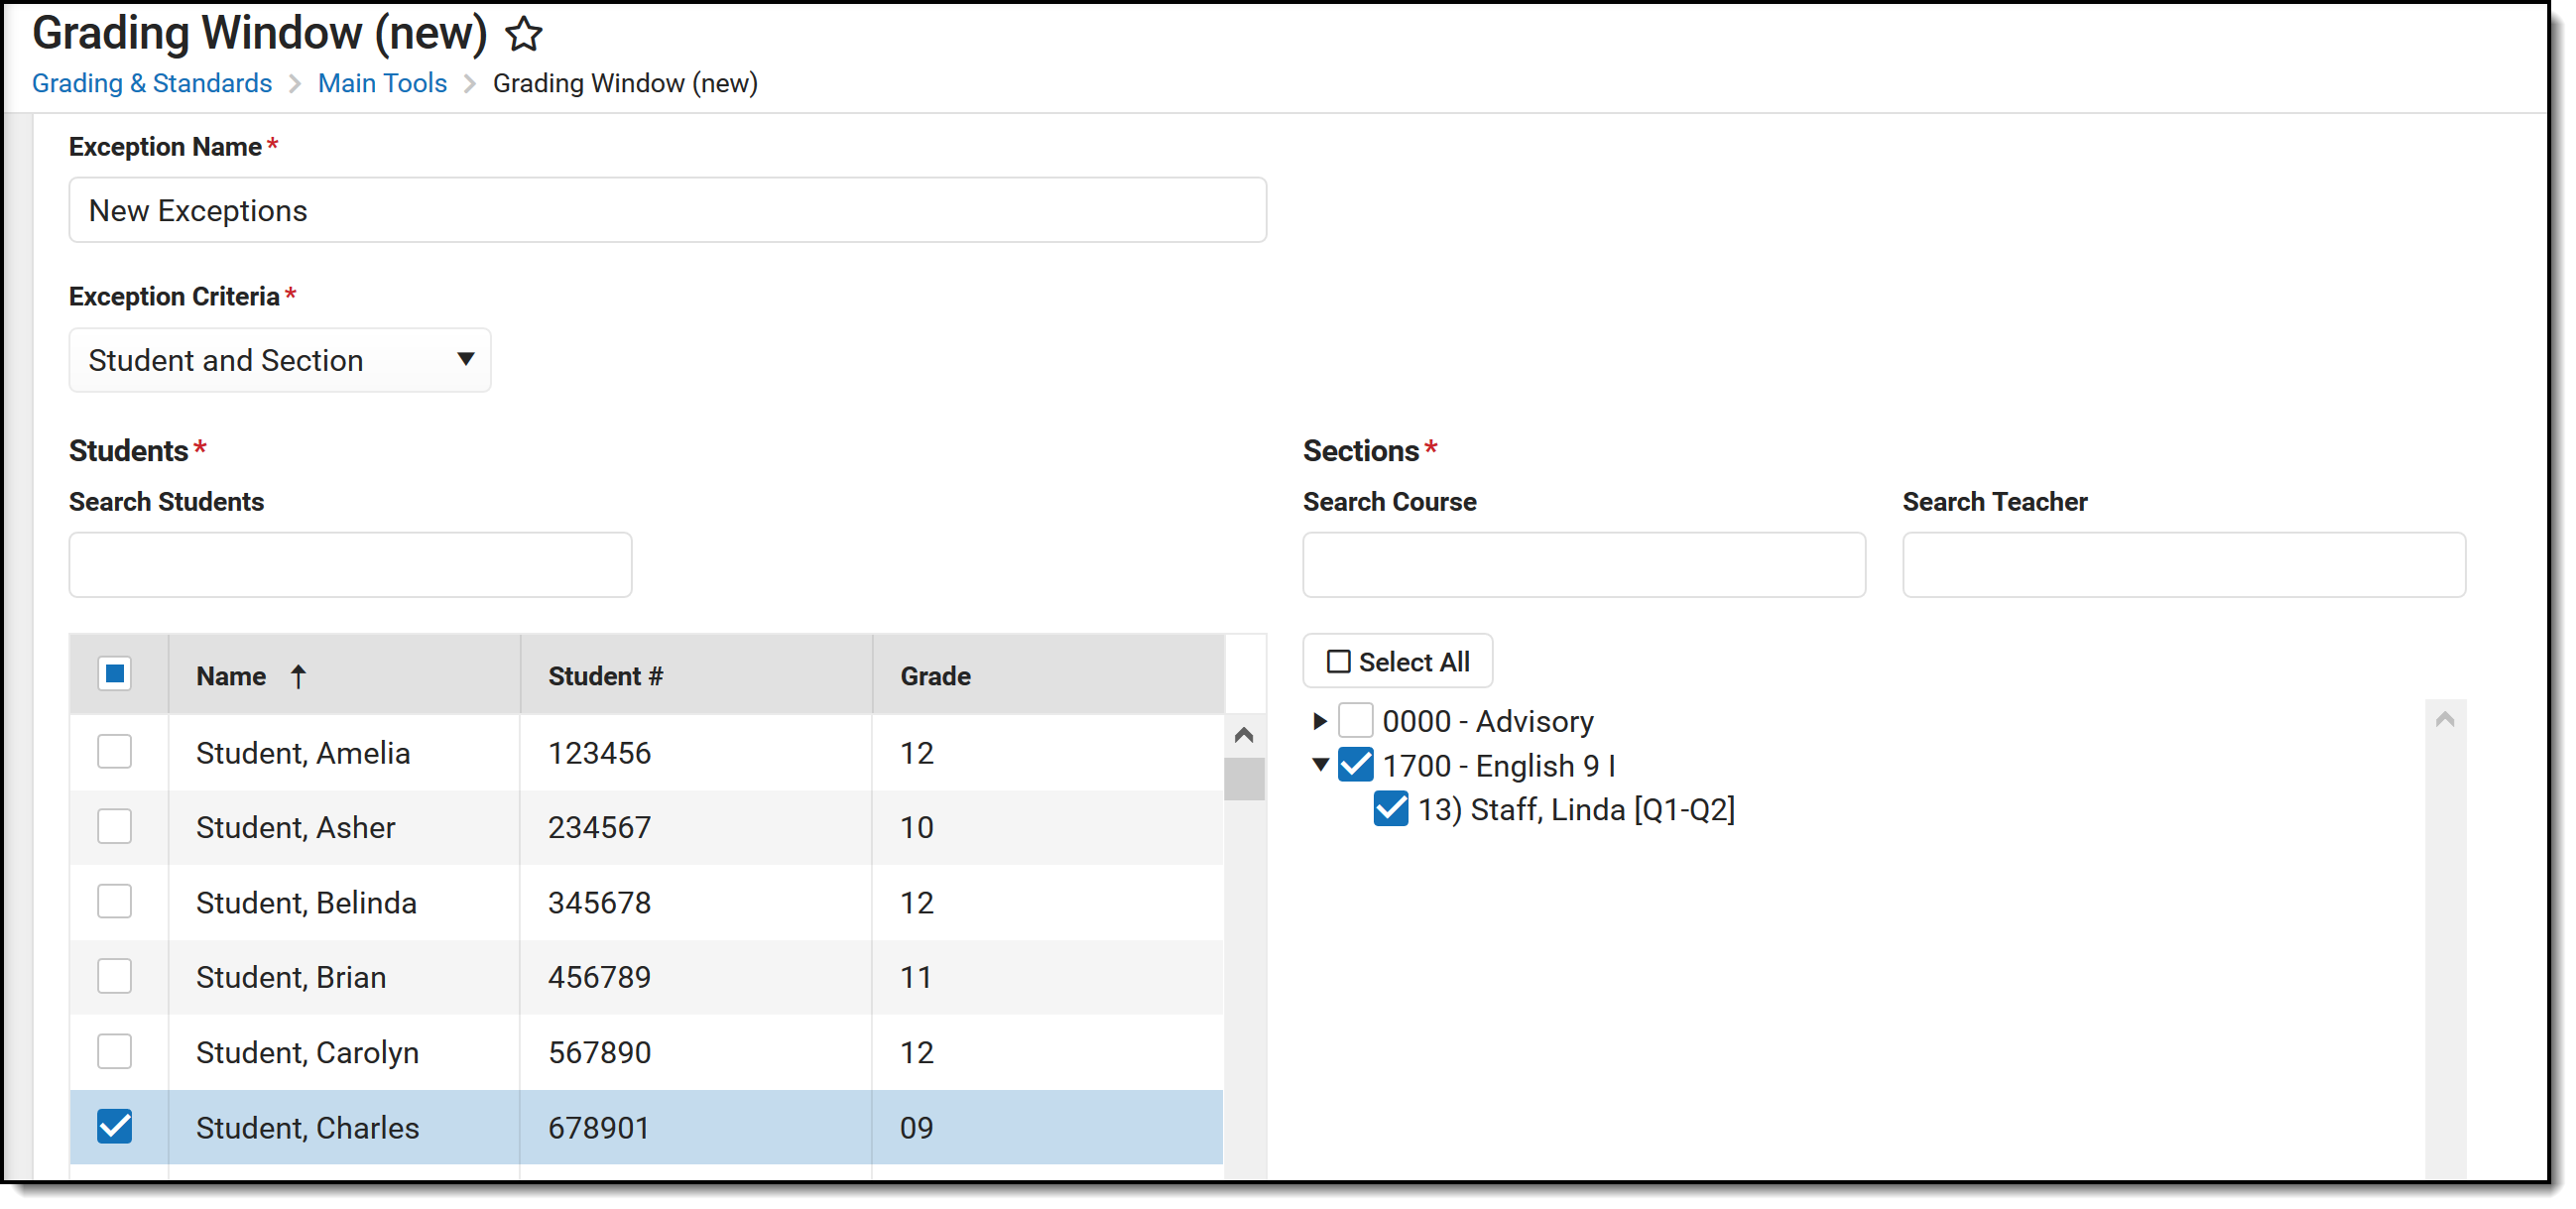
| Student and Section | This schedules a grading window for the selected student(s) and a specific course section(s). All Sections for any students selected display. If two students are selected, all sections for both students display. Use this option to post grades for a student who is transferring and a single teacher needs to post grades. This lets the teacher post grades for just that student for just that section. |
Search for the students by entering criteria into the Search Students field. This could be the student's last name, first name, student number or grade level. Or, scroll through the list of students to select them. Mark the checkbox next to the desired course and section. Marking the checkbox next to a course name selects all of that course's sections. |
|
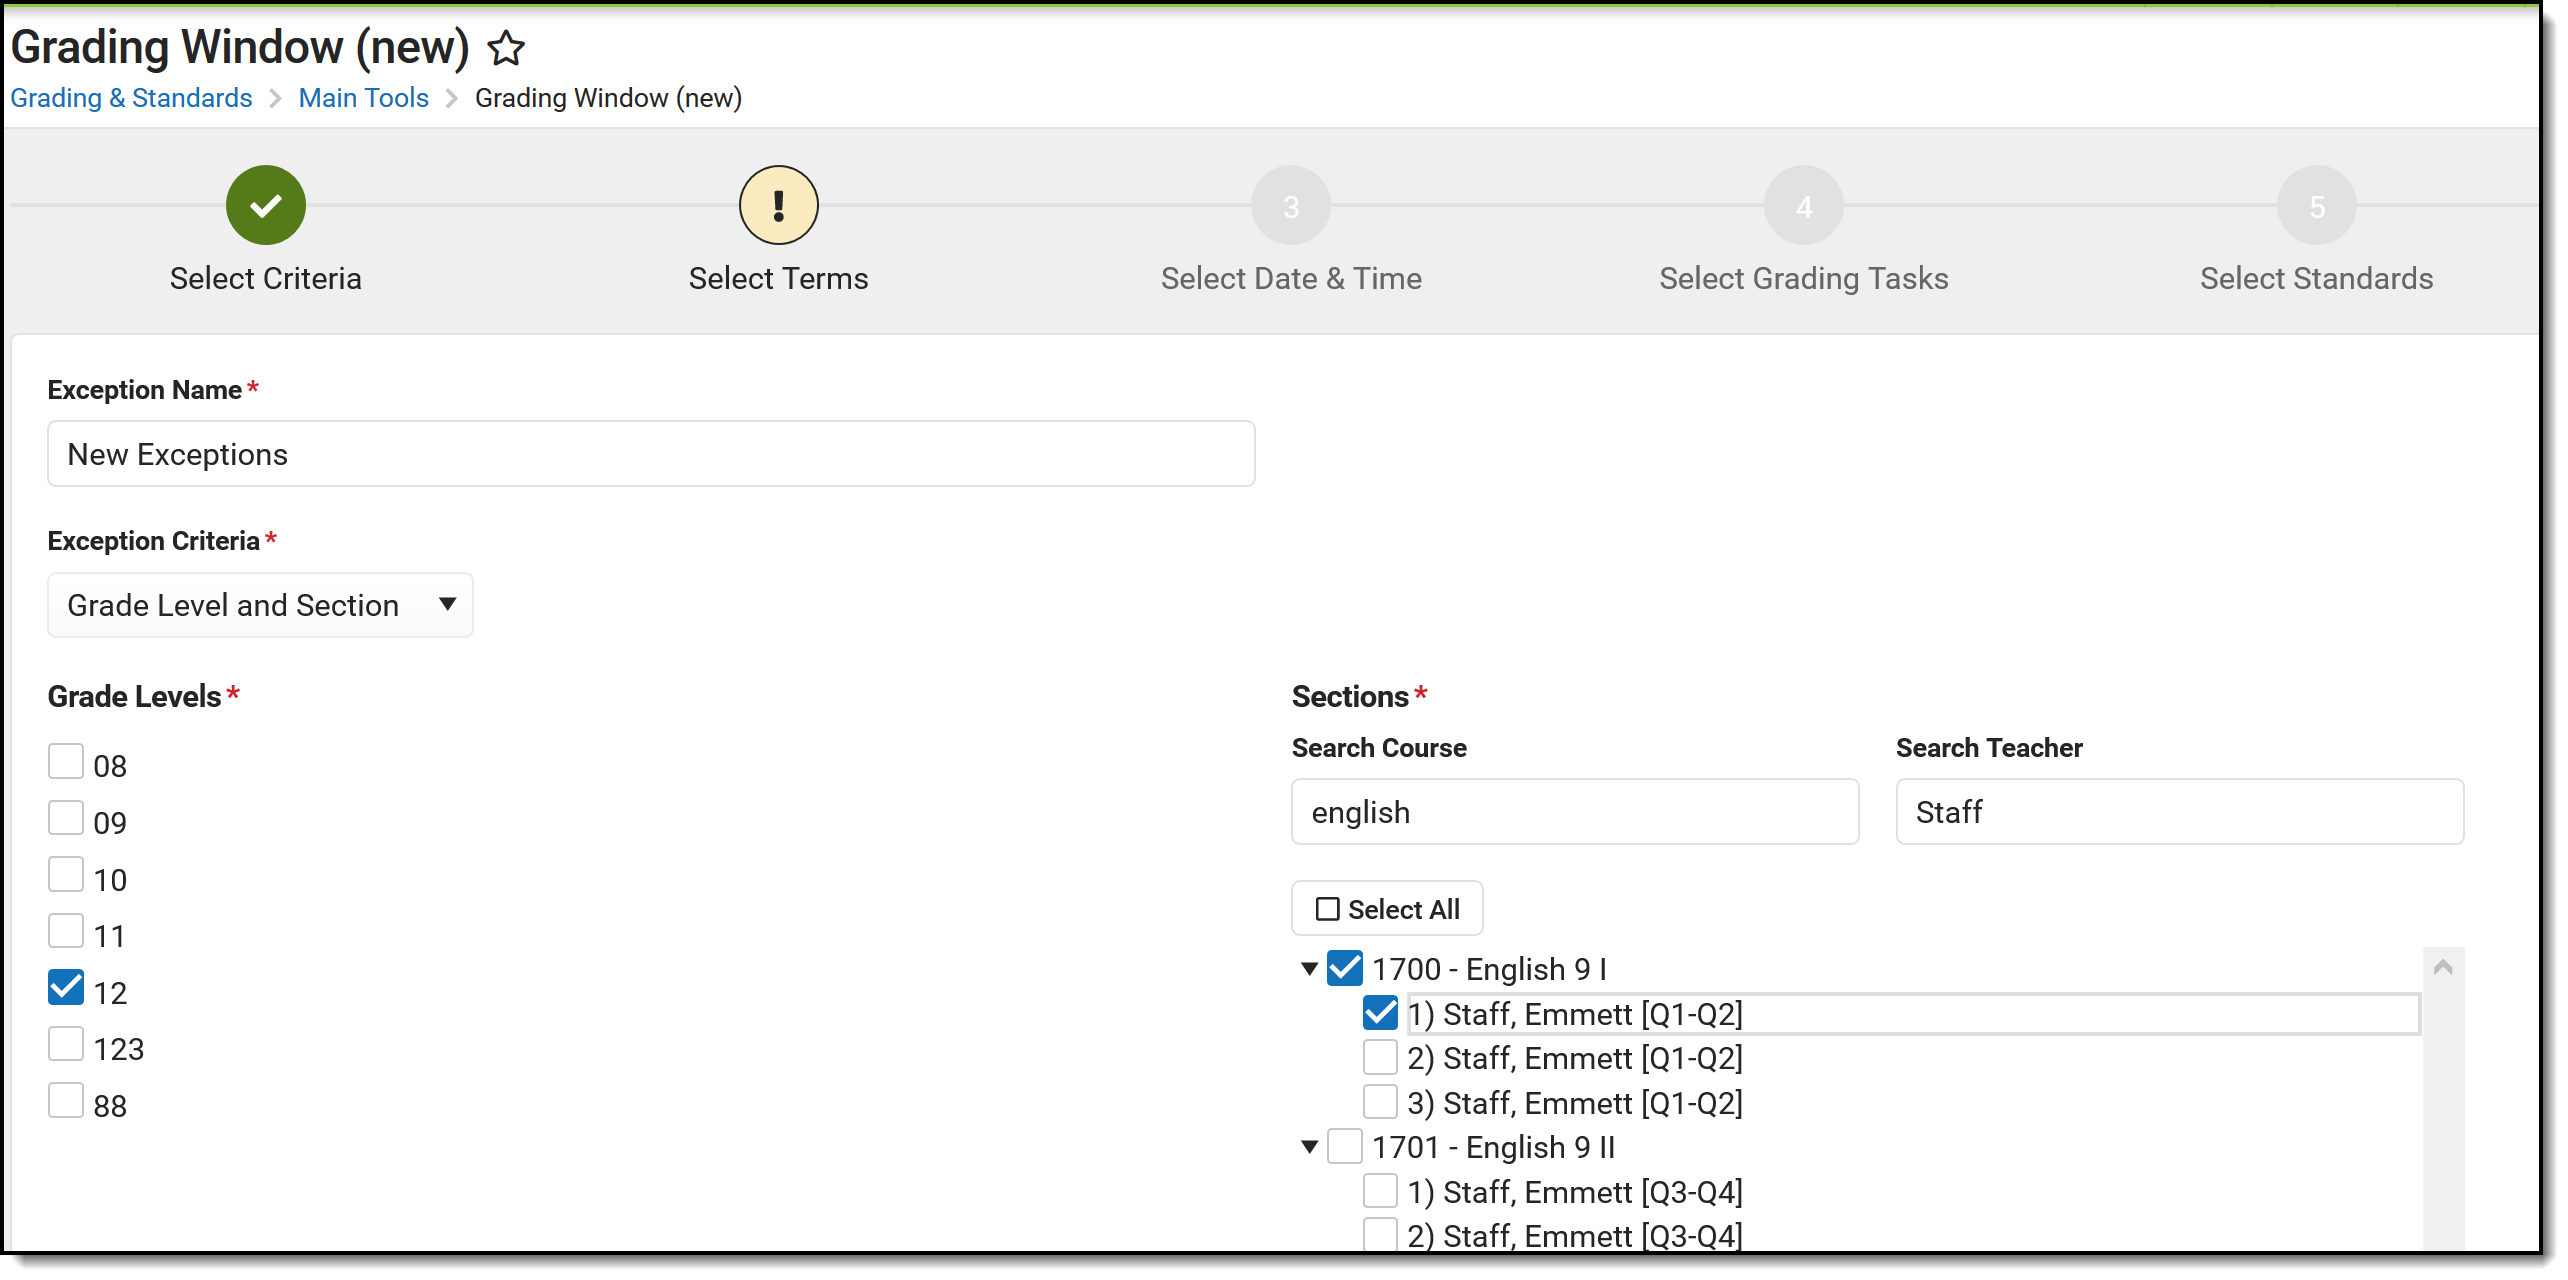
| Grade Level and Section | This schedules a grading window for all students in the selected grade level for the selected courses sections. Use this option to post grades for a section that includes students enrolled in several grade levels, but the teacher only needs to post grades for one particular grade level (e.g., seniors in a math class). |
Mark the checkbox next to the desired grade level. All grade levels in the selected calendar are available. Then, search for and mark the desired course section. |
|
Terms
The Grading Window Exception can be set for any combination of terms, meaning the first and third terms can be turned on, or just the first term, or just the third term. If the selected calendar has more than one schedule or period structure, terms are grouped into the appropriate schedule or structure. Note that the term numbers displayed are the order assigned to the term, and not necessarily the name of the term. This means that a term structure of Q1 (order 1), Q2 (order 3), Q3 (order 5) and Q4 (order 7), the terms display as 1, 2, 3 and 4.
Any selected section filters this term list, including a schedule structure. If a selected section only meets in one of the term structures and only for term 4, then only that single term displays.
Mark the appropriate terms and click Next.
Select Date and Time
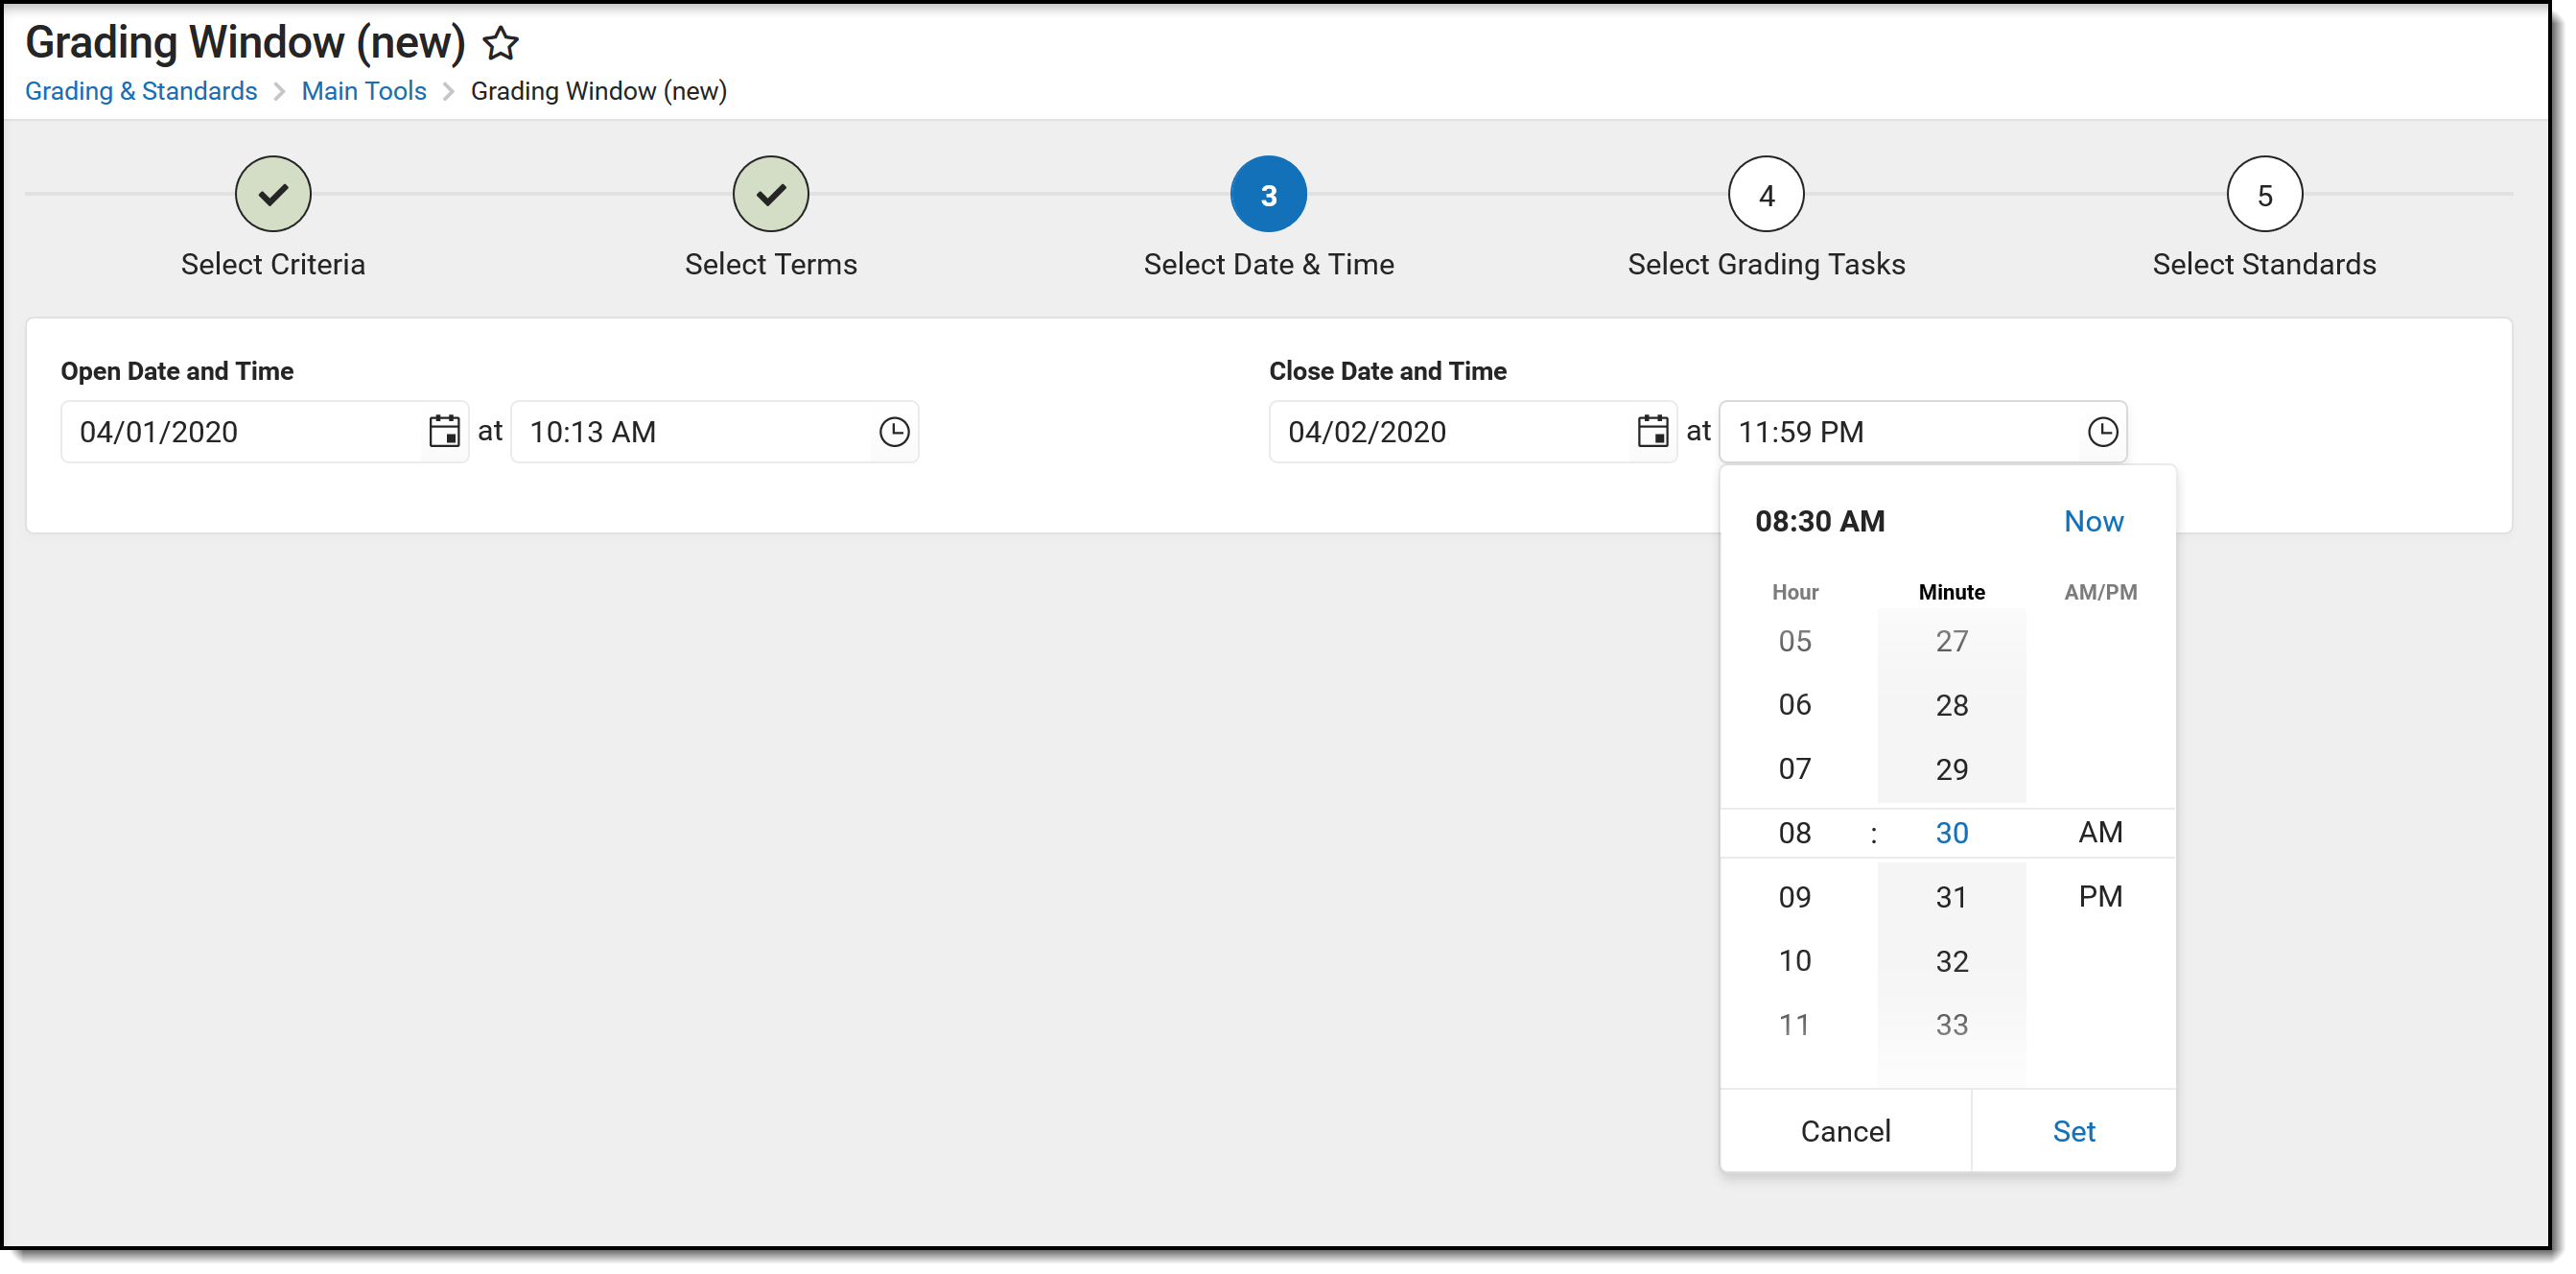
An Exception Grading Window is assumed to be immediately available, since these types of grading windows are because a teacher forgot to post or a student did not have scores posted for them. For this reason, the Open Date and Time is pre-populated with the current date and the current time. The Close Date and Time is not pre-populated. Modify the Open Date and Time as needed, and enter the Close Date and Time as needed.
- The Open Date of an Exception cannot be before the Start Date of the selected Calendar. If more than one calendar is selected, the earliest calendar start date is used to validated the Open Date of the Exception.
- The Close Date of an Exception cannot be more than 90 days after the End Date of the selected Calendar. If more than one calendar is selected, the latest calendar end date is used to validated the Close Date of the Exception.
It is recommended that Grading Window Exceptions be open for a limited amount of time.
Click the Calendar icon to enter a date. Click the Clock icon to enter a specific time. Note that the Set button must be marked in order to populate the time field. Click Next when ready.
Select Grading Tasks and Standards
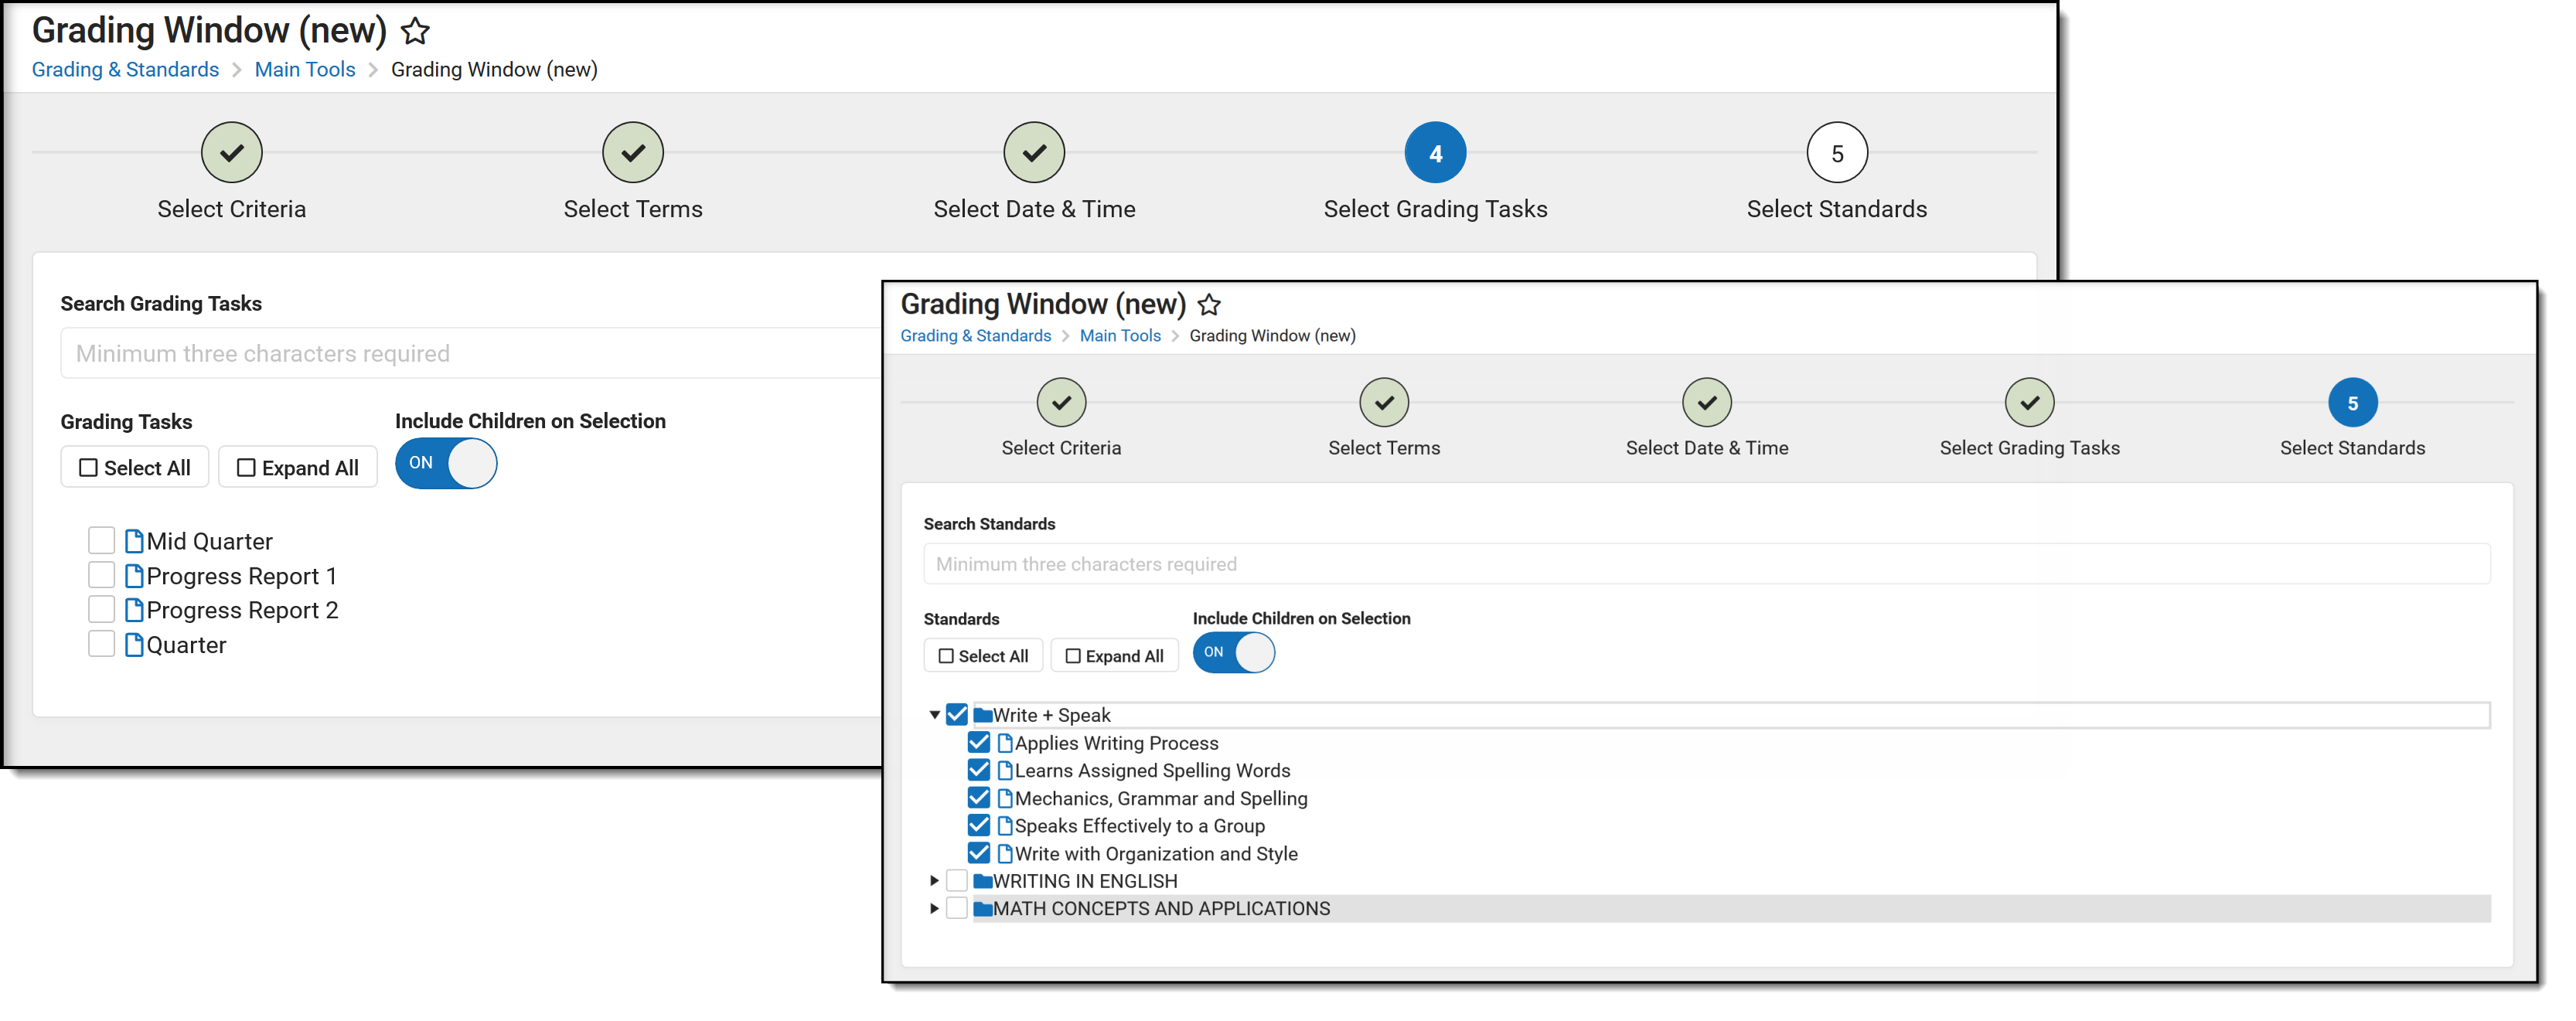
All grading tasks and/or standards associated to a course and have the Term Mask checkbox marked are listed. For ease in selecting grading tasks and viewing them, use the Select All/Deselect All and the Expand All/Collapse buttons. To locate a specific grading task or standard, enter the name of the task in the Search Grading Tasks or Search Standards field.
If the selected calendar does not use grading tasks, but does use standards, click Next to choose Standards. If the selected calendar does not use standards, but does use grading tasks, mark the grading tasks and ignore the standards selection.
At least one Grading Task or Standard must be selected to schedule the Grading Window Exception. Click Save to schedule this Grading Window Exception.
Schedule Grading Windows Exceptions
Scheduling a Grading Window Exception is a five step process that includes selecting terms, choosing course sections and students, choosing dates and times for the grading window, selecting the desired grading tasks and standards.
Click New to begin. At any time during the process, use the Previous button to move to the previous screen or the Cancel button to begin again. Alternatively, you can also click the areas in the progress tracker to return to that specific screen.
Step 1. Select Criteria
- Enter the Exception Name.
- Select the Exception Criteria.
- Select additional information based on the selected criteria (see the Select Criteria above).
- Click Next when ready.
Step 2. Select Terms
- Mark the desired Terms.
- Click Next when ready.
Step 3. Select Date and Time
- Enter the desired date and time in the Open Date and Time fields for when the Exception is available.
- Enter the desired date and time in the Close Date and Time fields for when the Exception is no longer available.
- Click Next when ready.
Step 4. Select Grading Tasks
If your school does not use Grading Tasks, continue to Step 5 to select Standards.
- Mark the desired Grading Tasks to be scored. Use the Select All button to mark all available grading tasks. Enter search criteria for the grading task in the Search Grading Tasks field.
- Click the Next button to select Standards.
Step 5. Select Standards
If your school does not use Standards, click Save to schedule the exception.
- Mark the desired Standards to be scored. Use the Select All button to mark all available grading tasks. Use the Expand All button to open all Standards Groups to show all parents/children standards. Enter search criteria for the standard in the Search Standards field.
- If the Include Children on Selection is set to On, select the checkbox by the parent standard to mark the parent and all children; or, click the name of the parent standard to mark the parent and all children.
- Remove selections for individual standards as needed.
- If the Include Children on Selection is set to Off, parent standards and child standards need to be marked individually.
- Click the Save button to schedule the exception.
