Food Service for the Cashier - Study Guide
Last Modified on 10/22/2022 10:44 am CDT
This study guide shows food service administrative personnel and cashiers how to process transactions on the POS terminal.
Getting Started on the POS Terminal
Learn to log into the POS terminal, choose a serving method, turn on the audio, and display patron's photos.
Documentation
Log In
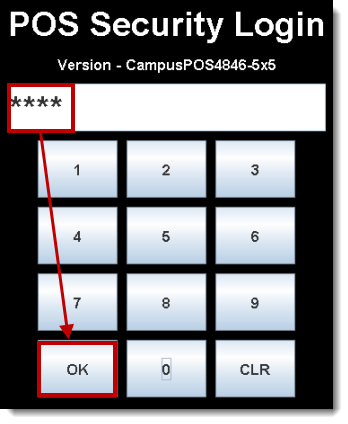
After the terminal has booted, the POS Security Login screen displays. The cashier enters their PIN and selects OK.
Select a Serving Method
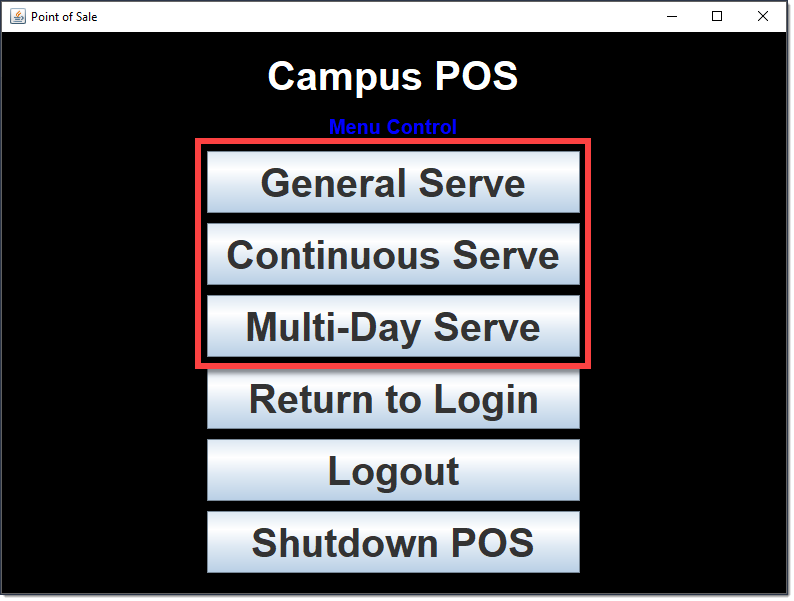
Two methods are available for processing meal transactions. The first cashier of the first serving period in the day should select the serving method.
Method | Description |
|---|
General Serve | Use when several menu options are offered to patrons; e.g., patron has choice of Lunch and/or Ala Carte items. |
Continuous Serve | Use when there is only ONE menu option offered to all patrons; e.g., when the Lunch option for all patrons is the same. |
| Multi-Day Serve
| Use when you need to hand out meals for multiple days using a single transaction on the point of sale. |
After a serving method has been selected, the cashier is asked to select a new serving period (when this is the first login of the current day) OR they are prompted to re-open the last cash drawer (if this is NOT the first login of the current day). This prompt only appears when Serving Periods have been enabled on the Admin POS Option menu.
Turn on Audio
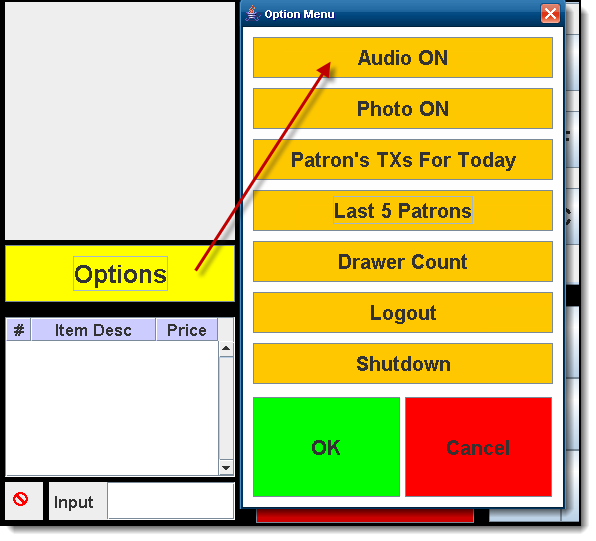
The terminal sound may be turned on or off by selecting the Options menu and Audio On/Off.
Turn on Patron Photos
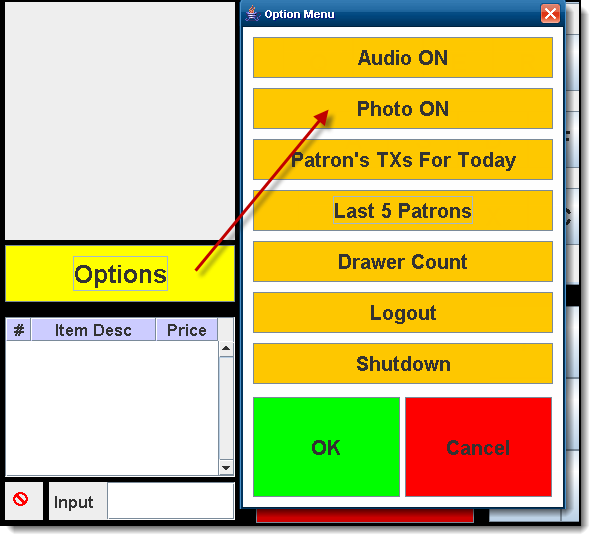
Patron photos may be turned on or off by selecting the Options menu and Photo On/Off.
For a patron’s photo to display, the following requirements must be met:
- The District/School must have uploaded a photo for the patron on his/her Campus account.
- When the terminal was loaded with Campus data, it should have been set to load “All” (which loads patron data and pictures).
If patron pictures were not initially loaded to the terminal, only the Food Service Administrator may do so, with the following steps:- Login using the POS Admin PIN.
- Select Load POS Data from the Admin POS Menu.
- Select Patron Pictures.
Serving Periods and Cash Drawers
This document describes the POS terminal processes performed when cash drawers are attached to the POS terminal and a drawer count is required. If your district does not require a drawer count and/or have Serving Periods enabled, then this article may not apply to you.
Documentation
This article describes the POS terminal processes performed when cash drawers are attached to the POS terminal and a drawer count is required. If your district does not require a drawer count and/or have Serving Periods enabled, then this article may not apply to you.
After the serving method; i.e., General Serve or Continuous Serve, has been selected, the cashier is prompted to select the current Serving Period. Selecting the Serving Period opens a new cash drawer or re-opens an existing cash drawer for serving.
This article includes the following topics:
To allow Serving Period functionality, a food service administrator must have enabled the feature on the POS terminal and also set it up within the Campus application.
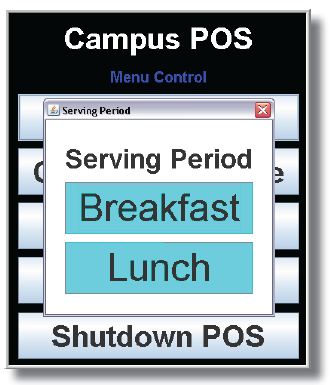
Serving Period selection window
Starting a New Serving Period/Cash Drawer
If this is the first login of the day, or if the drawer has NOT been previously opened, the Serving Period window will display.
The cashier should select the appropriate Serving Period (i.e., Breakfast or Lunch).
After the serving period has been selected, the patron Search screen will appear and normal processing may begin.
Reopening the Last Serving Period/Cash Drawer
If a cashier realizes he/she needs to log back into the last serving period and cash drawer but has already logged out or shut the terminal down, he/she can still log back into the last cash drawer and serving period.
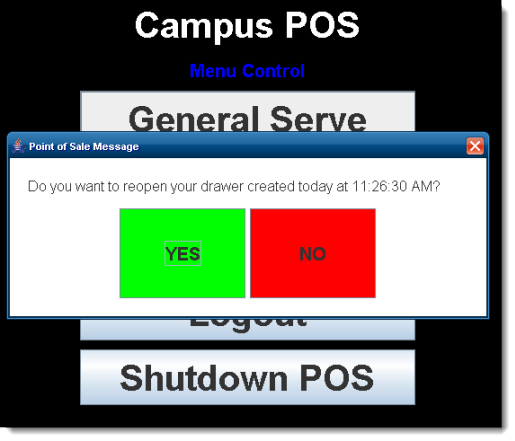
When the same cashier logs in twice, a message will ask whether the last serving period and cash drawer should be re-opened.
Option | Description |
|---|
Yes | The cashier’s last serving period and cash drawer will re-open and the patron Search screen will appear. Normal processing may begin. |
No | A new cash drawer will open, and the cashier will be prompted to select a Serving Period. If this option is selected, the cashier will not be able to re-open the previous drawer (a final drawer count will not be possible). |
Switching Serving Periods
The cash drawer is changed when the Serving Period changes; e.g., from breakfast to lunch. Cashiers should always log off or shut down at the end of a serving period. The steps for switching serving periods/cash drawers depends on whether or not the cashier also changes.
If the cashier is... | Then the cashier should... |
|---|
the same as the previous serving period | - Log back into the terminal.
- Select General Serve or Continuous Serve. The Serving Period options will appear.
- Select the new Serving Period (e.g., Lunch). The patron Search screen will appear.
At this point, a new cash drawer has been opened for the new serving period. Processing may take place as normal.
|
new and did not process the previous serving period | - Log back into the terminal.
- Select General Serve or Continuous Serve. The Serving Period options will appear.
- Select the new Serving Period (e.g., Lunch).
Result
Since a drawer is already opened for a different cashier, a window with the following message displays:
“Another cashier has an open drawer. Would you like to open a new drawer?” - Select one of the following options:
Yes. A new cash drawer will open and the patron Search screen will appear. Normal processing may begin. If this option is selected, the cashier will not be able to re-open the previous drawer (a final drawer count will not be possible). - No. The Campus POS Menu Control screen remains and the new cashier can log out.
|
Terminal Screen Layout
This document explains the three main areas of the terminal screen layout:
- Patron account information--appears in the upper-left corner of the screen.
- Menu and serving options--appear in the middle and right side of the screen.
- Processing options--appear at the bottom of the screen.
Documentation
The terminal screen layout has three main areas:
- Patron account information--appears in the upper-left corner of the screen.
- Menu and serving options--appear in the middle and right side of the screen.
- Processing options--appear at the bottom of the screen.
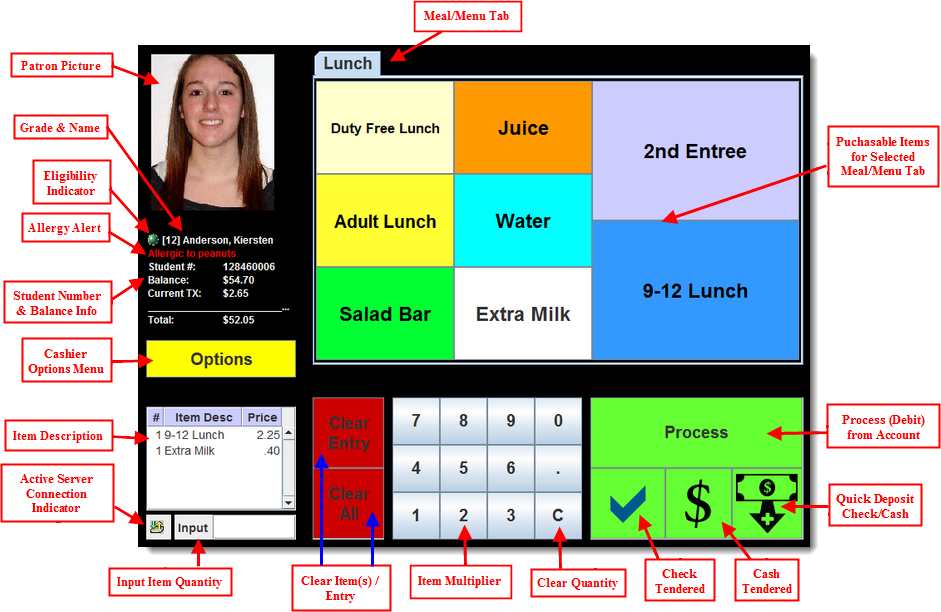
The following table describes each button:
Button/Field Area | Description |
|---|
Meal/Menu Tabs | Each tab contains the menu needed for a specific meal/serviceable time. See the Application Manager (POS Terminal Setup) article for information on creating meal/menu tabs. |
Patron Picture | The picture of the patron being served. Pictures are pulled from the patron's Demographics tab. |
Grade & Name | Indicates the patron's name and current grade. |
Eligibility Indicator | Indicates the patron is eligible for Free or Reduced meals. The following describes each color: - Gray - Adult/Staff Member
- Green - Paid Student
- Yellow - Reduced Student
- Red - Free Student
|
Allergy Alert | Indicates the patron's allergy(s). A program must have the POS Display checkbox marked in order to display on the terminal. Information entered in the User Warning field will display on the Point of Sale Terminal. In order for the patron to indicate an allergy, he/she must be assigned the program on the Flags tab. |
Student Number & Balance Info | Indicates the patron's Local Student Number and current account balance. |
Cashier Options Menu | Opens the Options Menu, containing options for assisting the cashier including control over audio, display of patron pictures, a list of a patron's transactions for the current date, the last 5 patrons served, drawer count, the ability to log out as cashier and the ability to shutdown the terminal. See the Common Cashier Actions article for more information. |
Item Description | Describes each item added to the patron's order. These items will be charged to the patron's account unless cleared via the Clear Entry or Clear All button. |
Active Server Connection Indicator | Indicates whether or not the terminal is properly connected to the server. A red circle with a line through it indicates the Point of Sale is not currently connected to the server. Green and gold arrows pointing up and down indicate the Point of Sale is currently connected to the server. |
Input Item Quantity | Indicates how many items are in the patron's current order (corresponding to the items listed in the Item Description box). |
Clear Item(s) / Entry | If the Clear Entry button is selected, the most recent item added to the patron's order (corresponding to the items listed in the Item Description box) is removed and not charged to the patron's account. If the Clear All button is selected, all data entered during a patron's order (including items listed in the Item Description box) are removed. |
Item Multiplier
| Allows the cashier to enter item quantities and perform other actions which require number entry. |
Clear Quantity | Clears the quantity entered via the Item Multiplier. |
Check Tendered | Opens the Check Tend editor, allowing patrons to pay for the meal order via check. This is an optional button made available by the Admin on the Point of Sale. |
Cash Tendered | Opens the Cash Tend editor, allowing patrons to pay for the meal order via cash. The Cash Tendered button is also used to open the cash drawer for a No Sale transaction or activity. This is an optional button made available by the Admin on the Point of Sale. |
Quick Deposit Check/Cash | Opens the Deposit editor, allowing cashiers to deposit checks or cash to the patron's account in real time. Cashiers cannot deposit money into a patron's account until all items have been cleared from the patron's order (via the Clear Entry or Clear All buttons). This is an optional button made available by the Admin on the Point of Sale. |
Process (Debit) from Account | Charges (debits) the patron's order to their account. |
Purchasable Items for Selected Meal/Menu Tab | Selectable items which are added to a patron's order when touched. These items will not be charged to the patron's account until the Process button is selected. |
General Serve - Processing Patron Transactions
General Serve is used when patrons can select from a variety of different purchasable items. Selecting General Serve from the Campus POS Menu Control displays the Search screen, where a cashier may start processing transactions.
Documentation
Continuous Serve - Processing Patron Transactions
Continuous Serve is used when all patrons are purchasing the same menu item. The meal only needs to be selected once; i.e., before serving the first patron.
Documentation
Common Cashier Actions
This document contains several common actions a cashier may need to perform such as selecting multiple items, clearing incorrect entries, voiding transactions, depositing money into a patron's account, and charging a second meal to a patron's account.
Documentation
Ending a Serving Period
A cashier may perform a Drawer Count to record the balance of the terminal’s cash drawer at the end of his/her serving period.
This document only applies to terminals that have the Serving Period and Cash Drawer options enabled.
Documentation
Logging Out and Shutting Down POS Terminals
This article shows how a cashier should log out and shut down a POS terminal after finishing a serving period.
Documentation
Handling Remote Reload Requests
Administrators have the ability to remotely manage district POS terminals from any computer that has access to the Campus system. This means the administrator does not need to be physically present at the school in which the terminal is located to reboot, shutdown or reload it.
When an administrator has to remotely perform an action on the terminal, the cashier receives a message and needs to respond accordingly.
Documentation
Cashier's Cheat Sheet
Food service administrators can print this document and give it to the cashiers to keep it near the POS terminal in case they need a quick review during the serving period.
Documentation
Troubleshooting
This document contains questions and answers to common food service cashier operations.
Documentation


