Tool Search: SIF Message History
The SIF Message History tool allows users to generate a report which includes detailed information about messages sent for a specific SIF object within a specific time frame, agent, and zone. This report allows you to review recent SIF agent activity and is especially useful for troubleshooting errors to and from a SIF reporting entity.
 SIF Message History
Read - Access and generate the report
Write - Provides no function for this tool
Add - Provides no function for this tool
Delete - Provides no function for this tool
For more information about Tool Rights and how they function, see this Tool Rights article.
Generating the SIF Message History Report
Users can generate the SIF Message History Report to review recent SIF agent activity and diagnose SIF message errors which may be occurring from a SIF reporting entity.
 Generating the SIF Message History
To Generate the SIF Message History Report
- Enter the Start Date. This is the first day in the date range of SIF messages included in the report.
- Enter the End Date. This is the last day in the date range of SIF messages included in the report.
- Select an agent from the Agent Selection dropdown list. Only SIF messages processed from this agent are included in the report.
- Select a zone from the Zone Selection dropdown list. Only SIF messages processed through this zone are included in the report.
- Select which SIF Objects will report message data. Select 'All Objects' to see all SIF messages within the timeframe of the zone and agent selected or select an individual (or more) SIF Object to see SIF message results for these specific objects.
- Select the Report Format. Options include HTML or CSV.
- Select how the report will be generated.
- Click Generate Extract to view the report in the selected format or
- Click Submit to Batch to schedule when the report will generate. When submitting the report to batch, the report will appear within the Batch Queue List in a Status of Queued. Once complete, the Status will update to Completed and you can access the report by clicking the Get the report hyperlink (see image below).
 Get the Report Link

Understanding the SIF Message History Report
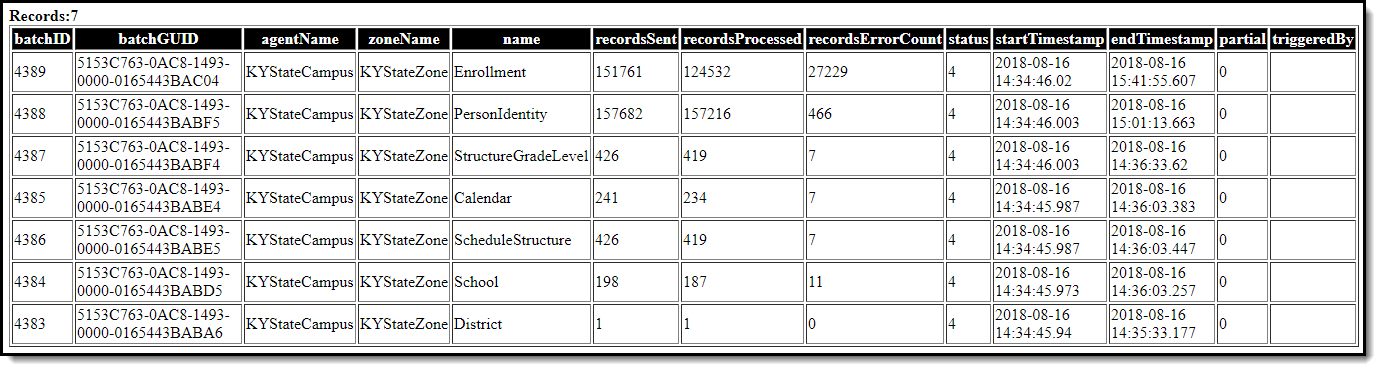 Example of the SIF Message History Report
The table below describes each column on the report.
| Column | Description |
|---|---|
| Batch ID | A unique identifier for the batch sync processed for that object in the identified agent and zone. |
| Batch GUID | A unique identifier for the batch sync processed for that object in the identified agent and zone. |
| Agent Name | The agent which processed the SIF messages. |
| Zone Name | The zone which processed the SIF messages. |
| Name | The name of the SIF object. |
| Records Sent | The number of records sent during the batch sync. |
| Records Processed | The number of records successfully processed by the receiving SIF entity. If this number varies from the Records Sent number, this indicates errors occurred. |
| Records Error Count | The number of records that were not successfully processed by the receiving SIF entity. This indicates additional investigation might be necessary to identify the reason behind these errors. |
| Status | The determined status of the batch sync.
|
| Start Timestamp | The time in which the SIF request is received by the SIF reporting entity (this is not when Campus has responded). |
| End Timestamp | The time in which the SIF message failed. This will only populate a value for failed messages. If the message was successful, this field reports as null. |
| Partial | Always reports as 0. |
| Triggered By | Always reports blank. |
