This guide explains how to edit existing course information. Existing course information can be modified by changing current values for the selected course. Any new courses need to be added using the Add Course tool.
 Course Information Editor
See the Course Information Tool Rights
article for information about rights and subrights needed to use this tool.
Before you start
- Always follow your school's/district's policies for updating course information.
- For schools/districts using Course Master, changes to courses need to be made in Course Master Information.
- Changes to courses are best managed before the start of the school year.
Course Deletion
- Deleting a course results in the loss of current and historical data, including student scores, transcript records, and attendance data.
- Courses cannot be deleted when:
- The Active Trial is locked.
- Sections are assigned to the course.
- Cross-Site Enrollment students are scheduled into the course.
- Responsive Course Schedules are aligned with the course.
- Scheduling Rules and Planning Rules are associated with the course.
- Assessments are aligned to the course.
Instead of deleting the course, set the course to inactive by removing the Active checkbox. An inactive course remains visible when searching for it, but it will not be listed when using the Scheduling Board, and students cannot request the course or be scheduled into it. Inactive courses still roll forward to future calendars and can be marked as Active when they need to be available again. This way, historical data is not lost.
Edit Course Information
- Locate and modify the desired value for the appropriate field. The required fields must have a value to save the updates.
- Click Save when finished.
Set Course Parameters Used in Scheduling Processes
- Enter the number of Terms, Schedules, and Periods in which a course section meets. For example, Integrated Math I A course sections meets for two terms, two days of the rotation (or both days when it is an A/B rotation), and for one period each meeting.
- Enter the number of Sections to Build.
- Enter the maximum number of students who can be placed in a course section the Max Students field.
- Enter the priority that should be assigned to the course in the Schedule Load Priority field.
- Review any other values selected for the course and modify as needed.
- Click the Save button when finished.
Delete Courses
- Search for and select the Courses to delete.
- Click Delete.
When there are no validation errors, the course and its corresponding sections are deleted. Once deleted, the screen goes blank, and then the Course Search option opens.
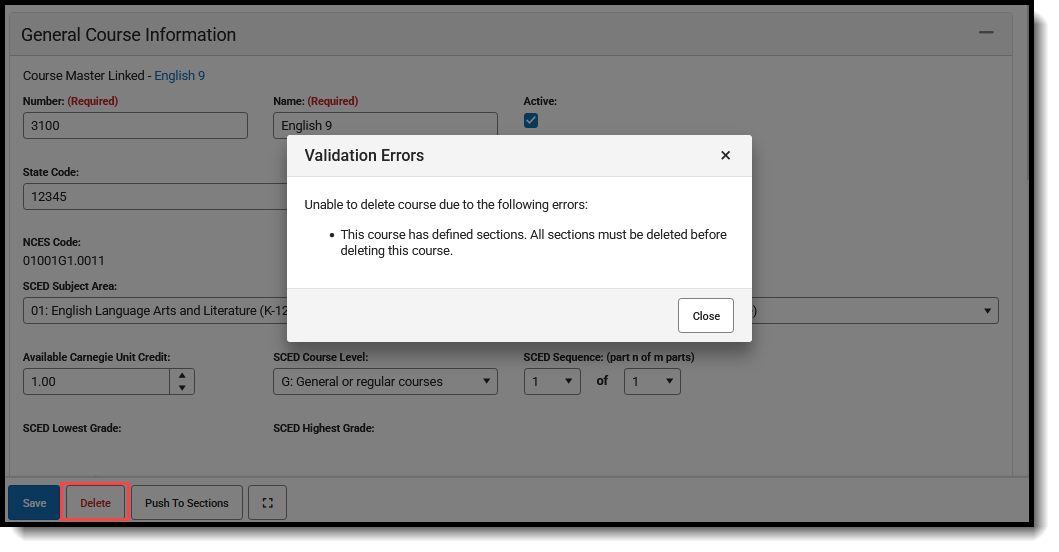 Delete Course Validation Error
What's next
Once course information is saved, Section data can be created. Or, when building sections from scratch using the Scheduling Board, sections are created based on the number of students registering for a course.
